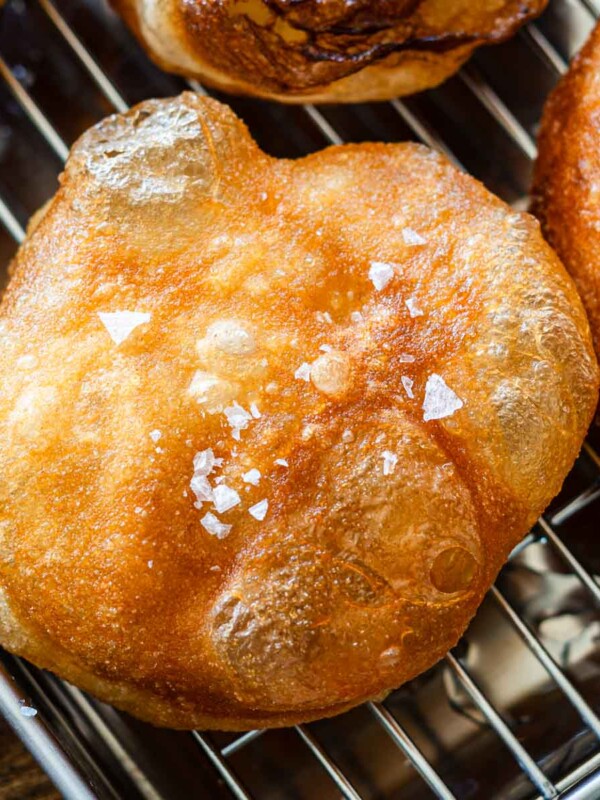
These Nama Donuts are made with a rich brioche dough with a secret ingredient that produces a soft and fluffy texture that melts in your mouth. Inspired by the secret recipe from the popular I’m Donut? shop in Japan, this homemade version brings similar irresistible flavors right to your kitchen.
Growing up, my favorite donuts were the soft and chewy mochi donuts from Mister Donut. Japan’s innovative culinary scene has always fascinated me, blending tradition with creativity to produce unique treats. This year, I had the chance to try the infamous nama donuts from I’m Donut?, and I was inspired to recreate the experience in my own kitchen.

Table of Contents
What are Nama Donuts?
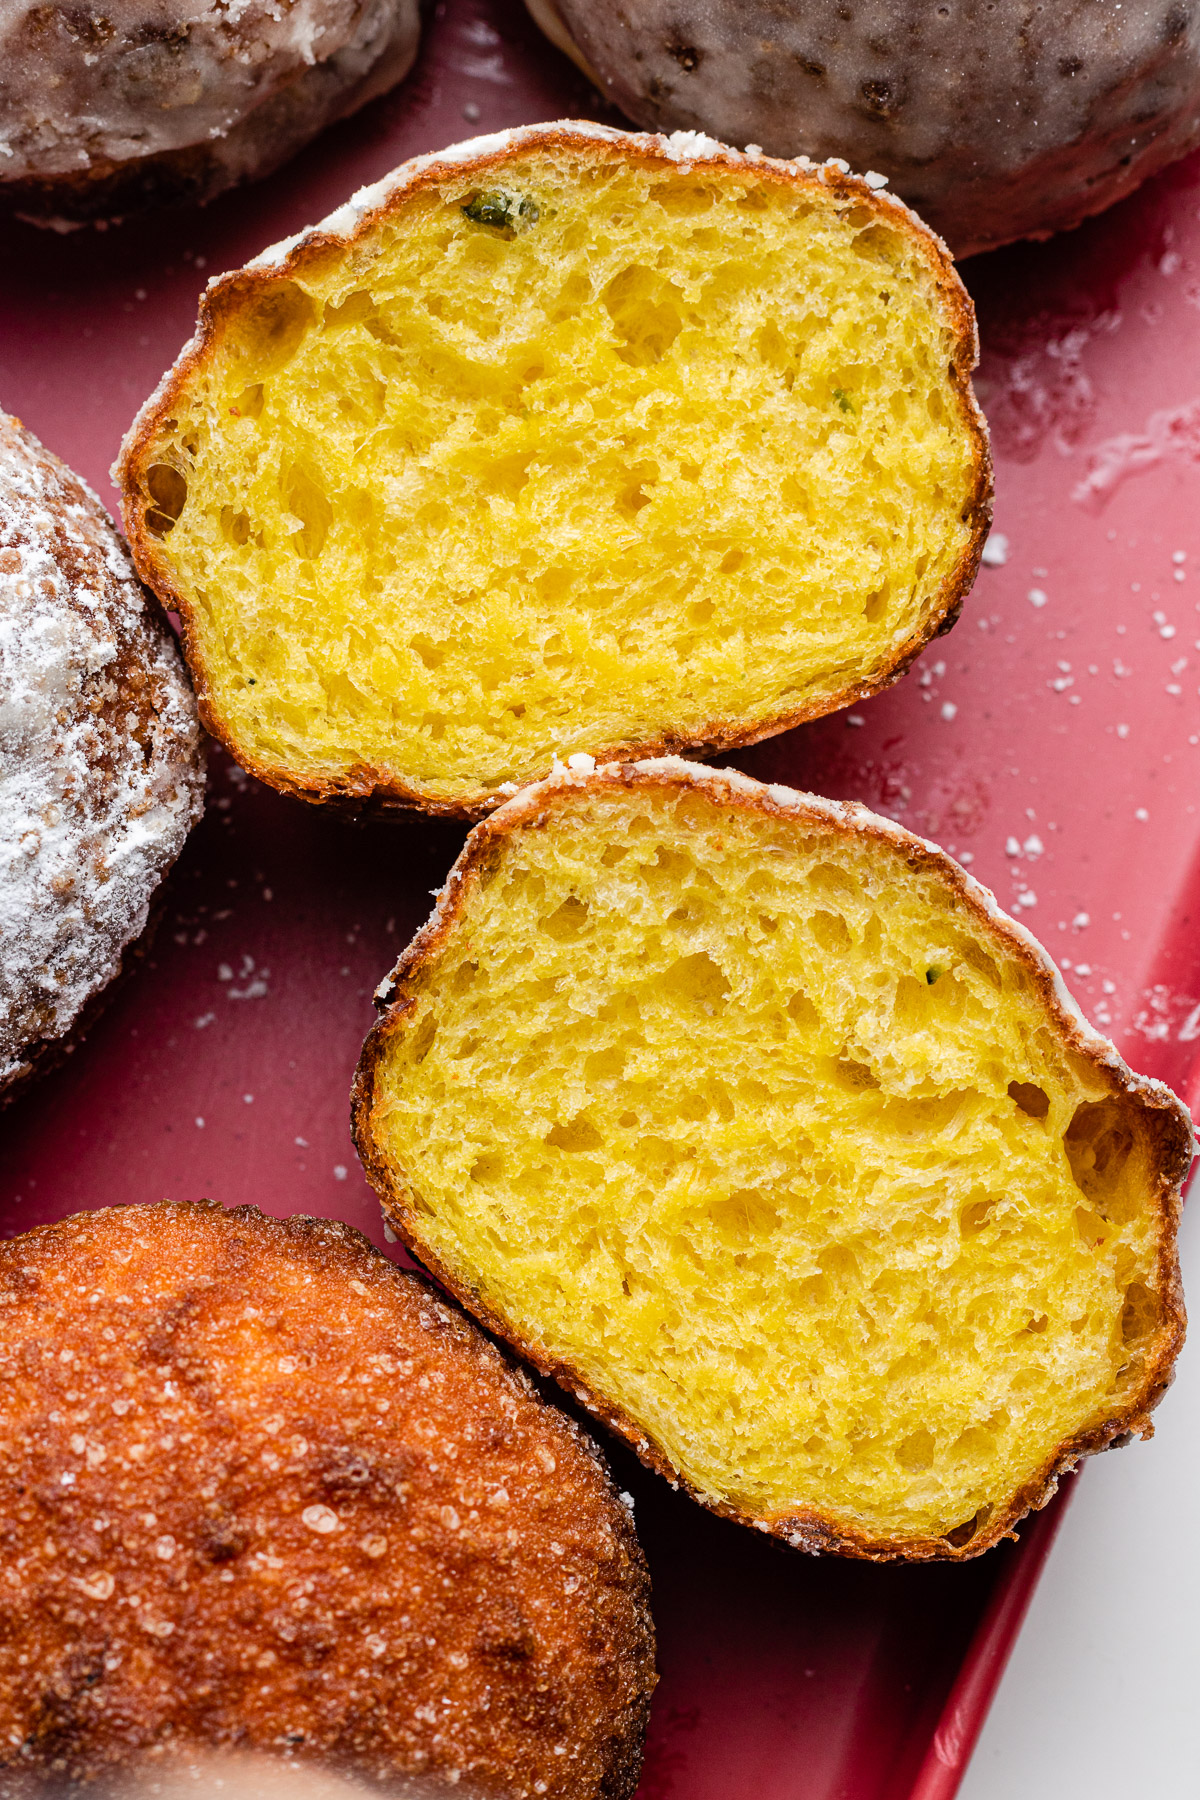
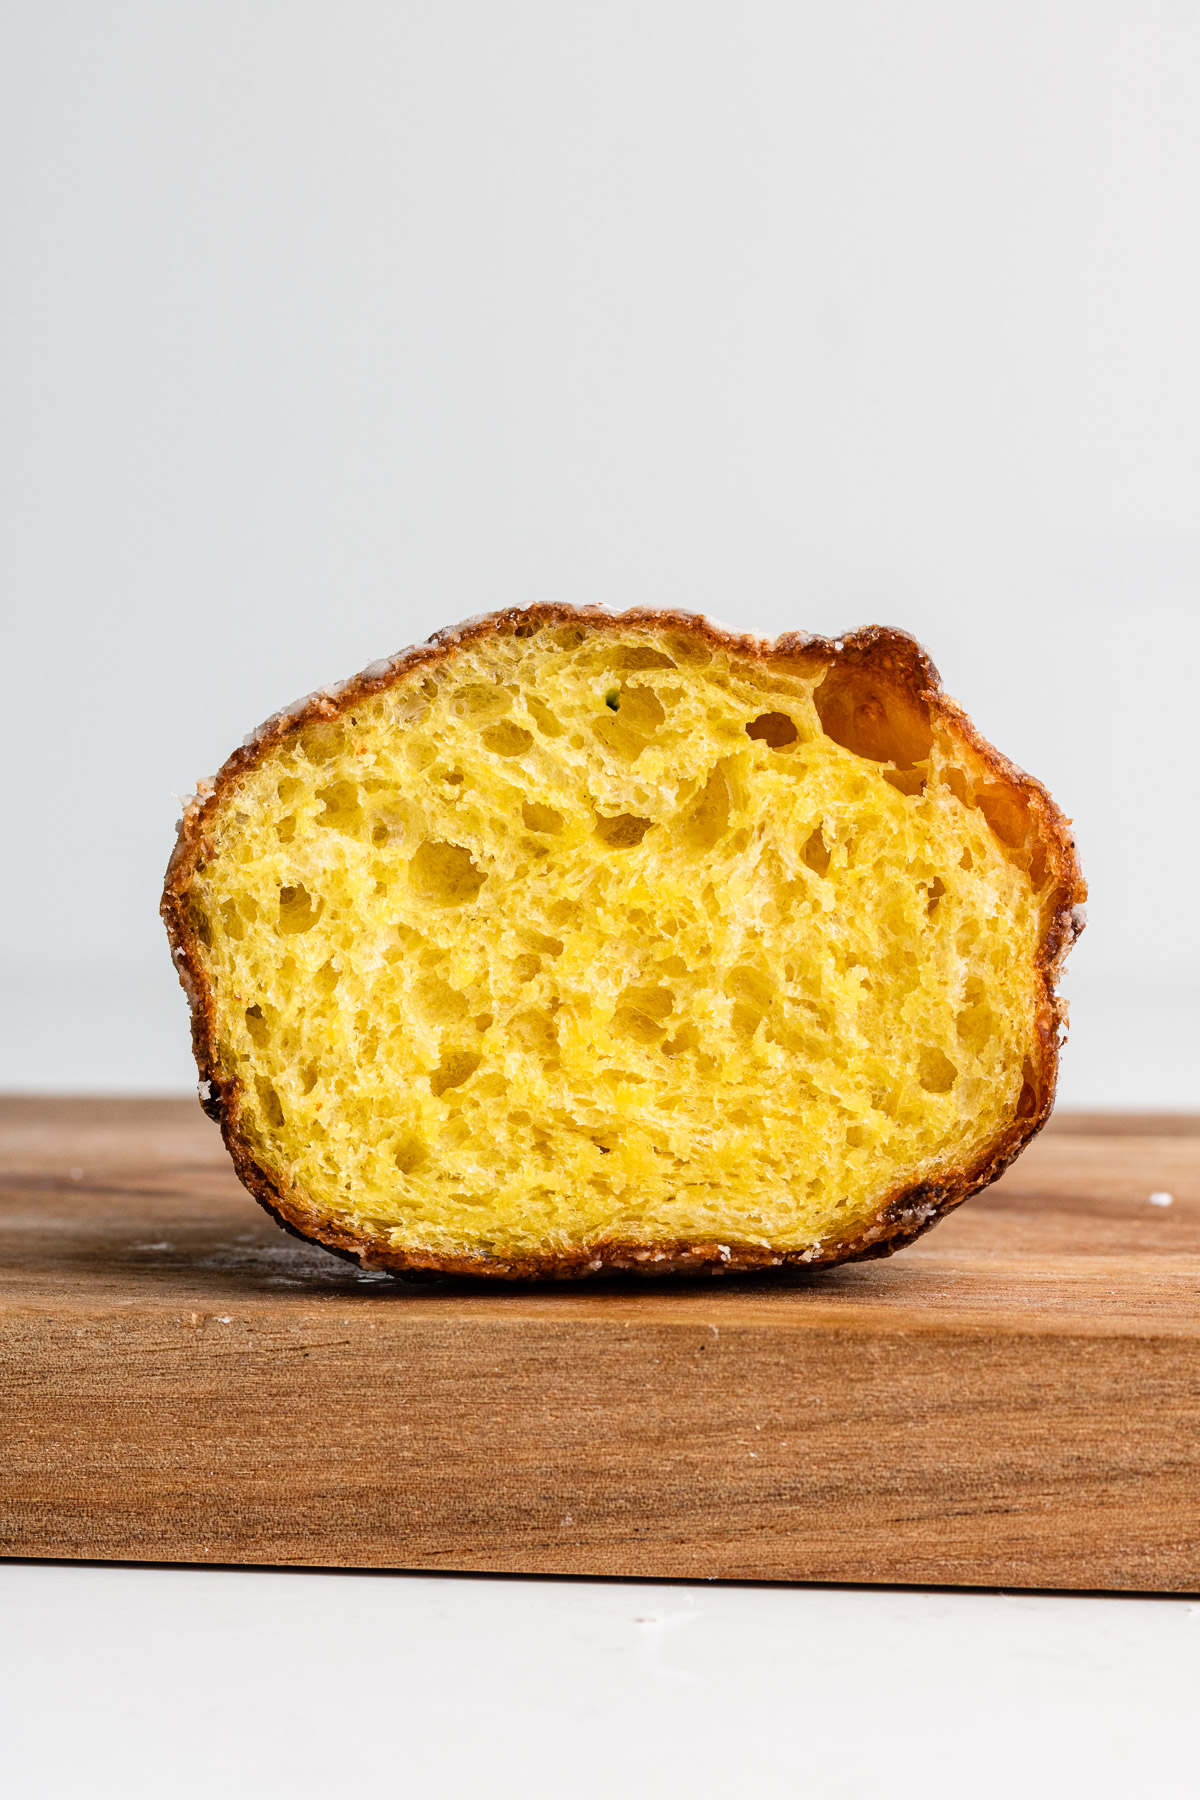
Nama donuts (生ドーナツ) are a unique Japanese creation that stands out due to their incredibly soft, toothsome texture. They are more brioche-like in composition, with a tender, melt-in-your-mouth feel. Although the dough is fully cooked, its texture is reminiscent of something “raw” or freshly made, hence the name “nama,” meaning “raw” or “fresh” in Japanese. This soft texture is achieved by using special dough formulations, including the use of kabocha (Japanese pumpkin) in the original recipe. The kabocha helps cut the gluten, making the donut less bread-like and more delicate, allowing it to almost dissolve in the mouth. The donuts are fried at a high temperature for a short time, giving them a light outer crisp while keeping the inside soft.
Nama donuts have become wildly popular in Japan because of their distinct texture, innovative flavor profiles, and the high-quality ingredients used, such as an original blend of Japanese flour and trans-fat-free shortening. The variety of flavors, from classic plain and chocolate-covered to more inventive creations like framboise (raspberry cream cheese) and savory options like prosciutto with chopped olives, further adds to their appeal.
The brand that popularized nama donuts is I’m Donut?, an offshoot of the famous Fukuoka-based bakery Amam Dacotan. Their unique take on doughnuts, along with their attention to quality, has led to massive demand, with long queues forming daily.
Currently, I’m Donut? operates at several locations, including:
- Nakameguro
- Shibuya
- Fukuoka
- Harajuku
- Omotesando
In 2023, I’m Donut? launched a new concept store called DACO? in Nakameguro, which expands on their artisanal approach to baked goods, offering a variety of pastries in addition to their signature nama donuts. There is also news that they are also expanding to New York!
Nama Donuts Ingredients
I’m donut? combines various flours to create two distinct types of dough: brioche and pastry, both of which undergo long fermentation at low temperatures.The brioche dough incorporates oven-baked pumpkin, skin included, as a binder, which helps maintain high moisture levels and results in a smooth, chewy texture. The pastry dough, on the other hand, features a blend of several wheat flours, including Kitanokaori from Hokkaido, providing a fluffy and chewy texture that contrasts with the brioche. This recipe is my version of their original brioche dough.
- Yudane: Helps keep a high water content that is easier to shape.
- Raw Kabocha: Adds moisture to the dough and gives donut a softer texture.
- Milk: Adds richness and helps hydrate the dough.
- Egg: Binds the ingredients and adds richness to the dough.
- Sugar: Sweetens the dough and contributes to browning during frying.
- Bread Flour: Provides the structure and elasticity necessary for a fluffy and chewy texture.
- Instant Dry Yeast: Leavens the dough, allowing it to rise and become airy.
- Salt: Enhances the flavor and strengthens the dough structure.
- Unsalted Butter: Adds richness, moisture, and tenderness to the dough, contributing to its soft texture.
How to Make Nama Donuts
I’ve tested this recipe over 5 times, manipulating each step and the method of using yudane, overnight proofing and frying at high temperatures resulted in the best nama donut texture. Here’s a quick rundown:

- Prepare Yudane: Mix bread flour with boiling water until a dough forms. Let it rest.
- Cook Kabocha: Steam or microwave kabocha until soft, then mash.
- Make Dough: Combine mashed kabocha, milk, egg, sugar, yeast, flour and salt. , and yudane. Knead until smooth, then add butter and salt. Knead again until elastic.
- First Rise (Overnight Method): Cover the dough and let it rise in the fridge overnight.
- Shape Donuts: The next day, punch down the dough, shape into donuts, and let rise again at room temperature until doubled in size.
- Fry: Fry the donuts in hot oil for a short time, until golden and fluffy.
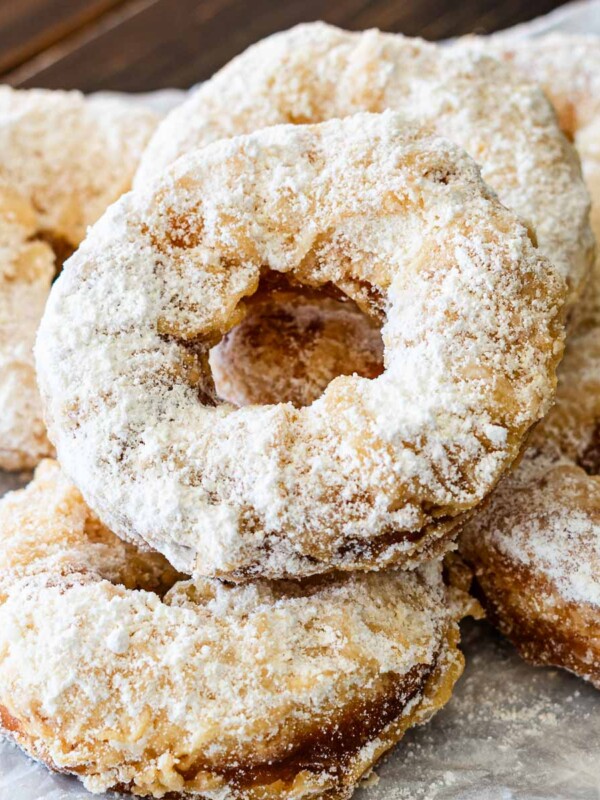
- Glaze or goat in sugar: Make the glaze and dip the donuts in or coat in sugar.
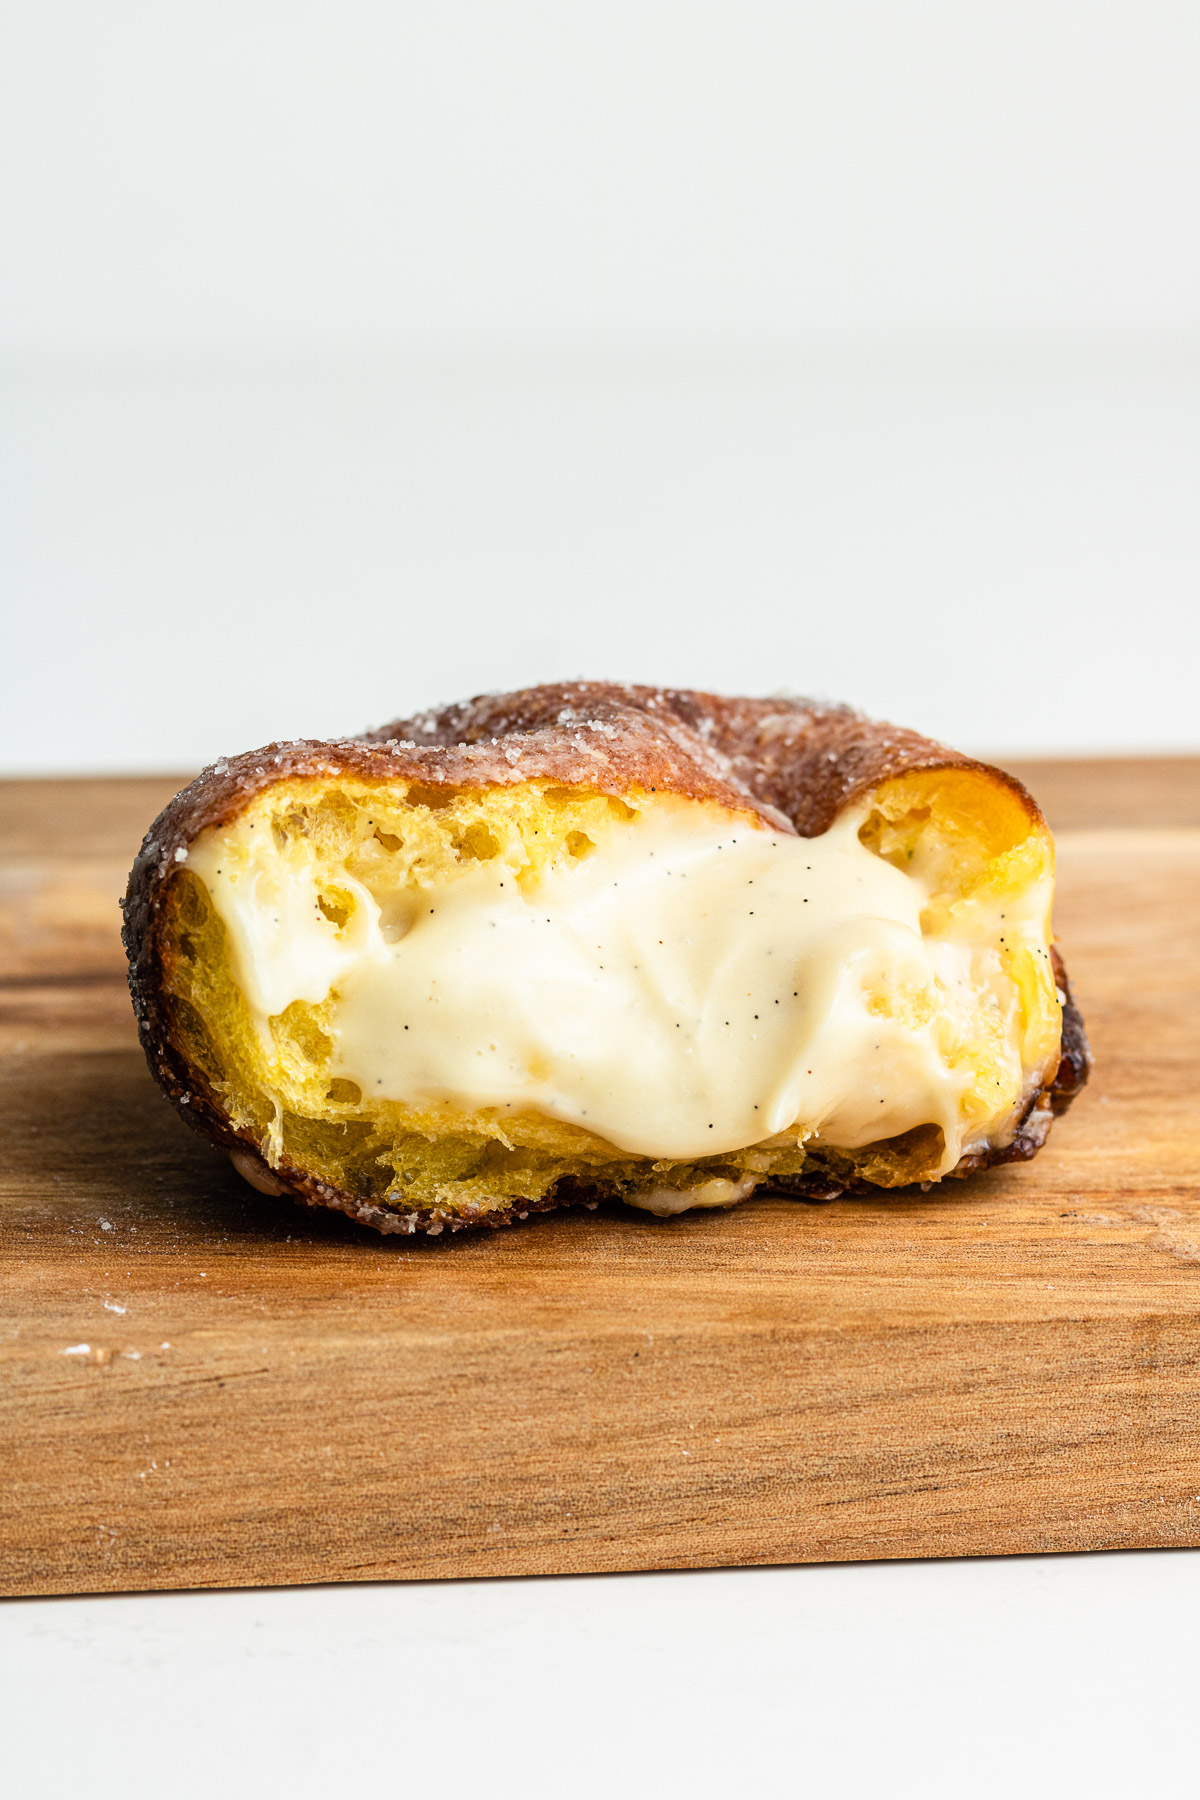
- Fill: Add whipped cream, custard cream or diplomat cream right before serving.

Lisa’s Recipe Tips for Perfect Donuts
- Use a kitchen scale: As always, I highly recommend using a kitchen scale to weigh all the ingredients for best, consistent and accurate results.
- Salt & yeast: Add the salt and yeast away from each other as direct contact can inhibit or kill the yeast.
- Temperature: Kneading temperature is crucial because it affects yeast activity and gluten development. If the dough gets too hot, it can overstimulate or kill the yeast, while cold dough slows fermentation and stiffens gluten formation. Maintaining an optimal temperature ensures proper rise, texture, and elasticity in the dough. For overnight donuts, the optimal kneading temperature is slightly cooler, around 70-75°F (21-24°C). This slower fermentation allows the dough to develop flavor and structure gradually without overproofing during the extended rest in the fridge. To achieve optimal kneading temperature, adjust the temperature of your ingredients. Use slightly cooler milk if in a warm environment and warm and room temperature ingredients if in a colder environment.
- Proof overnight: Proofing donuts overnight allows for slow fermentation, which enhances both flavor and texture. The extended, cooler fermentation period helps the dough develop more complex, richer flavors while also improving its structure, making the donuts lighter and fluffier. Additionally, overnight proofing gives you more control over timing, allowing you to shape and fry the donuts fresh the next day for optimal taste and softness.
- Frying temperature: Most donuts are typically fried at 160-180°C (320-356°F), but nama donuts are fried at a higher temperature, between 230-240°C (450-480°F), for a shorter time. However, no matter how many types of doughs and timings I’ve tested these frying temperatures with, they always came out too dark and had raw parts in the middle. I’ve found for the best texture and consistency to be at around 210-220°C (410-428°F) for 60-70 seconds. This high-heat frying method creates their unique soft and moist texture while preventing the dough from absorbing too much oil. Fry until deeply golden, just before burnt. The internal temperature of the donuts should read 180–190°F (82–88°C). 180 will be boarder line raw texture and 190 will be more cooked and slightly fluffier.
How to Store Donuts
Nama Donuts are best enjoyed fresh and warm, especially if unfilled. For cream-filled donuts, serve them cool or at room temperature. For optimal texture and freshness, fill the donuts right before serving.
- Unfilled Donuts: Place fried, unfilled donuts in an airtight container at room temperature for up to 1 day. You can freeze unfilled donuts for up to 1 month. Defrost them at room temperature and warm slightly before serving.
- Filling: The filling can be stored in the fridge for up to 3 days. Custard that hasn’t been mixed with heavy cream can be frozen for up to 1 month. After defrosting, it may look separated—whisk vigorously or use an immersion blender until smooth, then fold into whipped cream before using.
Flavours and Variations
These raw donuts are delicious simply coated in powdered sugar, a glaze or sugar but are also often filled with different fillings such as custard, diplomat cream and whipped cream. I also love filling them with cream cheese whipped cream! You can even go the savory route and stuff them with tamago salad or potato salad!
Equipment to Make Donuts
- Kitchen aid standmix
- Bread machine
- Digital kitchen scale: My new favourite kitchen scale! It’s dual and has a precision scale, perfect for measuring the correct amount of yeast.
- Bench scraper
- Cooking thermometer: Use a cooking thermometer to check the temperature of the dough, oil and internal temperature of the donut.
- Timer
- Wire rack
- Piping bag (for custard cream)
- Whisk (for custard cream)
- Mixing Bowls (for custard cream)
- Spatula (for custard cream)
- Deep fryer: I really like using a deep fryer when making batch this size. I’ll use the stove when making half the recipe. This deep fryer is not too big and much easier to clean up than over the stove.
Recipe FAQ
You’ll know the dough is kneaded enough when it feels smooth, elastic, and springs back after you press it. Nama donut dough doesn’t need to pass a windowpane test. If it quickly bounces back when you poke it, the dough is ready.
How do I know my dough has proofed enough?
You can tell your dough has proofed enough when it has doubled in size and feels light and airy. To check proper proofing after shaping, gently press your finger into the dough—if the indentation springs back slowly, it’s ready. When the dough springs back too quickly, let it rest longer; if it doesn’t spring back at all, you may have over-proofed it.
Can I air fry the donuts?
Yes, you can air fry nama donuts, although the texture may differ slightly from traditional frying. Preheat the air fryer, then place the donuts in a single layer, making sure not to overcrowd them. Spray them lightly with oil for a better crust, and air fry at around 190°C (375°F) for about 8-10 minutes, flipping halfway through. Keep an eye on them to avoid overcooking, and adjust the time as needed based on your air fryer model. While they may not have the same moist texture as fried nama donuts, they can still be delicious!
There are many factors that will affect how long it takes for dough to rise in both the first and second rise such as the temperature and humidity of trhe room and temperature of the ingredients. To complete the first rise, place the dough in the fridge, ideally in the produce compartment. It will take a minimum of 6 hours, and you can extend it for up to 24 hours. At room temperature, it can take anywhere from 1 hour to 3 hours.
You can kind of control the speed of the yeast by putting it in a warm environment like the oven or proofing box. A proofing box will be more accurate but if you don’t have one, place the dough in the oven with a bowl of hot water.
You could, but this dough is very soft and sticky to work with so I don’t really recommend it. Instead, you could try using a spatula to mix all the ingredients until well combined. If using this method, I highly recommend proofing it overnight to help some of the gluten development that takes place with cold and slow fermentation.
I have a recipe for vegan donuts that have a very similar melt in your mouth texture. However, you can still use this recipe and make some substitutions! I actually use non-dairy ingredients for this recipe (the milk and butter) and for the eggs, substitute with half butter and half milk or a full fat non-dairy yogurt. Start with a lesser amount because these ingredients have a bit more water to them than eggs.
Final Thoughts
As a final note, I want to emphasize that frying great donuts comes with experience, as many factors can affect the outcome. I recommend recording everything you do when making them for the first time: note the room temperature, ingredient temperatures, take a photo of the dough before rising, and measure the oil temperature (experiment with different ranges to find what works best for you). Also, track how long the dough rises and the frying time. If your donuts don’t turn out as expected on the first try, revisit your notes to see where adjustments can be made. Even when following my own recipes, it doesn’t always yield perfect results! I record all my recipe notes on a piece of paper and transfer them to notion for ease. Subscribe to my Substack if you’d like a copy of my Recipe Note Taking Chart (notion, excel & printable)!
More Donuts to Try
- Bagnut (Bagel Donuts)
- Kare Pan (Savory Curry Donut)
- Vegan Yeast Donuts
- Banana Bread Donuts
- Tofu Donuts
Enjoy!! If you make this Nama Donuts recipe, let me know! Leave a comment, rating and if you decide to share it on socials, tag me on instagram @Okonomikitchen. I’d love to hear from you!
Print
Nama Donuts
- Total Time: 24 hours 15 minutes
- Yield: 12 pieces
- Diet: Vegetarian
Description
These Nama Donuts are made with a rich brioche dough with a secret ingredient that produces a soft and fluffy texture that melts in your mouth. Inspired by the secret recipe from the popular I’m Donut? shop in Japan, this homemade version brings similar irresistible flavors right to your kitchen.
Ingredients
Yudane
- 1/3 + 2 tbsp (60 g) bread flour
- 1/4 cup (60 ml) water
Main Dough
- 65 g raw kabocha (45 g cooked)
- 1/3 + 1 tbsp (90–100 ml) milk (warmed to about 100 – 130 °C / 38 – 55 °F)*
- 1 large (54 g) room temperature egg
- 3 tbsp (38 g) granulated sugar
- 1 + 3/4 cup (240 g) bread flour
- 3/4 tsp (3 g) instant dry yeast*
- 1 tsp (6 g) salt
- 5.5 tbsp (76 g) unsalted butter, softened
Coating (choose your preference)
- 1 cup powder sugar
- 1/2 cup granulated sugar
- simple vanilla glaze (makes 1/2 cup)
- 1 cup powder sugar
- 2–3 tbsp of water, milk or heavy cream
- 1/4 tsp vanilla extract
Filling (choose your preference)
- 1 recipe of diplomat cream
- 1 recipe of custard cream
- whipped cream (makes 3/4 cup)
- 2/3 cup (160) ml heavy cream
- 1 tbsp (15 g) sugar
Instructions
Yudane (Skip to next section if not using yudane)
- In a small bowl, combine 60 g of bread flour with 60 g of boiling water. Mix until it forms a dough.
- Wrap it in plastic wrap or place it in an airtight container and let it sit at room temperature for at least 4 hours or overnight in the fridge.
Main Dough
- Prepare the Kabocha: Peel and cut the raw kabocha into small cubes. Place it into a bowl, cover and microwave the kabocha until soft, about 1-2 minutes. Weigh the kabocha, it should be about 45 grams. If it’s more, reduce the amount of milk (90 ml). If less, use more milk (100 ml). Mash the cooked kabocha until smooth, and let it cool to room temperature.
- Make the main dough: In a mixing bowl, combine the milk, egg, sugar, mashed kabocha, bread flour, yeast, and salt. Mix until the dough comes together. Knead in the yudane until well incorporated. (If you’re not using yudane, add the extra bread flour and water that would have been in the yudane directly to the main dough). Then, knead in the butter until fully absorbed. The dough will be sticky at first, but continue kneading until it becomes smooth and elastic—about 10-15 minutes by hand or 7-10 minutes using a stand mixer. The dough should be soft but not too sticky to the touch.
- First proof: Place the dough in a bowl or container, cover and refrigerate overnight in the produce compartment. If using the same day method, cover the dough with a damp cloth and let it rise in a warm place for about 1-1.5 hours, or until doubled in size. In the meantime, prepare custard cream if using.
- Shape: Remove from fridge and let it sit out for 60-90 minutes or until the dough is about 18°C to 20°C / 64.4°F to 68°F . Punch down the dough and divide into equal portions (about 50 grams each). Shape each portion into a round ball. Place them on a piece of parchment paper.
- Second rise: Cover and let them rise for 30-45 minutes or until puffy and double in size.
- Deep fry: Heat oil in a deep pot to 210°C to 220°C (410°F to 430°F), aiming for the lower end. Fry the donuts 2-4 pieces at a time (depending on pot size) for 60 – 70 seconds per side until deep brown. They will be darker than your traditional donut.
- Coat donuts: Remove the donuts and drain on a wire rack or paper towels. Make the glaze by stirring the powder sugar and liquids. Start with lesser amount and adjust consistency. The runnier the glaze the thinner it will be on the donut. Add powdered sugar or sugar to a shallow bowl if using these as the coatings. While still warm, coat in powdered sugar, granulated sugar or a glaze as desired. If filling with cream, wait until they are completely cool.
Filling
- Prepare the Piping Bag: Take a piping bag and fit it with a round tip.
- For whip cream: Add sugar to the heavy cream and whip until stiff peaks.
- Fill the Bag: Carefully spoon the diplomat cream or whipped cream into the piping bag. You can also place the piping bag inside a tall glass or jar to help keep it open while you fill it. Once filled, squeeze out any air, and seal the top.
- Pipe the Cream: Take a chopstick and insert it into the side of a donut while wiggling it to make room for the cream. Insert the piping tip into the side of the donut and gently squeeze the bag to fill the donut with diplomat cream (about 45 grams each). Move the piping bag in and out slightly while squeezing to ensure even filling.
- Finish: Once filled, remove the piping tip and repeat with the remaining donuts.
Notes
- *For same day method, increase yeast to 5 grams
- ** If in a warm environment, aim for the milk to be warmed to 100 °C / 38 °F and if in a cool environment aim for 130 °C / 55 °F.
- Prep Time: 24 hours
- Cook Time: 15 minutes
- Category: Dessert
- Method: Frying
- Cuisine: Japanese
Okonomi Kitchen is a participant in the Amazon Services LLC Associates Program. When you purchase something through my amazon affiliate links, I earn a small commission that helps me produce consistent content at no cost to you. Thank you for your support!


We followed the recipes cook times and temperatures and the donuts turned out perfect 🤩 great recipe and so much detail. The dough I made felt a bit sticky (I may have accidentally added too much milk and slightly had more pumpkin) so I added a bit more flour to get the dough to the right texture. We rolled them in some cinnamon sugar and they were the best donuts we’ve ever had 🫶🏻
This came out so good and I love the kabocha addition. Dough came out soft and chewy
I had to tweak a few things because I can’t get all the exact things where I live but it worked good enough for me to satisfy my craving for the donuts I had in Japan!!
Definitely recommend 🙂
I’ve never had the nama donuts, but I can objectively say that this recipe is incredible! I was a little worried because I didn’t catch that they were meant to be fried at a high temp until I’d made the dough. My deep fryer only goes up to 375º, but I just ended up frying them for 2 mins per side and they came out lovely. I’m sure there’s some kind of texture difference, but since I haven’t had the original I can’t really compare and complain :p
What’s even better is that these seem to hold up really well as day-old donuts. They don’t seem prone to drying out at all.
Thank you for this recipe!! They came out PERFECT and exactly like their OG! Help me curate a recipe for TRUFFLE Bakery’s Salt Roll I want to recreate it so bad!
This is exactly them!! I can’t thank you enough for putting in the time to curate this! I’m so glad I was able to find this recipe, they’re absolutely perfect! You should help me recreate the Truffle bakery salty rolls next, I’m having withdrawals already from not being able to have those.
Hi! Tried this recipe but sometimes it turned out the dough too fermented — are you doing the overnight fermentation in the chiller or freezer? My dough rose up so much
Yes, it should be in the fridge!
Im a bit confused for what the right measurements are for the yudane. In the ingredients list it states that you need 60g of bread flour and 60ml of water but in the instructions it states to mix 50g of bread flour with 50g of water.
Thank you for catching that! It’s 60 water and 60 flour 🙂
I got so many compliments on the donuts I made using this recipe! I followed closely the temperature recommendations for the different ingredients and I think that contributed to how much the dough rose and puffed up during frying! I would also recommend putting the extra effort in to make the yudane. For this attempt, I filled them with the crème diplomat recipe on the blog and it was incredible. I think next time I will try out flavouring the cream too!
These look amazing! Can you please share the recipe for the diplomat cream you used in the filling?
Yes! It’s linked in the recipe now 🙂