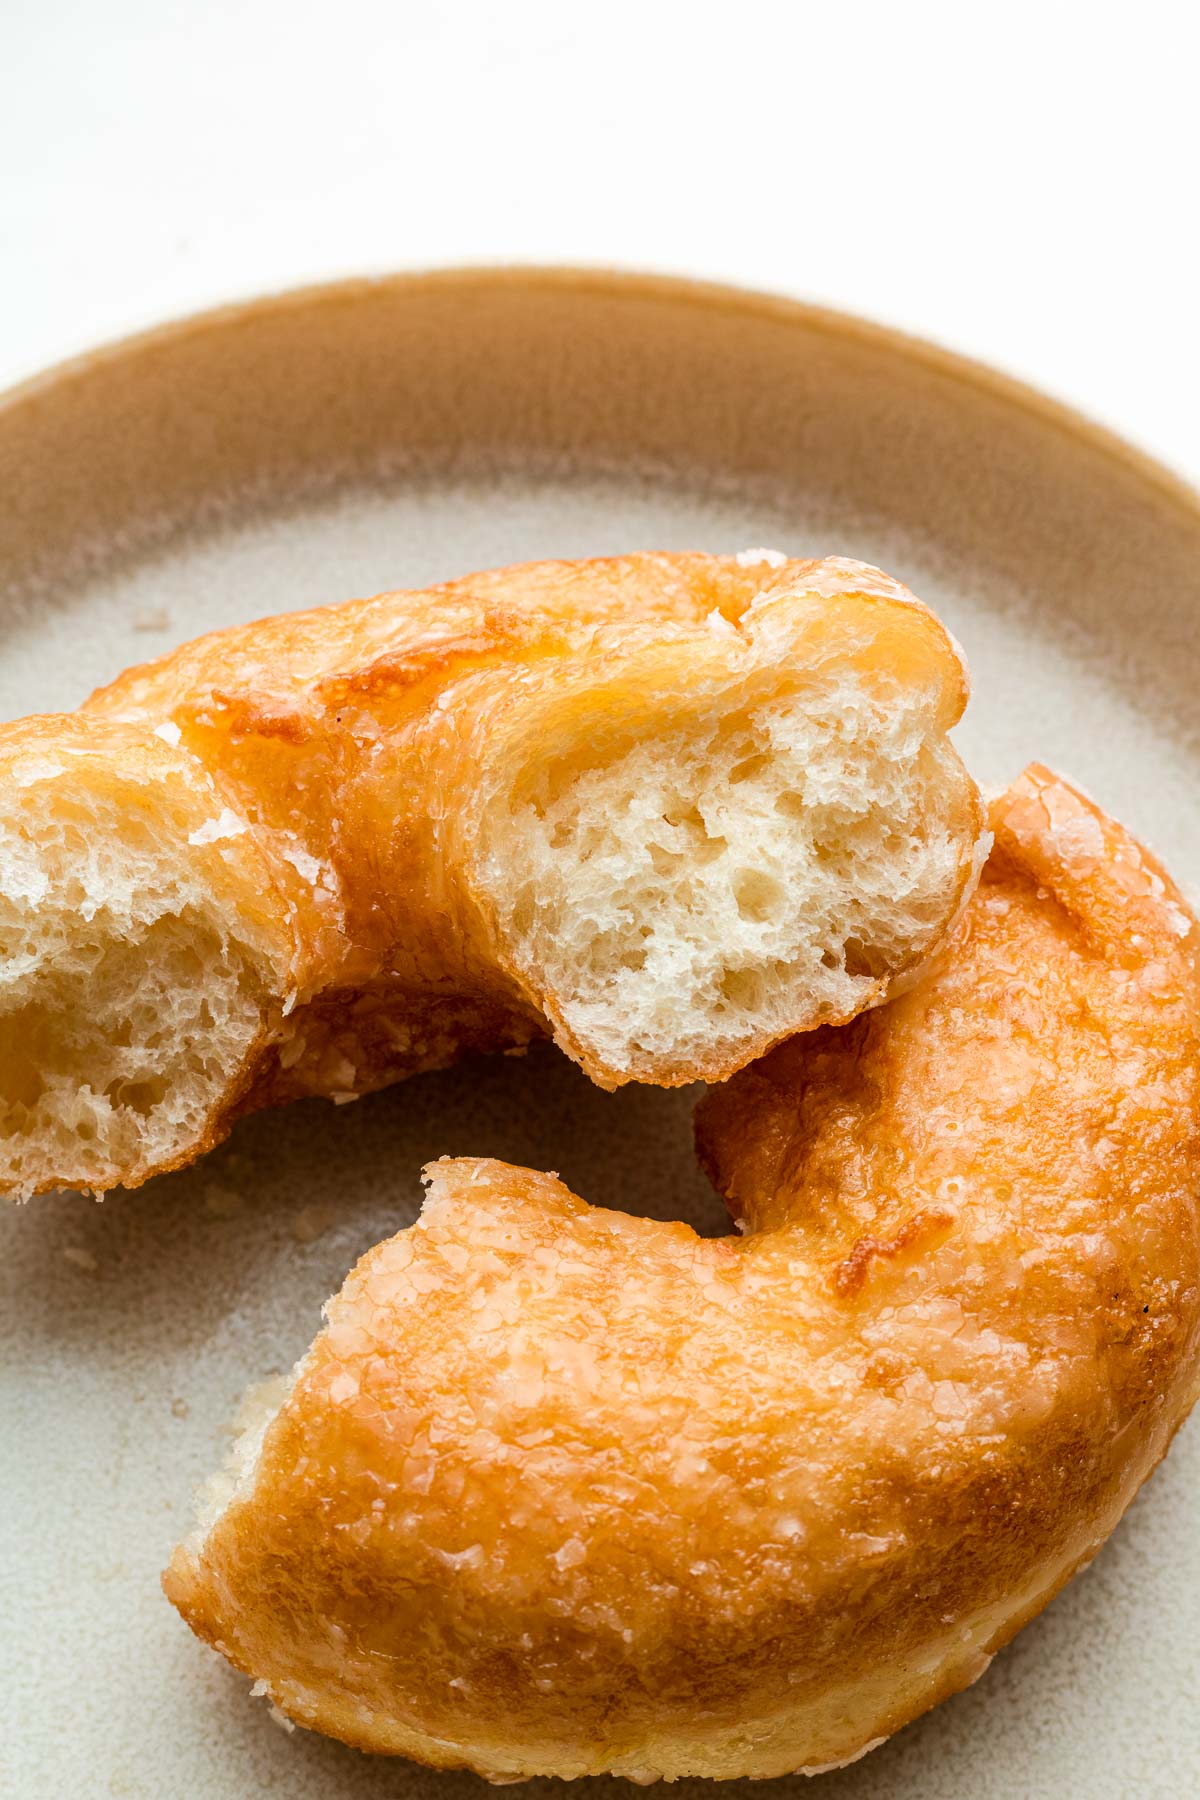
These yeast-risen vegan glazed donuts are soft, fluffy, and perfectly sweet with a light, airy texture that melts in your mouth. Made without dairy or eggs, they feature a smooth, glossy glaze that adds just the right amount of sweetness. Kinda better than Krispy Kreme.

Table of Contents
Krispy Kreme Style Vegan Donuts
I LOVE donuts. They might be in my top 3 favourite desserts of all time. Many vegan donuts tend to be baked or cake but I’m team fried donut. Nothing beats a crispy melt in your mouth fried donut with a crackly glaze. At the end of 2022, I went through a huge donut phase (still going strong) and went down a rabbit hole of developing the best, ultimate yeast risen vegan donut recipe. I’ve made these over 10 times and my friends and family love them even more than Krispy Kreme 😦. I’ve gate kept this recipe for too long, excited to finally it here on the blog!!
Ingredients for Vegan Glazed Donuts
These yeast risen vegan glazed donuts are made with 7 pantry staple ingredients:
- All-Purpose Flour: ou can swap the flour for all purpose flour or use all bread flour if you like chewier donuts. The combination of both bread and cake flour yields a very soft-melt-in-your-mouth texture with a slight chew on the outside. Using all purpose flour only has a all around soft texture.
- Salt: A crucial ingredient that enhances flavor, balancing the sweetness of the donuts and contributing to the overall taste.
- Instant Dry Yeast: This helps the donuts rise, creating a light and airy texture. Instant yeast is convenient as it doesn’t require proofing before use.
- Granulated White Sugar: Adds sweetness to the donuts and helps activate the yeast, contributing to a beautifully golden crust when fried.
- Condensed Coconut Milk: This creamy ingredient not only adds a subtle sweetness but also contributes to the rich, moist texture of the donuts and is what replaced eggs.
- Unsalted Vegan Butter: Provides richness and flavor, helping to create a tender donut crumb. Using unsalted butter allows for better control of the overall saltiness.
- Soy Milk: A plant-based milk alternative that adds moisture and helps bind the ingredients together, contributing to a soft, tender texture.
- Powdered sugar: For glazing!
How to Make Vegan Glazed Donuts
Yeast risen donuts are pretty easy to make! Here’s a brief rundown:

- Mix the Dough: In a large bowl, whisk together bread flour, cake flour, and salt (keeping salt separate). Sprinkle yeast on the opposite side, then add sugar, condensed coconut milk, softened vegan butter, plant-based milk, and water. Mix until a dough forms.
- Knead the Dough: Transfer the dough to a floured surface and knead for 8-10 minutes until smooth and elastic. The dough can be made in a stand mixer, bread machine or by hand.
- First Rise: Place the dough in a greased bowl, cover with plastic wrap, and refrigerate overnight (8-12 hours) for slow fermentation.
- Shape & Second Rise: The next morning, let the dough come to room temperature for 30 minutes. Punch it down, roll it out, and cut into donut shapes. Allow the donuts to rise for 45 minutes to 1 hour until puffed.
- Fry the Donuts: Heat oil in a deep pot to 175-190°C (350-375°F) and fry the donuts in batches for 1-2 minutes on each side until golden brown. Then fry the donut holes for about 20-30 seconds per side.
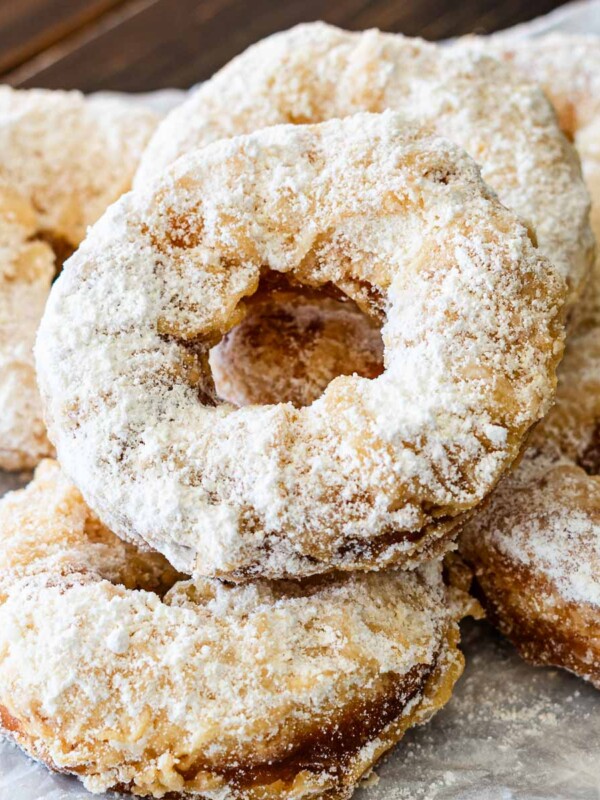
- Cool & Glaze: Cool the donuts on a wire rack and add glaze while still warm. You can also coat them in powdered sugar or granulated sugar if you prefer.
Tips for PERFECT Vegan Donuts
- Temperature of the dough: Depending on the method of kneading and the temperature of your room, it’s important to use the right temperature for your milk. Aim to maintain the dough’s temperature at about 78°F to 82°F (25.6°C to 27.8°C) for optimal yeast activation and dough consistency. Using warm milk (around 110°F or 43°C) can help achieve this if your kitchen is on the cooler side. If the room is warm, you might want to use cooler milk (around room temperature, 68°F or 20°C) to keep the dough within the desired range.
- Overnight rest: You can make donuts on the day of or overnight. Both yield great donuts, but overnight does give it a deeper flavour, but you can only tell if you eat it side by side. Additionally, I find working with cold dough a bit easier. For overnight, I prefer proofing the first rise in the fridge— however you can shape the dough and then do the second proofing in the fridge overnight (ideally, for this method somewhere between 8-10 hours, so making it at night and frying them in the morning).
- Rolling and cutting: There are two ways to roll and cut out doughnuts. The first is to use a doughnut cutter, or cookie cutters and a small lid from a bottle (or anything that you can cut out circles with, one large and one small). The other is to divide the dough into equal portions, roll them back into balls and rest for a few minutes (relaxes the gluten). Then flatten them and cut out a small hole with a small cutter or poke your finger in the middle and open the hole by twirling your fingers (see photo above). I don’t really prefer either, it just kind of depends on my mood. I like that the cookie cutter version yields very pretty donuts (good for gifting!), but like that the free hand version has less scraps and kinda dig the ‘home made’ look.
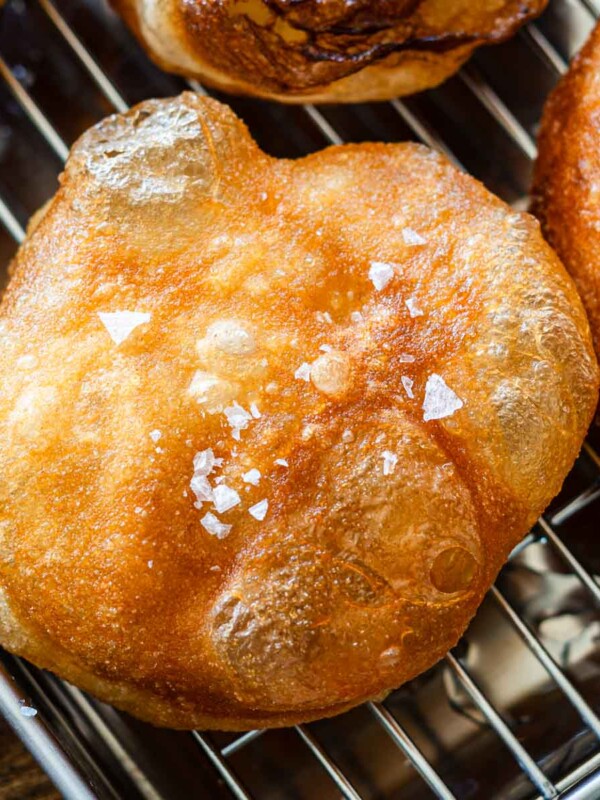
- ‘Dry out’ the dough before frying: Once they’re nearly ready to fry, remove the cover and let the donuts dry out a bit. I find it easier to fry and yields a nice slight … crisp? I’m not sure if crisp is the right word but a delicate… fried texture.
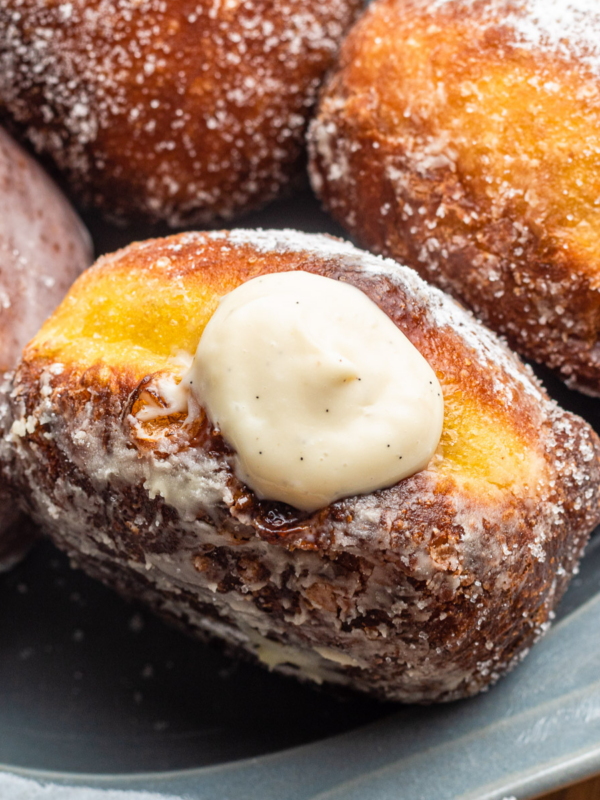
- Frying scraps: You could gather the scraps and re-roll them but they tend to come out a bit tougher. I like to attach the donut holes together for one cute pon de ring donut and either fry the rest of the scraps as is OR make rustic fritters!! I cut the scraps into small pieces of dough (toss some bananas or apples in there) and then scoop them into blobs. They’ll look like they’re going to fall apart, but the moisture around it will stick as they rise.
- Frying temperature: Throughout my donut making journey, temperature truly makes or breaks the final result of the donut. I’ve found the optimal temperature to be around 350-375 for ring donuts. 350 for a lighter colour and 375 for a deeper brown colour.
- Glazing / coating: If coating with sugar do them while they’re on the slightly hotter side of warm. If glazing, avoid glazing while they’re too warm or it’ll just slide right off. Glaze while on the cooler-warm si
Helpful Equipment
- Kitchen aid standmix
- Bread machine
- Digital kitchen scale: I highly recommend using a digital kitchen scale for best results.
- Bench scraper
- Cooking thermometer: Use a cooking thermometer to check the temperature of the dough, oil and internal temperature of the donut.
- Donut cutter
- Timer
- Wire rack
- Deep fryer
How to Store Glazed Donuts
To store glazed donuts, place them in an airtight container at room temperature to keep them fresh for up to two days. If you need to store them for a longer period, consider freezing them; wrap each donut individually in plastic wrap and then place them in a freezer-safe bag. When you’re ready to enjoy them, simply thaw at room temperature or warm them in the microwave for a few seconds to restore their softness. Avoid refrigerating glazed donuts, as this can cause them to become stale more quickly.
Recipe FAQ
Yes! You can either cut the donuts out and not the middle part or divide the dough into 8 pieces and shape them into balls like my nama donut recipe. The ball-shaped donuts will need to fry a little longer because they have less surface area.

Enjoy!! If you make this Yeast Rirsen Vegan Glazed Donut recipe, let me know! Leave a comment, rating and if you decide to share it on socials, tag me on instagram @Okonomikitchen. I’d love to hear from you!
PrintVegan Donuts (Yeast Risen)
- Total Time: 24 hours 10 minutes
- Yield: 8 donuts
- Diet: Vegetarian
Description
These yeast-risen vegan glazed donuts are soft, fluffy, and perfectly sweet with a light, airy texture that melts in your mouth. Made without dairy or eggs, they feature a smooth, glossy glaze that adds just the right amount of sweetness. Kinda better than Krispy Kreme.
Ingredients
Donuts
- 2 cups (250 g) all purpose flour
- 1/2 tsp (3 g) salt
- 1/2 tsp (2.5–3 g) instant dry yeast
- 1 1/2 tbsp (20 g) granulated white sugar
- 2 tbsp (40 g) condensed coconut milk
- 1 1/2 tbsp (20 g) unsalted butter
- 1/2 cup (125 ml) soy milk
- 3 tbsp + 1 tsp (50 ml) water
Glaze
- 1 1/2 cups (200 g) powder sugar
- 3 tbsp (45 ml) heavy dairy free cream
- 2 tsp (10 ml) melted vegan butter
- 1/2 tsp vanilla extract
- pinch of salt
Instructions
Make the dough
Stand Mixer Method:
- In the bowl of a stand mixer, combine the all-purpose flour, salt, instant dry yeast, and granulated sugar. Mix briefly. Add the condensed coconut milk, softened vegan butter, soy milk, and water. Use the dough hook attachment to mix on low speed until a dough forms.
- Increase the speed to medium and knead for about 5-7 minutes until the dough is smooth and elastic.
Bread Machine Method:
- Add the ingredients to your bread machine in the order specified by the manufacturer, usually wet ingredients first. Set the bread machine to the “dough” cycle. Start the machine and let it knead the dough until smooth and elastic, usually around 1 hour.
- Once the dough is ready, remove it from the machine and shape it into donuts. Allow the donuts to rise for about 30-45 minutes before frying.
Hand Knead Method:
- In a large mixing bowl, whisk together the all-purpose flour, salt, instant dry yeast, and granulated sugar. Add the condensed coconut milk, softened vegan butter, soy milk, and water to the dry ingredients. Mix until a dough begins to form.
- Transfer the dough to a lightly floured surface and knead by hand for about 8-10 minutes until it’s smooth and elastic.
Overnight Method
- First Rise (Slow Fermentation): After kneading, place the dough in a greased bowl, cover it with plastic wrap, and refrigerate overnight (8-12 hours). The dough will rise slowly in the fridge.
- Shape & Second Rise: The next morning, remove the dough from the fridge and let it come to room temperature for about 30 minutes. Punch the dough down to release the air, then roll it out on a lightly floured surface to about 1 cm (approx. ½ inch) thickness. Use a donut cutter to cut out donut shapes. If you don’t have a donut cutter, you can use a large cup or glass to cut the outer circle, and then a smaller bottle cap or round object to cut out the inner circle. You should be able to get about 8 pieces.
- Second Rise: Place the cut donuts on a lined baking sheet, cover them with a cloth, and let them rise for another 45 minutes to 1 hour until they puff up. They should spring back slowly when gently poked. Remove the cover and let the donuts ‘dry’ out for 10-15 minutes before frying.
- Fry the Donuts: Heat oil in a deep pot to 175-190°C (350-375°F) 10-15 minutes before fully proofed. Fry the donuts in batches for 1-2 minutes on each side until they are golden brown. If you are making donuts without a hole in the middle, fry closer to 2 minutes. Then fry the donut holes for about 20 seconds per side.
- Cool & Glaze: Remove the fried donuts and let them cool on a wire rack. Once cool enough to handle, dip them into the glaze while still warm. You can also coat them in powdered sugar or granulated sugar. Enjoy!!
Same Day Method
- First Rise: Place the dough in a greased bowl, cover with a damp cloth or plastic wrap, and let it rise in a warm place for about 1.5-2 hours or until doubled in size. Proceed with the recipe.
Glaze
- In a medium bowl, whisk together the powdered sugar, dairy-free cream, melted vegan butter, vanilla extract, and a pinch of salt until smooth.
Notes
- *I use a blend of 180 g bread flour and 70 g cake flour but have tested these with all purpose since it is most accessible with very close results.
- Prep Time: 24 hours
- Cook Time: 10 minutes
- Category: Dessert
- Method: Frying
- Cuisine: American
Okonomi Kitchen is a participant in the Amazon Services LLC Associates Program. When you purchase something through my amazon affiliate links, I earn a small commission that helps me produce consistent content at no cost to you. Thank you for your support!


Hi! I’m curious: when you say the dough should be elastic and smooth, does that mean it should pass windowpane or not? Though I like there’s a suggested knead time, I always wish recipes were clearer about gluten development