Make Rice Cooker Saliva Chicken with Rice effortlessly with tender poached chicken and fluffy rice cooked in one pot. Topped with spicy chili oil and miso sauce, this Sichuan-inspired dish is packed with umami, spice, and sesame flavor—perfect for an easy, flavorful weeknight meal!
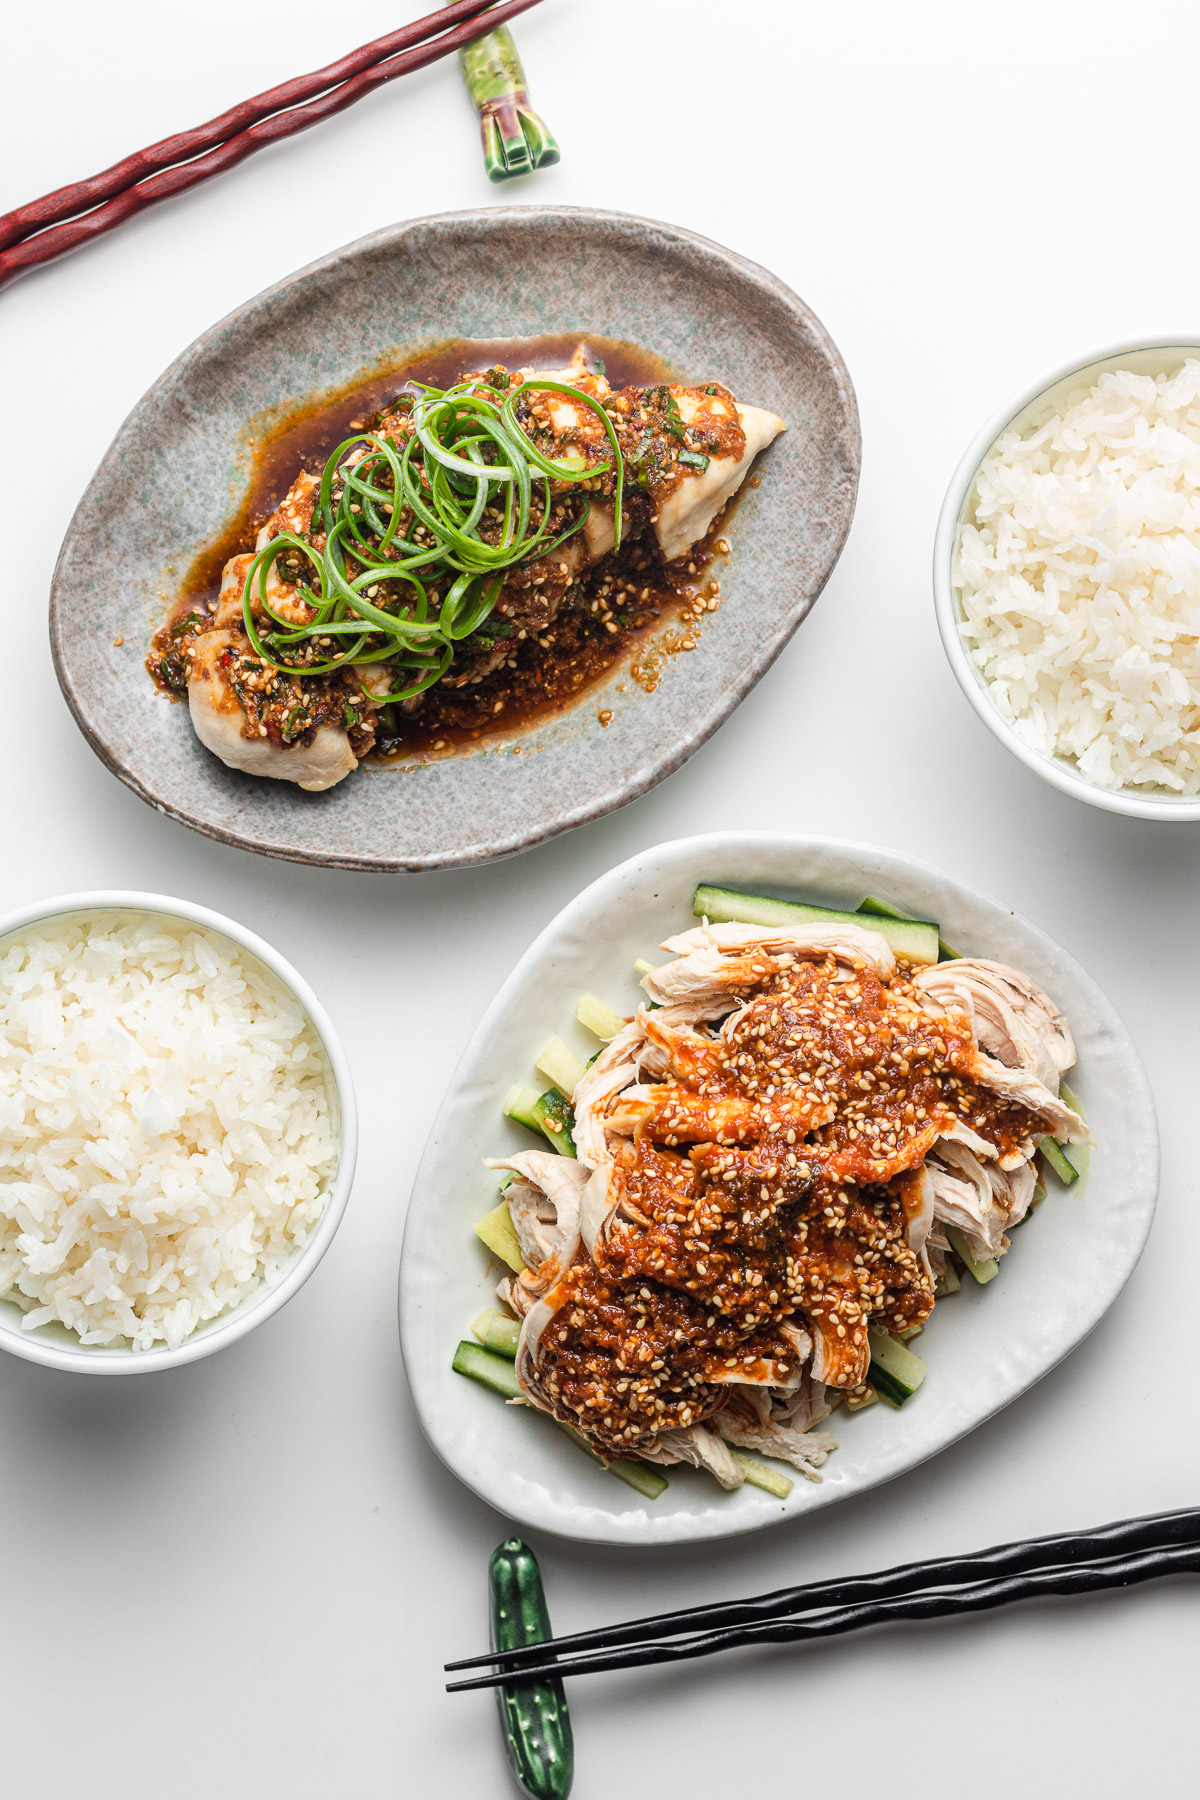
Table of Contents
One Pot Chicken with Rice and Sauce
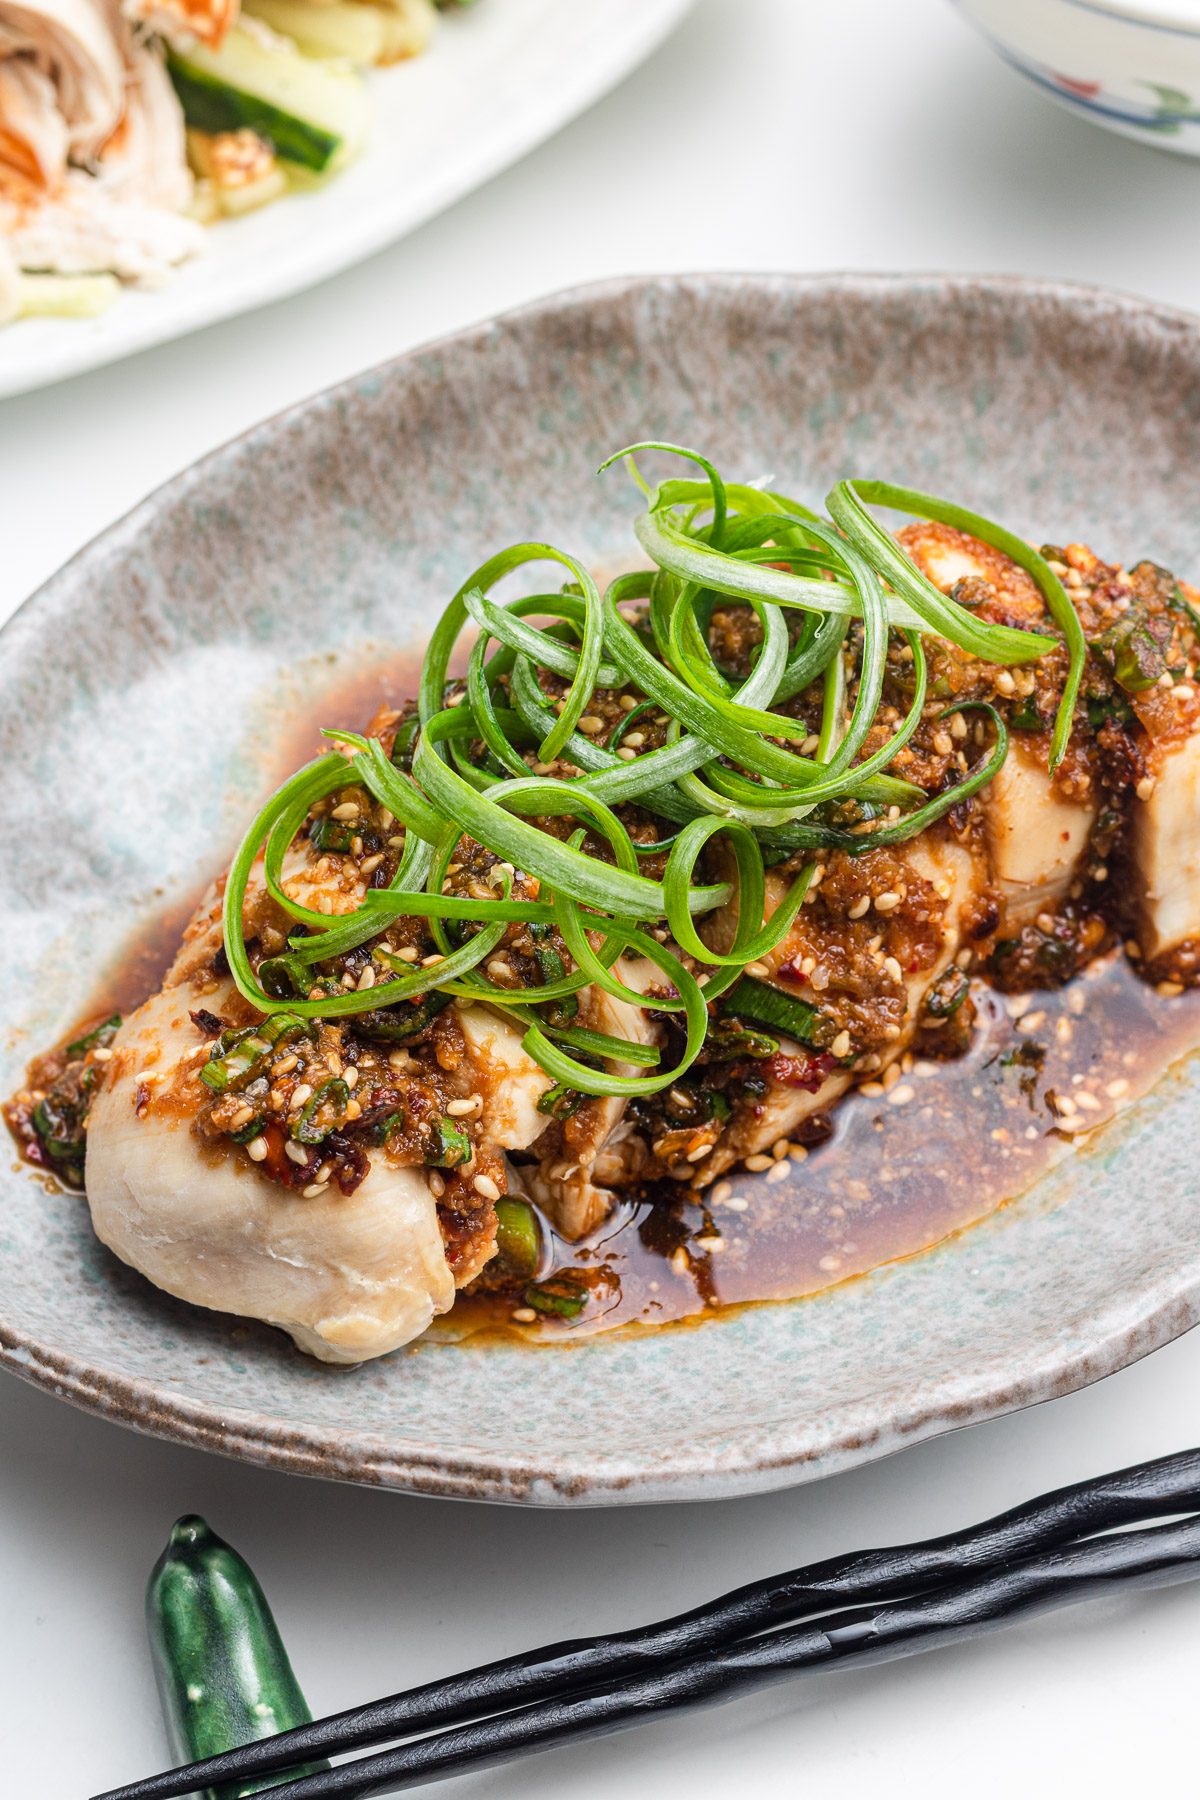
Yodare Chicken (よだれ鶏), also known as Sichuan Saliva Chicken (口水鸡), is a flavorful dish made with poached chicken and topped with a spicy, savory sauce. The name “drool chicken” comes from its irresistible taste that leaves you wanting more. Originally from Sichuan, China, this dish has been adapted in Japan as Yodare-Dori, where it’s commonly served as a cold appetizer with lighter seasoning. In this easy rice cooker version, you can cook both the chicken and rice together in one pot, preserving the bold umami, spice, and sesame flavors for a quick and delicious meal.
Ingredients and Substituions
To make this dish, you’ll need a few pantry staples and seasonings to achieve its signature bold flavors. If needed, some ingredients can be substituted based on availability.
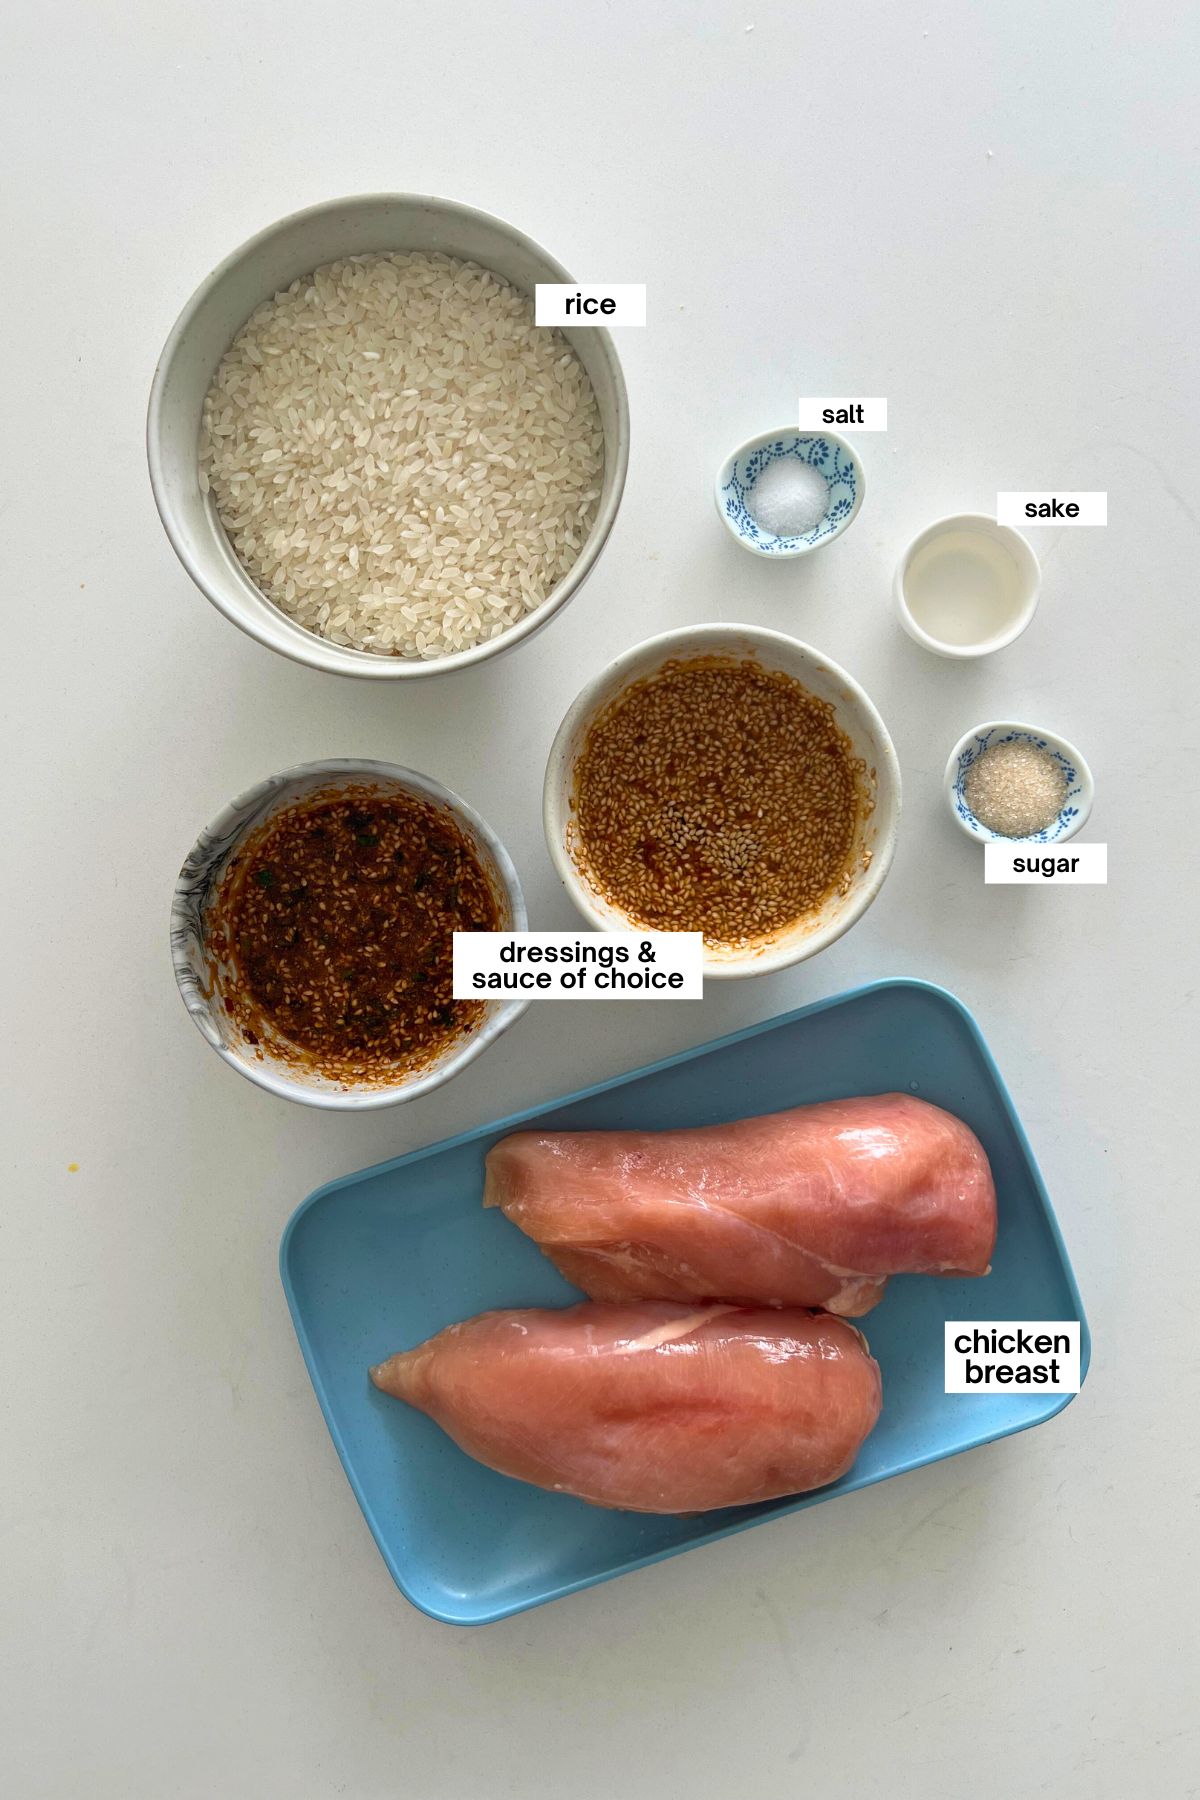
- Japanese short-grain rice: You can substitute with Jasmine rice if you prefer.
- Chicken breast: Traditionally chicken breast is used but you can swap it for chicken thigh. If you have access to chicken breast with skin on, use that as it’ll keep the chicken even more moist and flavourful.
- Sugar, salt and sake: These ingredients help keep the chicken breast soft and tender.
- Chili oil sauce: garlic, ginger, soy sauce, rice vinegar, sesame oil, chili oil, sugar, sesame, scallions, schimi and msg. You can omit some and/or add in other ingredients to your liking.
- Miso sauce: Garlic, ginger, soy sauce, rice vinegar, sesame oil, sugar, white miso paste, doubanjang and sesame seeds.
How to Make Chicken with Rice in a Rice Cooker
This dish comes together easily with just a few steps, making it perfect for busy weeknights.
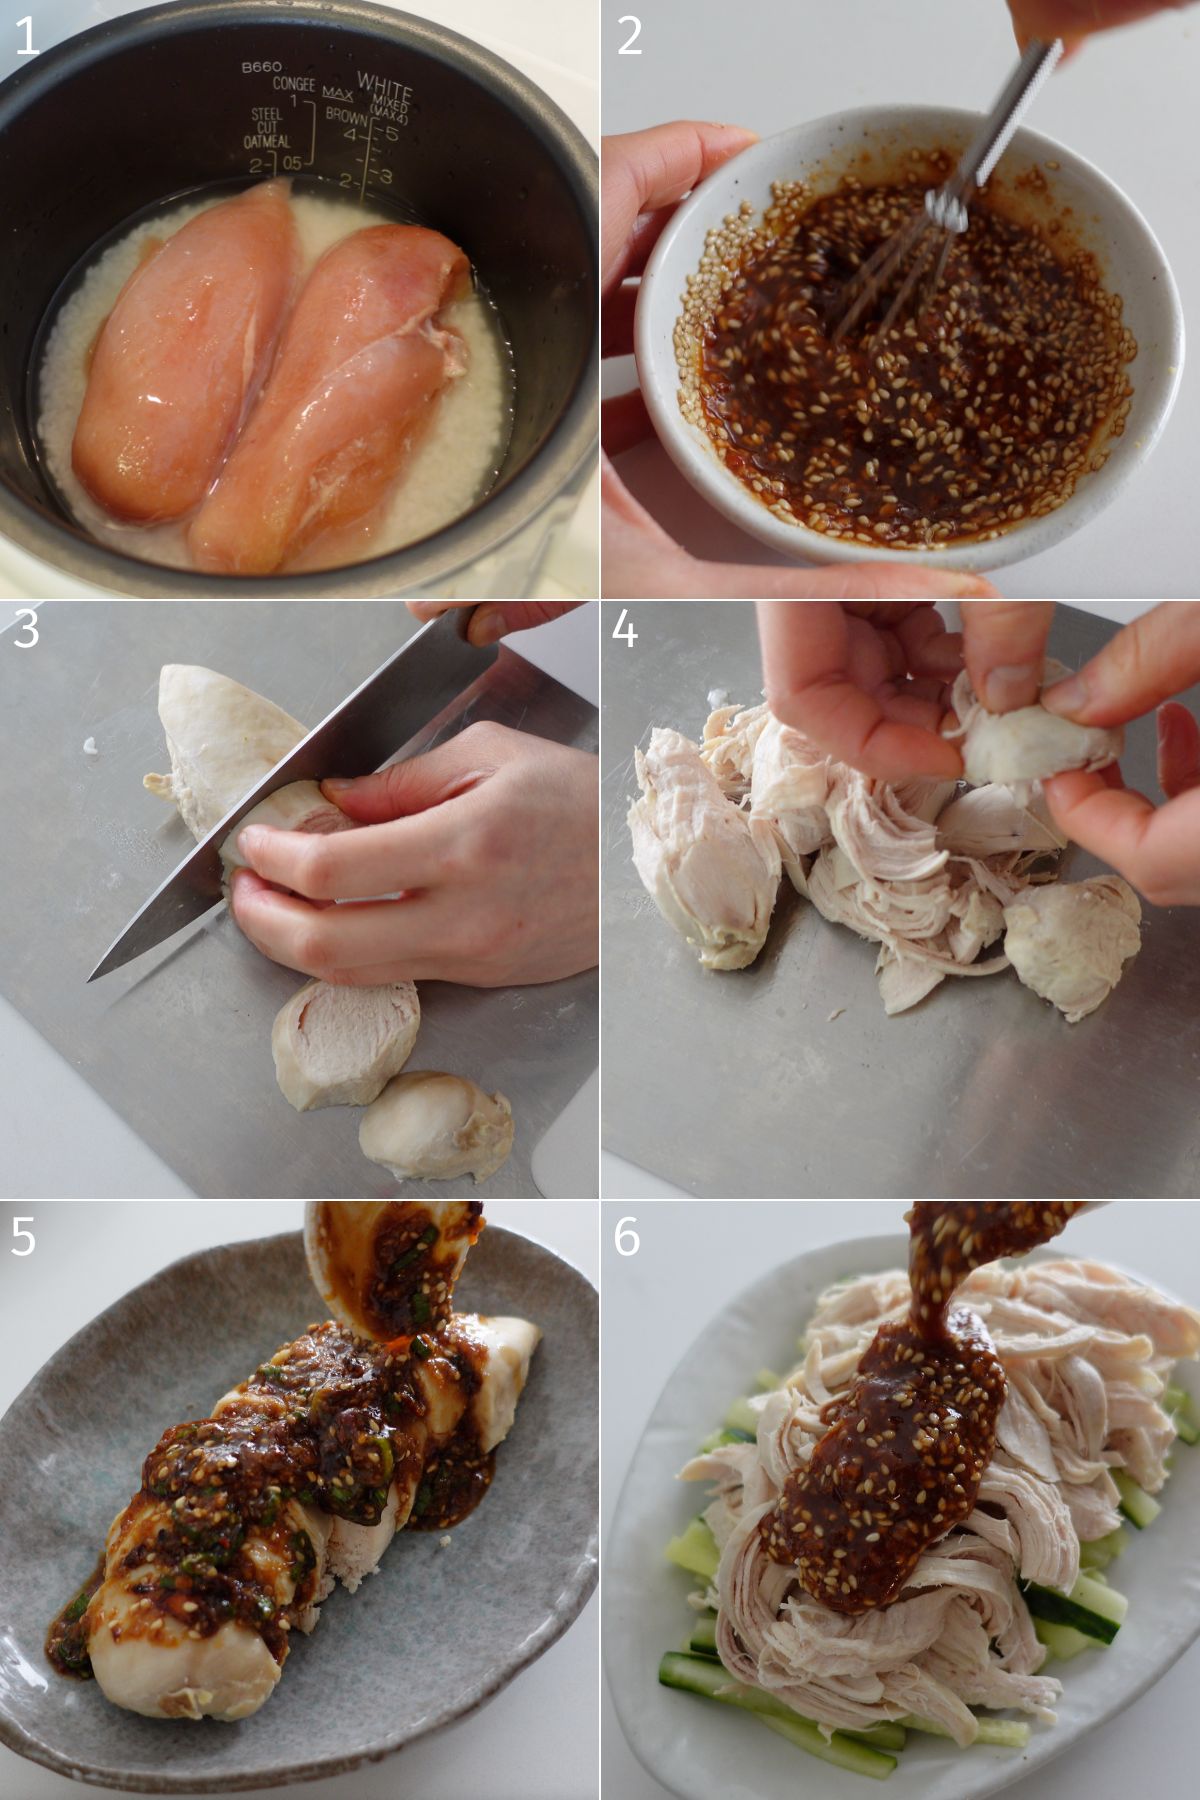
- Prepare the rice: Rinse the rice until the water runs mostly clear. Add it to the rice cooker with water just shy of the 2-cup line.
- Season the chicken: Coat the chicken with sugar, salt, and sake. Let it sit for 10 minutes, then pat dry to remove excess moisture.
- Cook: Place the chicken on top of the rice in the rice cooker and cook on the quick rice mode.
- Make the sauces: While the chicken and rice cook, mix all the ingredients for the chili oil sauce and miso sauce in separate bowls.
- Finish and serve: Once the rice cooker timer goes off, remove the chicken and let the rice sit for 10 minutes on keep-warm mode. Once cool enough to handle, shred or slice the chicken and serve with both sauces over rice. Enjoy!

VIDEO: Watch How to Make It
Lisa’s Recipe Tips
- Add vegetables: If you’d like to add vegetables to this dish, add firmer veggies like carrots and broccoli at the same time as the chicken. For quicker-cooking vegetables like spinach, bok choy, or bean sprouts, add them during the last 5-10 minutes using the rice cooker’s keep-warm function.
- Try different sauces: There are so many different variations of sauces you can dress the chicken with! I love pairing it with ginger scallion sauce, miso chili oil and spicy umami crisp!
- Make ahead: The sauces can be made in advance and stored in the fridge for up to 5 days.
- Add a little oil: The texture of the chicken is slightly on the drier side but still moist. It has what we call in Japanese ‘horo horo’ texture, which translates to “crumbly,” but it’s more about the chicken being tender and absorbing sauces well, which is perfect for this recipe. However, if you prefer a softer and more moist chicken, you can rub a little oil over the chicken breast before adding it to the rice cooker.
How to Store Leftovers
- Refrigerate: Store leftover chicken and rice in an airtight container for up to 3 days. Keep the sauces separate to maintain their flavors.
- Reheat: Gently reheat in the microwave or stovetop, adding a splash of water to keep the rice from drying out.
- Freeze: You can freeze the chicken and rice for up to 2 months, though the texture may slightly change upon thawing.
Recipe FAQ
You can cook the rice on the stovetop and poach or sous vide the chicken separately in water or broth.
The spice level depends on the amount of chili oil used. Start with a small amount and adjust to taste.
Yes, you can make Yodare Chicken in an Instant Pot! Follow all the same preparation steps and set the Instant Pot to pressure cook on high for 10-12 minutes, then let it naturally release pressure for 5 minutes.
More Chicken Breast Recipes
- Chicken Breast Karaage
- Sous Vide Chicken Breast
- Japanese Banbanji Chicken (Chicken Breast with Sesame Sauce)
- Air Fryer Chicken Katsu
- Sous Vide Oyakodon
- Salad Chicken (coming soon)
- Japanese Chicken Ham (coming soon)
Enjoy! If you make this Rice Cooker Saliva Chicken with Rice recipe, I’d love to hear what you think! Leave a comment and rating below, and if you share it on social media, tag me on Instagram @Okonomikitchen. I can’t wait to see your creations!
Print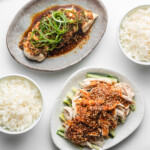
Rice Cooker Saliva Chicken and Rice (Yodare Chicken)
- Total Time: 40 minutes
- Yield: 2 servings
Description
Make Rice Cooker Saliva Chicken with Rice effortlessly with tender poached chicken and fluffy rice cooked in one pot. Topped with spicy chili oil and miso sauce, this Sichuan-inspired dish is packed with umami, spice, and sesame flavor—perfect for an easy, flavorful weeknight meal!
Ingredients
For the Chicken and Rice
- 2 cups Japanese short grain rice
- 1 lbs chicken breast (about 1 large or 2 small)
- 1 tsp sugar
- 1/2 tsp salt
- 1 tbsp sake
Chili Oil Sauce
- 1 garlic clove, minced
- 1 tsp ginger, minced
- 1 1/2 tbsp soy sauce
- 1/2 tbsp rice vinegar or black vinegar
- 1/2 tbsp sesame oil
- 1–3 tsp chili oil
- 1 tsp sugar
- 1 tbsp ground sesame or 2 tsp sesame paste
- 1 scallion, sliced
- schimi, to taste
- msg, to taste (optional)
Miso Sauce
- 1 garlic clove, minced
- 1/2 tbsp ginger, minced
- 2 tbsp soy sauce
- 1 tbsp rice vinegar
- 2 tsp sesame oil
- 2 tsp sugar
- 1 tbsp white miso paaste
- 1 tsp doubanjiang or gochujang
- 1 tbsp sesame seeds
Instructions
- Rinse the rice until the water runs mostly clear. Add to the rice cooker pot along with water just shy of the 2-cup line.
- Coat chicken in sugar, salt, and sake. Set aside for 10 minutes. Pat to remove excess moisture.
Place into the rice cooker pot and cook on quick rice mode. - In the meantime, combine all the ingredients for the chili oil sauce and miso sauce in separate bowls.
Once the timer goes off, remove the chicken and let the rice stand for at least 10 minutes on keep-warm mode before mixing. - Once the chicken is cool enough to handle, shred with your hands or slice against the grain. Place the chicken onto serving plates and top one chicken with the chili oil sauce and the other with the miso sauce. Serve with rice and enjoy!
- Prep Time: 10 minutes
- Cook Time: 30 minutes
- Category: Main dish
- Method: Rice Cooker
- Cuisine: Chinese, Japanese
Nutrition
- Serving Size: 1 serving
- Calories: 550
- Sugar: 8 g
- Sodium: 1600 mg
- Fat: 12 g
- Saturated Fat: 2 g
- Unsaturated Fat: 9 g
- Trans Fat: 12 g
- Carbohydrates: 90 g
- Fiber: 2 g
- Protein: 45 g
- Cholesterol: 90 mg


