These Scroissants (croissant-style scones) are flaky and buttery, peeling apart in layers like a croissant, yet soft and tender like a scone on the inside. They bake up super crispy on the outside with a crunchy, golden base, and come together quickly with no yeast or overnight proofing. Perfect for breakfast, brunch, or an afternoon treat!
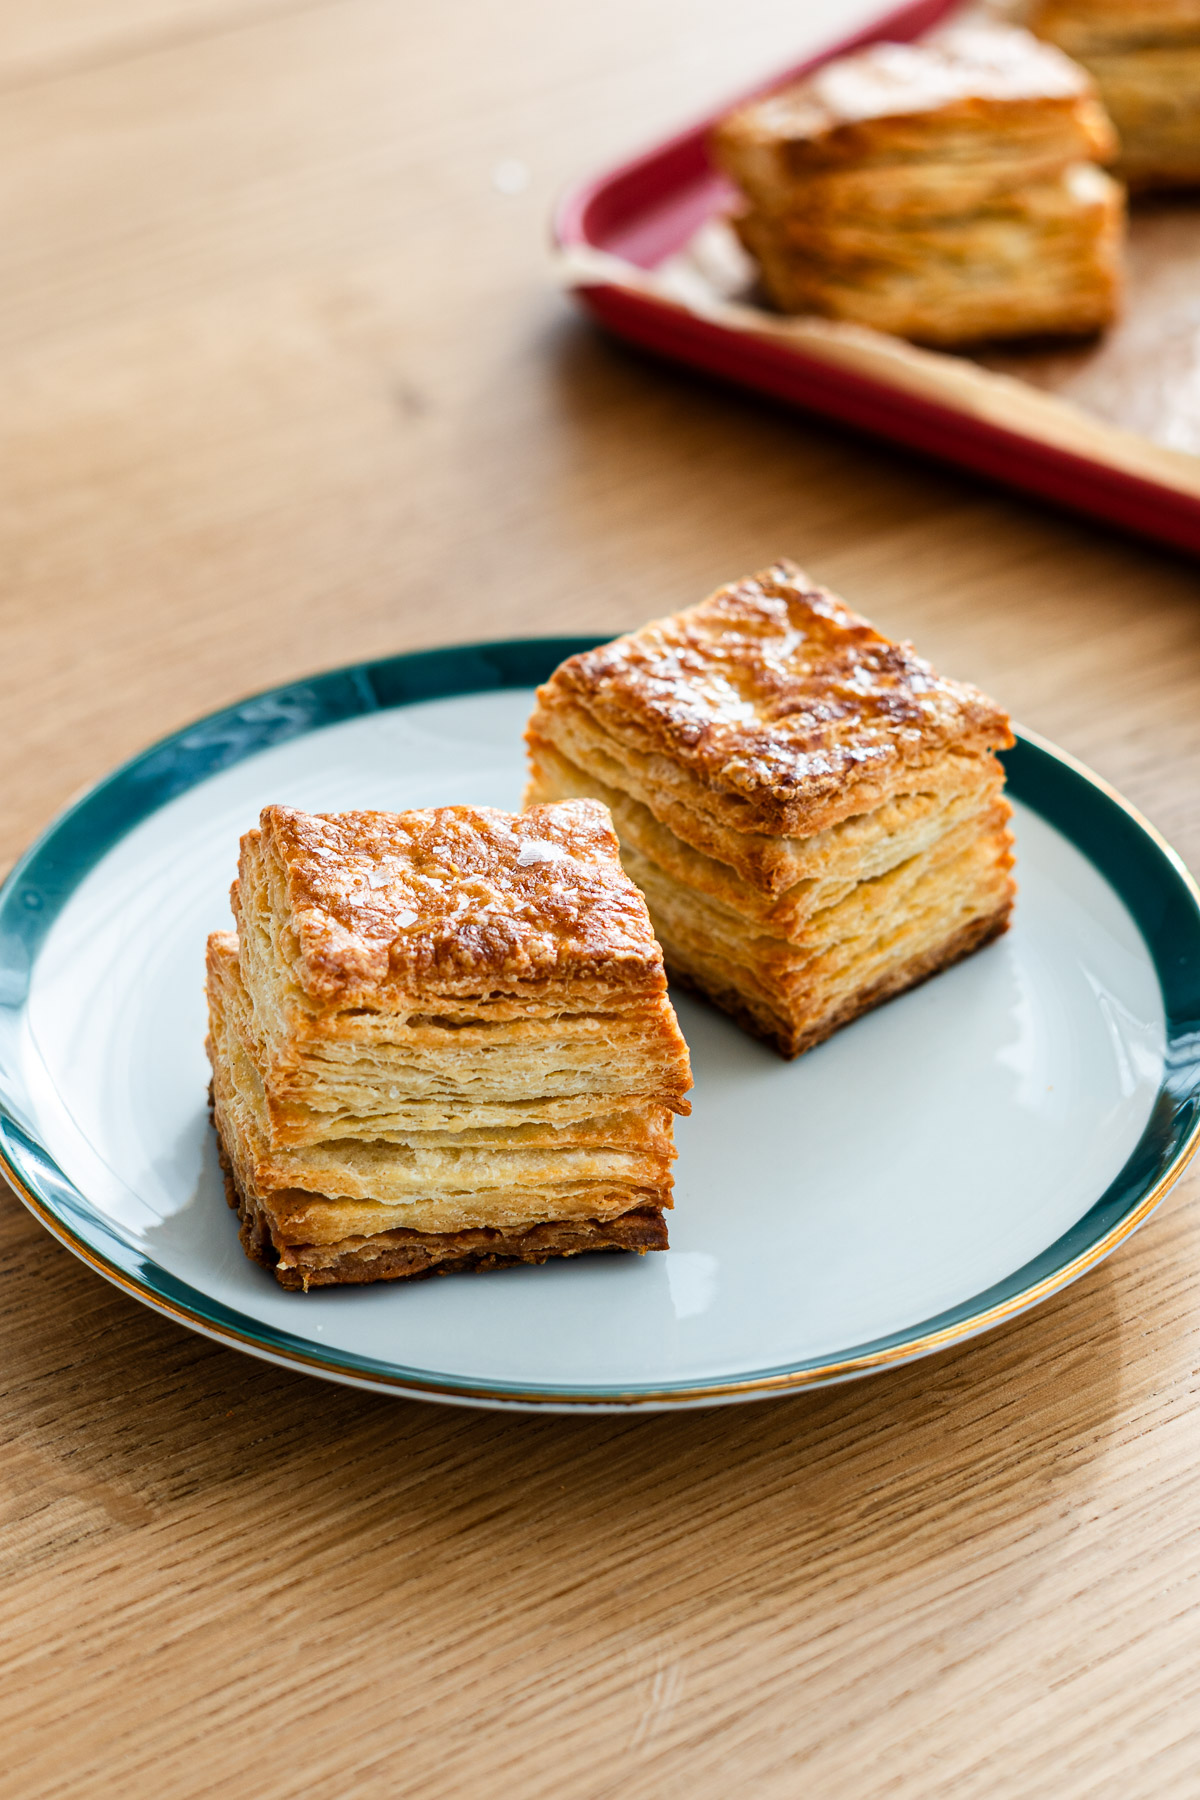
Table of Contents
This recipe is one of those that came out of an experimental accident. I had some scone dough that I scaled wrong, but I didn’t want it to go to waste. On a whim, I laminated some butter into the dough, and what came out was this hybrid pastry. The dough itself has less butter than traditional scones, but laminating the butter created this perfect cross between a croissant and a scone. If you love butter-forward pastries like croissant salt bread, shio pan bagels, or even a rich butter focaccia, these scroissants are right up your alley. Even for people who don’t usually love scones (me), the texture here is just so addictive!!
Croissant-Style Laminated Scones
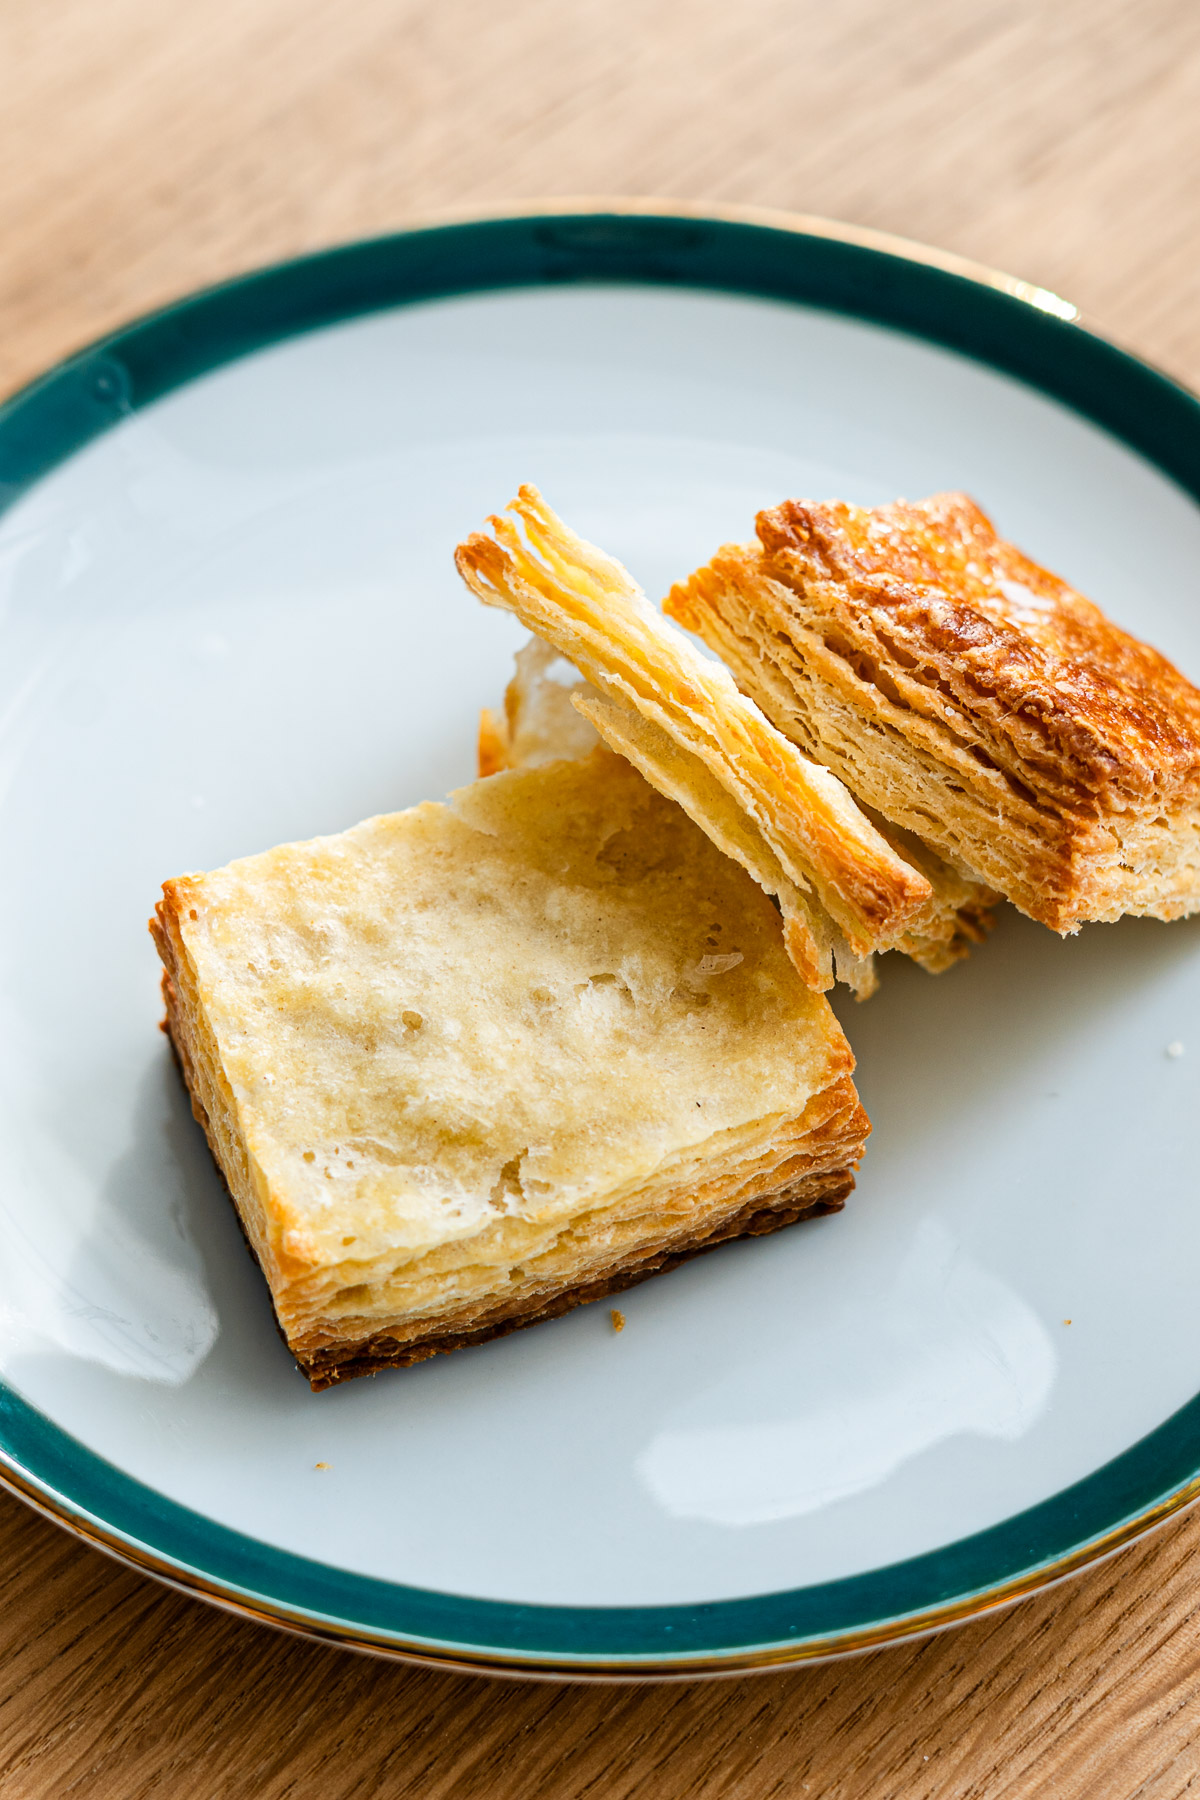
So what exactly is a scroissant? Think of it as a croissant-scone hybrid:
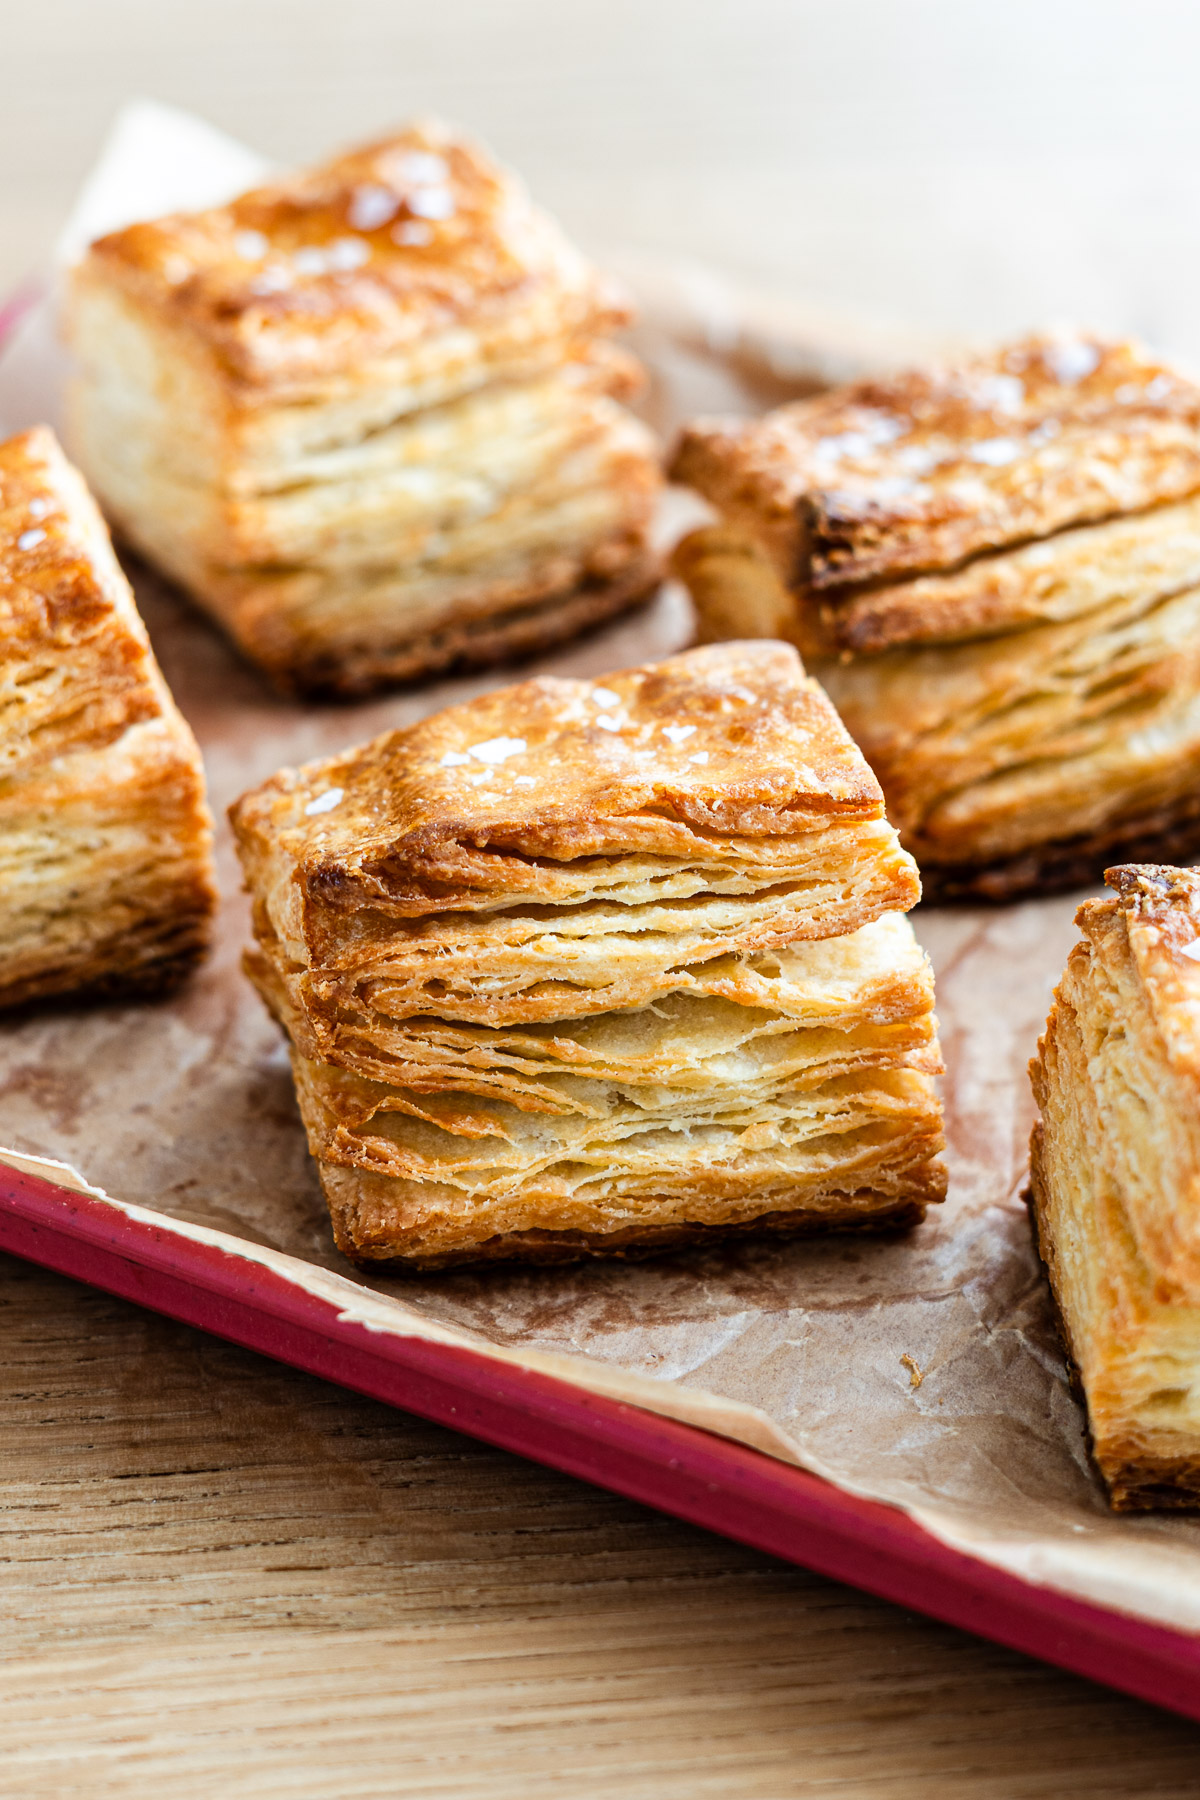
- Crispy, crunchy exterior: The outside bakes golden and crisp, and the bottom gets slightly crunchy like a cookie because the butter melts out during baking, basically frying the base— similar to the golden crust you get on salt bread or salt bread bagels.
- Flaky interior: The inside is buttery and layered, so you can peel each layer apart like a croissant or danish.
- Butter-forward flavor: It’s buttery in the best way— not greasy! It’s super rich in that buttery smell too.
This laminated technique gives the best of both worlds: a tender, pull-apart interior with the satisfying crisp of a pastry, all made without yeast or long proofing times!
Ingredients and Substitutions
You’ll need a few simple ingredients to make these laminated scones. Keeping everything cold is key. It ensures the butter stays in layers and the scones come out flaky and tender. Here’s what you’ll need:
- All-purpose flour
- Baking powder: Since these are no-yeast scones, the baking powder gives them lift.
- Salt
- Granulated sugar
- Eggs
- Milk: Hydrates the dough and keeps it tender. Whole milk works best for flavor, but you can substitute soy, oat, or almond milk for a dairy-free version.
- Unsalted butter: Divided into dough butter and the butter block for laminating. The butter block is what creates those flaky layers. Use cold, high-quality butter.
How to Make Laminated Scones
These laminated scones are easy to make and are much more forgiving than croissants because of its rough pastry. Here’s my step-by-step method:
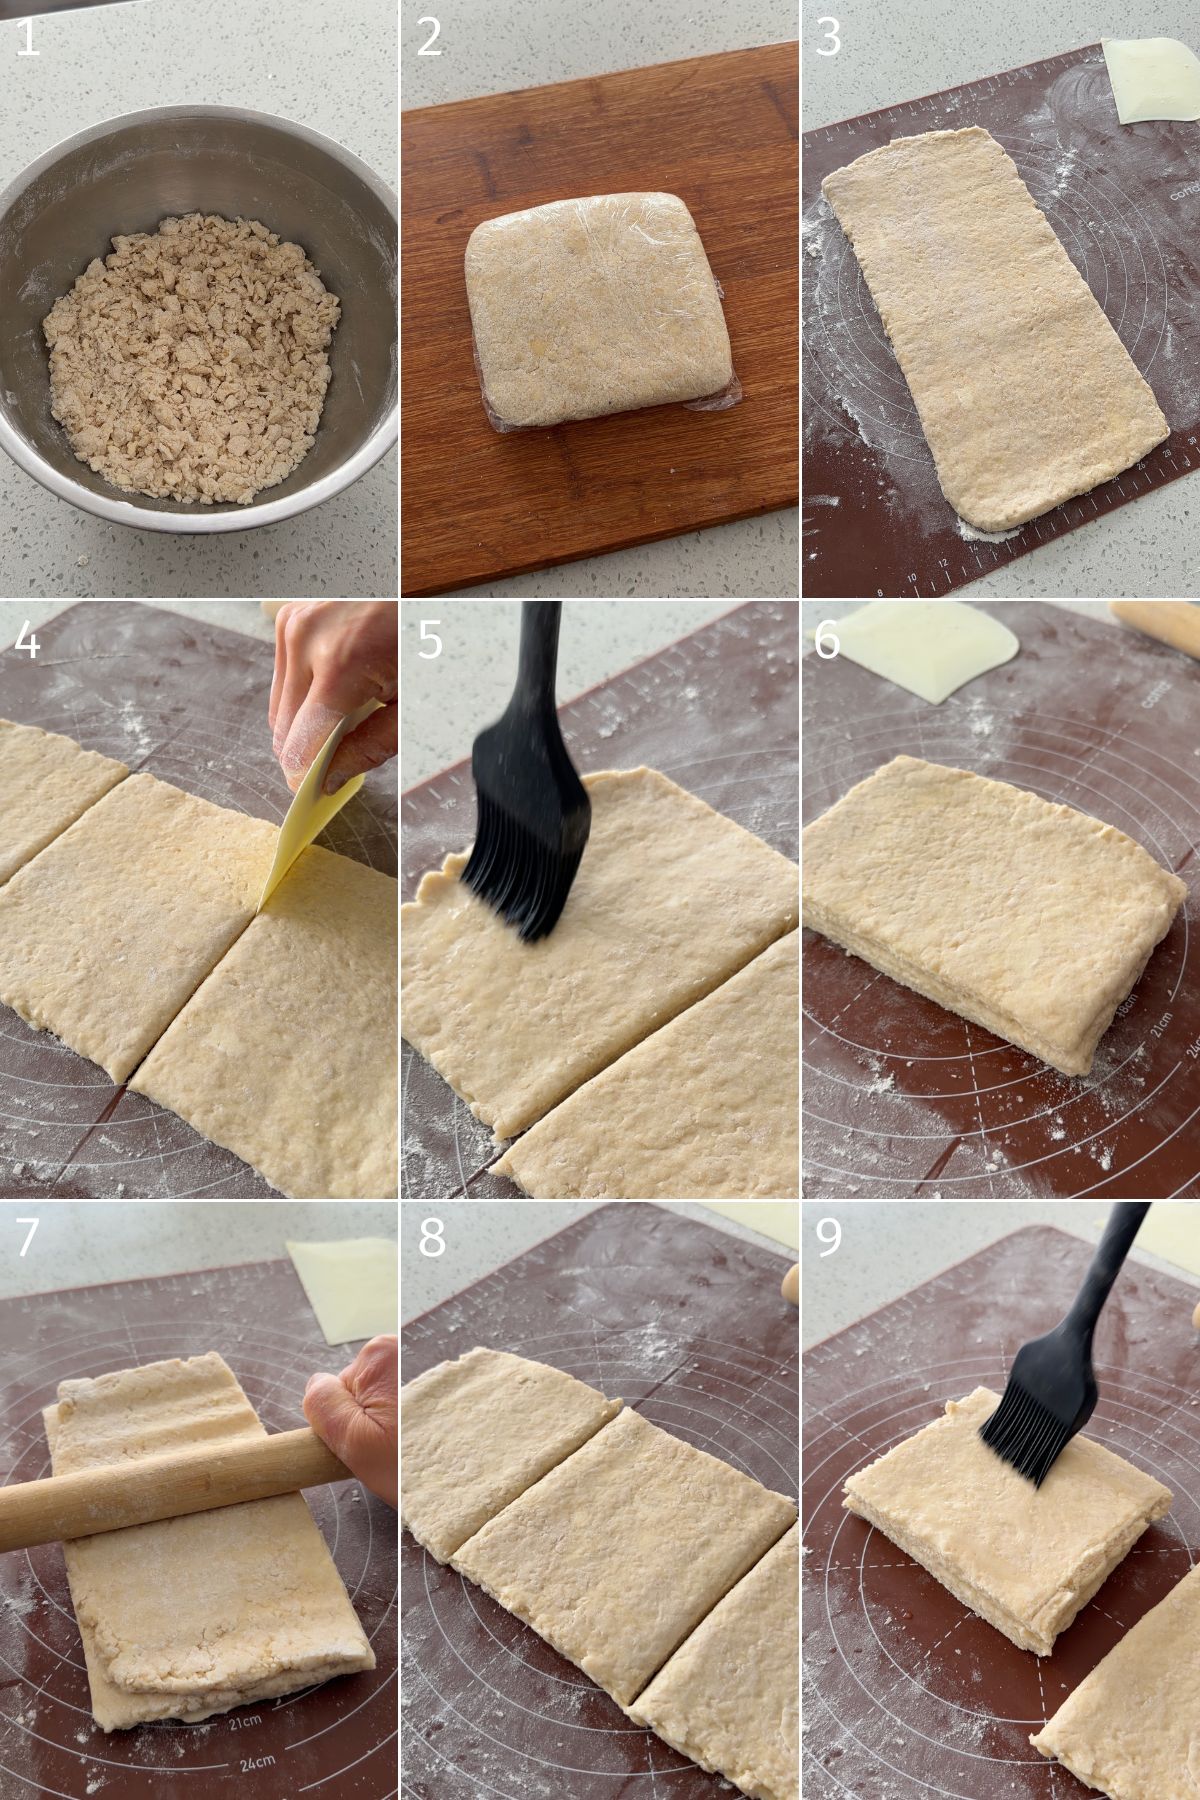
- Make the dough: Mix dry ingredients together, cut in cubed cold butter and then mix in wet ingredients until shaggy dough forms. Cover and refrigerate.
- Prepare the butter block: Shape the remaining butter into a square, keeping it cold. This will be laminated into the dough to create layers.
- Enclose the butter: Roll the dough into a square slightly larger than the butter block. Place the butter in the center and fold the dough over, corners meeting in the middle.
- First roll and stack: Roll into a rectangle, cut into three equal sections, brush lightly with water, and stack them. Chill if the dough gets too soft.
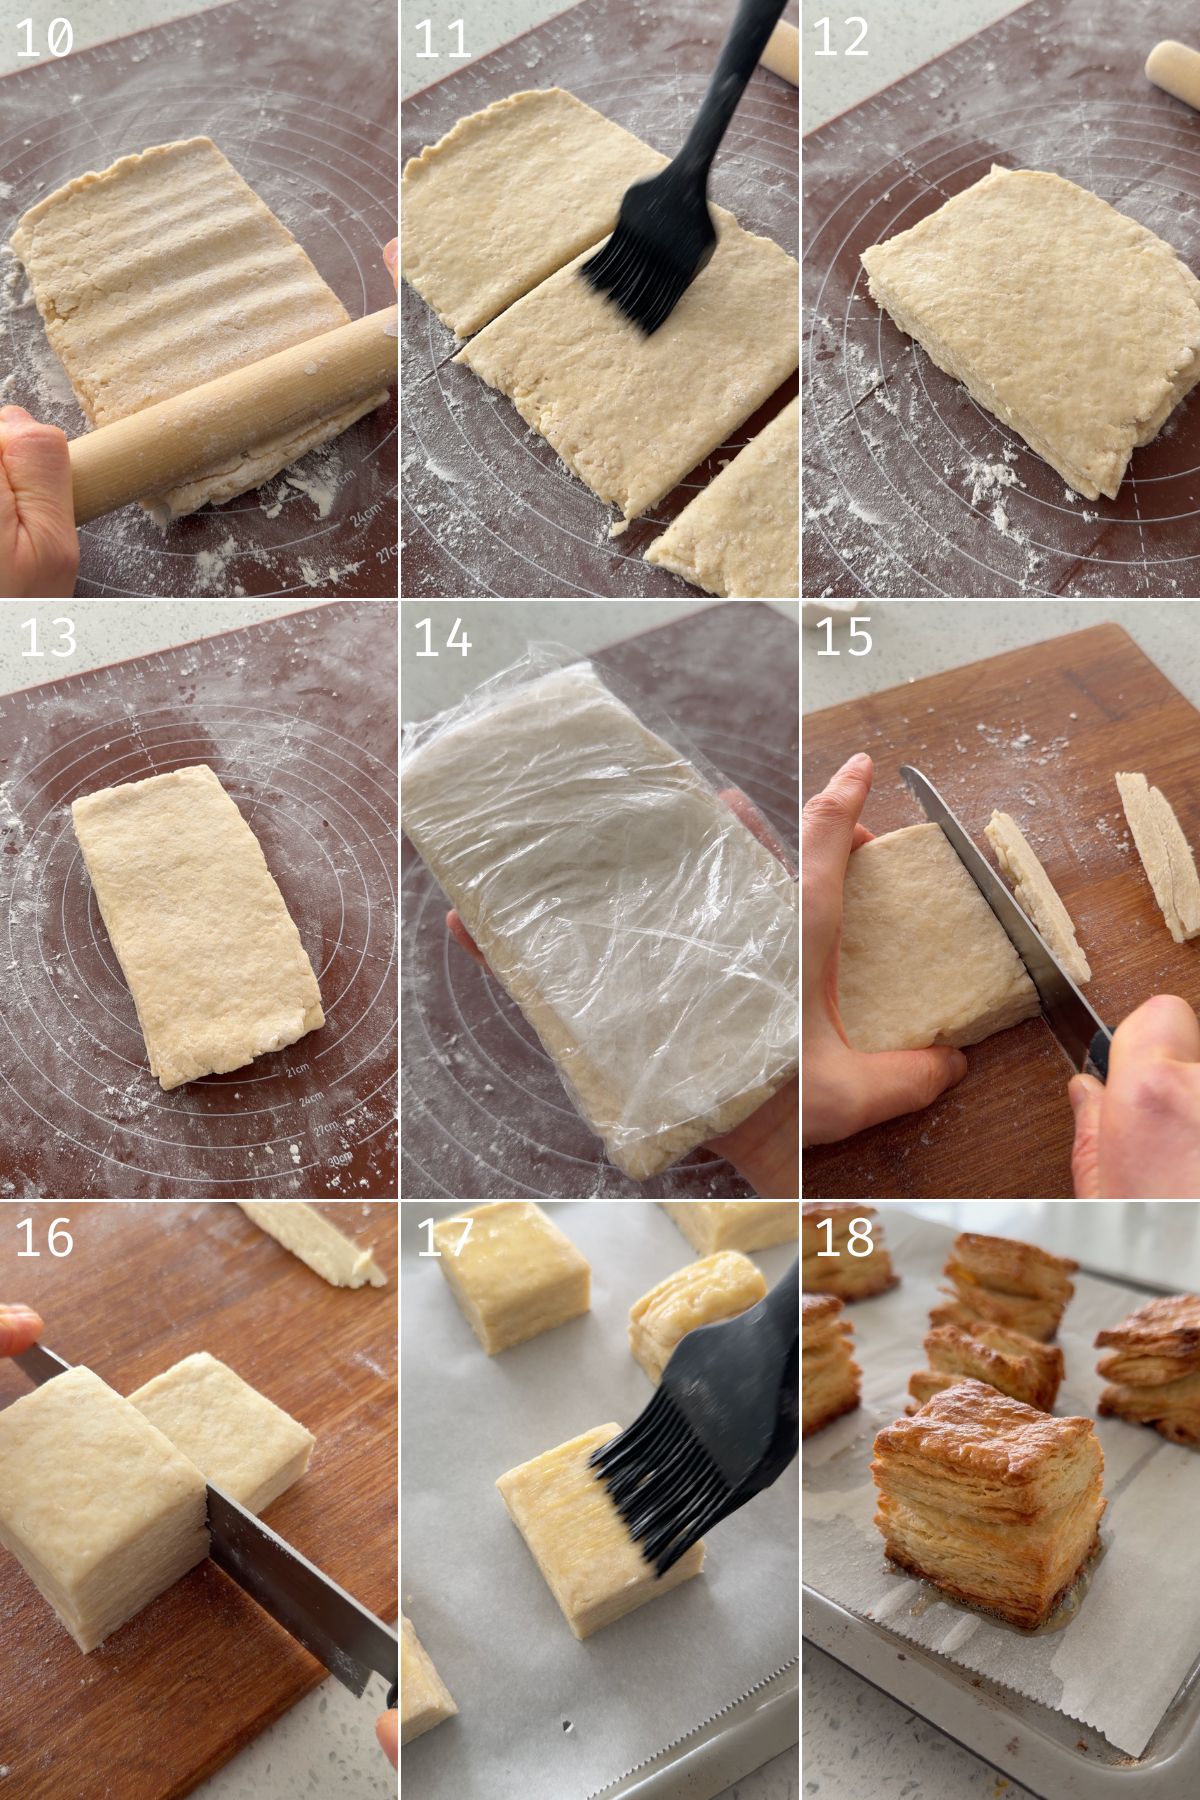
- Repeat lamination: Roll, cut, brush, and stack two more times. This creates layers similar to a croissant or Danish. After the final fold, roll the dough to the final rectangle and chill for one hour.
- Shape and cut: Trim the edges and cut into squares. Collect the scraps to make one more extra.
- Bake: Place on a lined baking sheet, brush with egg wash, and sprinkle with flaky salt if desired. Bake until golden, crisp, and flaky.
VIDEO: Watch How to Make It
Lisa’s Recipe Tips
- Keep everything cold: This is the most important tip. Your dough, your butter block, even your eggs and milk should come straight from the fridge. If the butter warms up too much during folding or rolling, it will melt into the dough instead of forming layers. I like to chill the dough in the fridge between each fold, and if my kitchen is warm, I even stick the rolling pin in the fridge for a few minutes.
- Don’t overwork the dough: It’s tempting to knead or mix thoroughly, but the less you handle it, the flakier the layers will be. You want the butter to stay in distinct pieces and the dough slightly shaggy. Overmixing can make it dense or tough instead of light and tender.
- Chilling the dough: If at any point the butter feels soft or the dough is too warm to roll, wrap it tightly and chill for 15–30 minutes. This not only keeps the layers sharp but also makes rolling easier. The dough should feel cool and slightly firm, not sticky.
Serving Suggestions
These scroissants are delicious on their own, but you can also get creative! Warm them slightly before serving— it really brings out the buttery aroma.
Split them open and serve with jam, clotted cream, cream cheese or your favourite spreads. It’s also fantastic with a drizzle with maple syrup, honey, or condensed milk for some sweetness.
How to Store and Reheat Leftovers
These scroissants are best the day they’re baked, but leftovers can be stored carefully:
At room temperature, place them in an airtight container for up to 2 days. Avoid leaving them uncovered, or the layers will dry out.
For longer storage, wrap each scone tightly in plastic wrap and place in a freezer-safe bag. They can be frozen for up to 1 month. To enjoy, thaw at room temperature for 20–30 minutes, then reheat in a toaster oven, conventional oven or air fryer at 175°C (350°F) for 4–7 minutes. This restores crispness without softening the layers like a microwave would.
Recipe FAQ
Yes! Small pieces of raisins, cranberries, or chopped apricots can be folded in before laminating.
Fold chocolate chips between layers or mix cocoa powder into the dough for a rich chocolate flavor.
Yes. Add a touch of vanilla, almond extract, or a pinch of cinnamon for subtle variations.
Yes. Use plant-based milk, vegan butter, and an egg replacer for the wash. The layers will still form, though the browning and flavor may vary slightly.

More Easy Pastry Recipes
Enjoy! If you make this Scroissant (Croissant Scones) recipe, I’d love to hear what you think! Leave a comment and rating below, and if you share it on social media, tag me on Instagram @Okonomikitchen. I can’t wait to see your creations!
Print
Scroissant (Croissant Scones)
- Total Time: 1 hour
- Yield: 6 pieces
- Diet: Vegetarian
Description
These Scroissants (croissant-style scones) are flaky and buttery, peeling apart in layers like a croissant, yet soft and tender like a scone on the inside. They bake up super crispy on the outside with a crunchy, golden base, and come together quickly with no yeast or overnight proofing. Perfect for breakfast, brunch, or an afternoon treat!
Ingredients
Dough
- 200 g all-purpose flour
- 28 g granulated sugar
- 4.5 g baking powder
- 2 g salt
- 22 g unsalted butter, finely cubed & frozen
- 28 g whole egg (about 1/2 large egg)
- 85 ml milk, cold
Butter Block
-
75 g unsalted butter, cold
For Finishing
- Egg wash (remaining egg)
- Flaky salt (optional)
Instructions
Preliminary Notes
- For best lamination, keep everything cold. Chill your mixing bowl for 10–15 minutes before starting.
- If your kitchen is warm, refrigerate the dry ingredients while preparing the butter.
Make the Dough
- In a chilled bowl, whisk together the flour, sugar, baking powder, and salt.
- Add the frozen butter cubes. Using a bench scraper or your fingertips, cut and rub the butter into the flour until the mixture looks sandy with a few pea-sized pieces remaining.
- Pour in the cold egg and milk. Using a bench scraper, gently fold and press the mixture just until no dry flour remains. The dough will look shaggy, avoid kneading.
- Transfer the dough onto plastic wrap and gently press it together into a rough square while wrapping. Refrigerate for 30 minutes.
Prepare the Butter Block
- Place the 75 g butter between two sheets of parchment and pound or roll into a 12 × 12 cm square. Keep it cold but pliable. If it softens, refrigerate briefly.
Enclose the Butter
- Lightly flour your surface and roll the chilled dough into an 18 × 18 cm square.
- Place the butter block in the center at a diamond angle so the butter corners point toward the dough sides. Fold the dough corners over the butter to meet in the center, sealing the butter inside. Patch any gaps with scrap dough.
First Roll & Stack (Creates Layers)
- Dust both sides of the dough with flour if needed. Using a rolling pin, press the dough from the middle moving upward. Then press the dough moving downward. This helps pre-roll the dough. Then roll the dough into a 14 × 30 cm rectangle.
- Cut the rectangle crosswise into 3 equal pieces. Lightly brush each piece with water and stack them.
- If the dough feels soft, wrap and chill for 30 minutes.
Repeat Lamination
- Roll the stacked dough back into a 30 × 14 cm rectangle.
- Repeat the process:
- Cut into 3 pieces
- Brush with water
- Stack
- Do this for a total of 3 rounds of rolling and stacking. Keep the dough cold between rounds by wrapping and refrigerator for 20-30 minutes between each set if needed.
Final Roll & Chill
- After the third round, roll the dough to about 19 × 13 cm.
- Wrap and refrigerate for 1 hour to relax the gluten and firm the butter.
Trim & Cut
- Unwrap the chilled dough and trim about 1/2 cm from all edges to expose clean layers.
- Cut into 6 squares (about 5–6 cm each).
- Place on a lined baking sheet, leaving space for expansion.
Egg Wash & Finish
- Preheat oven to 200°C / 400°F.
- Brush the tops with egg wash and sprinkle with flaky salt if desired.
Bake
- Bake for 15–18 minutes, until deep golden and crisp.
- If browning too quickly: reduce to 190°C / 375°F
- If not browning enough: increase to 220°C / 425°F for the last few minutes
- Transfer to a rack and cool slightly. Serve and enjoy!
- Prep Time: 45 minutes
- Cook Time: 15 minutes
- Category: Snack, Breakfast
- Method: Baking
- Cuisine: French-inspired
Nutrition
- Serving Size: 1 serving
- Calories: 250
- Sugar: 5.1 g
- Sodium: 222 mg
- Fat: 13.2 g
- Saturated Fat: 8 g
- Unsaturated Fat: 4.8 g
- Trans Fat: 0.4 g
- Carbohydrates: 28.4 g
- Fiber: 0.8 g
- Protein: 4 g
- Cholesterol: 49 mg


These were pretty easy to make and I loved the texture! Like a pie scone and croissant. We had them with honey and it was delicious