
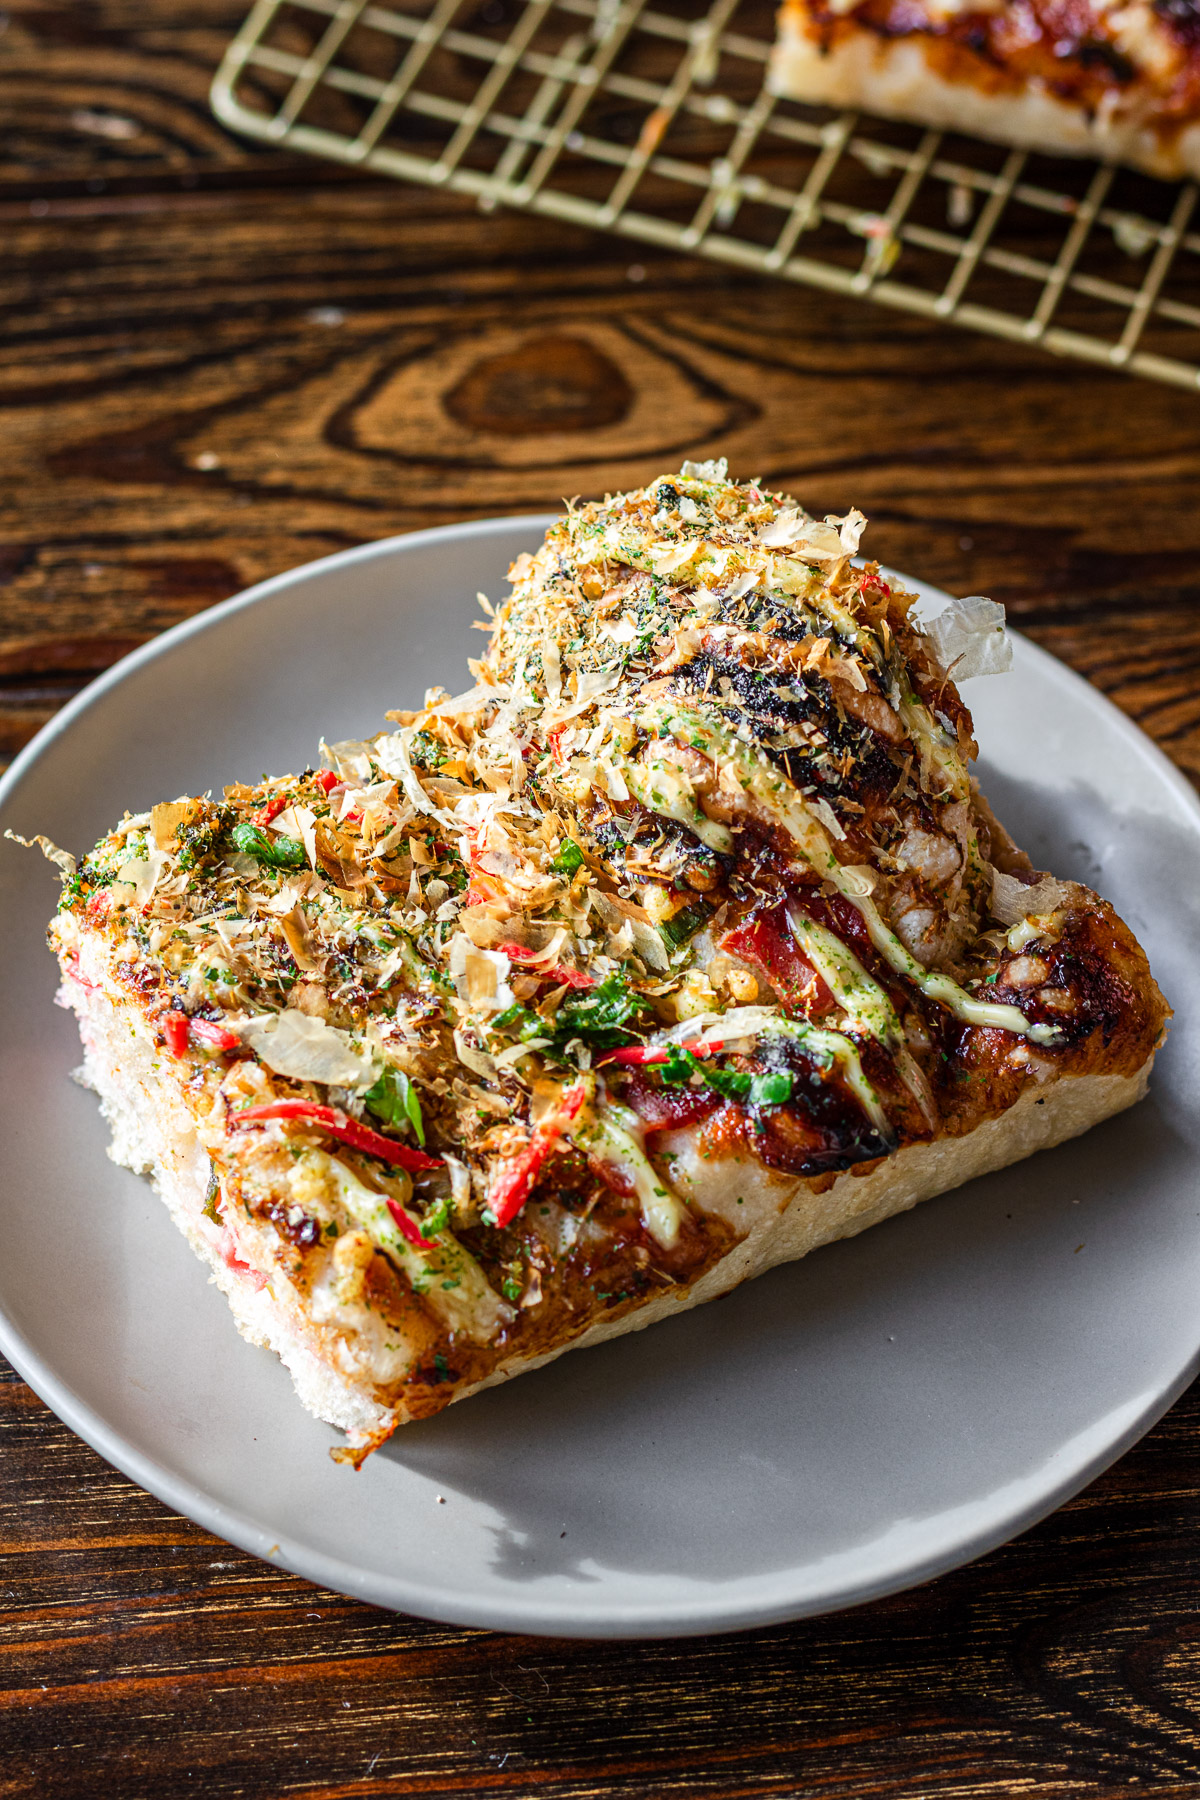
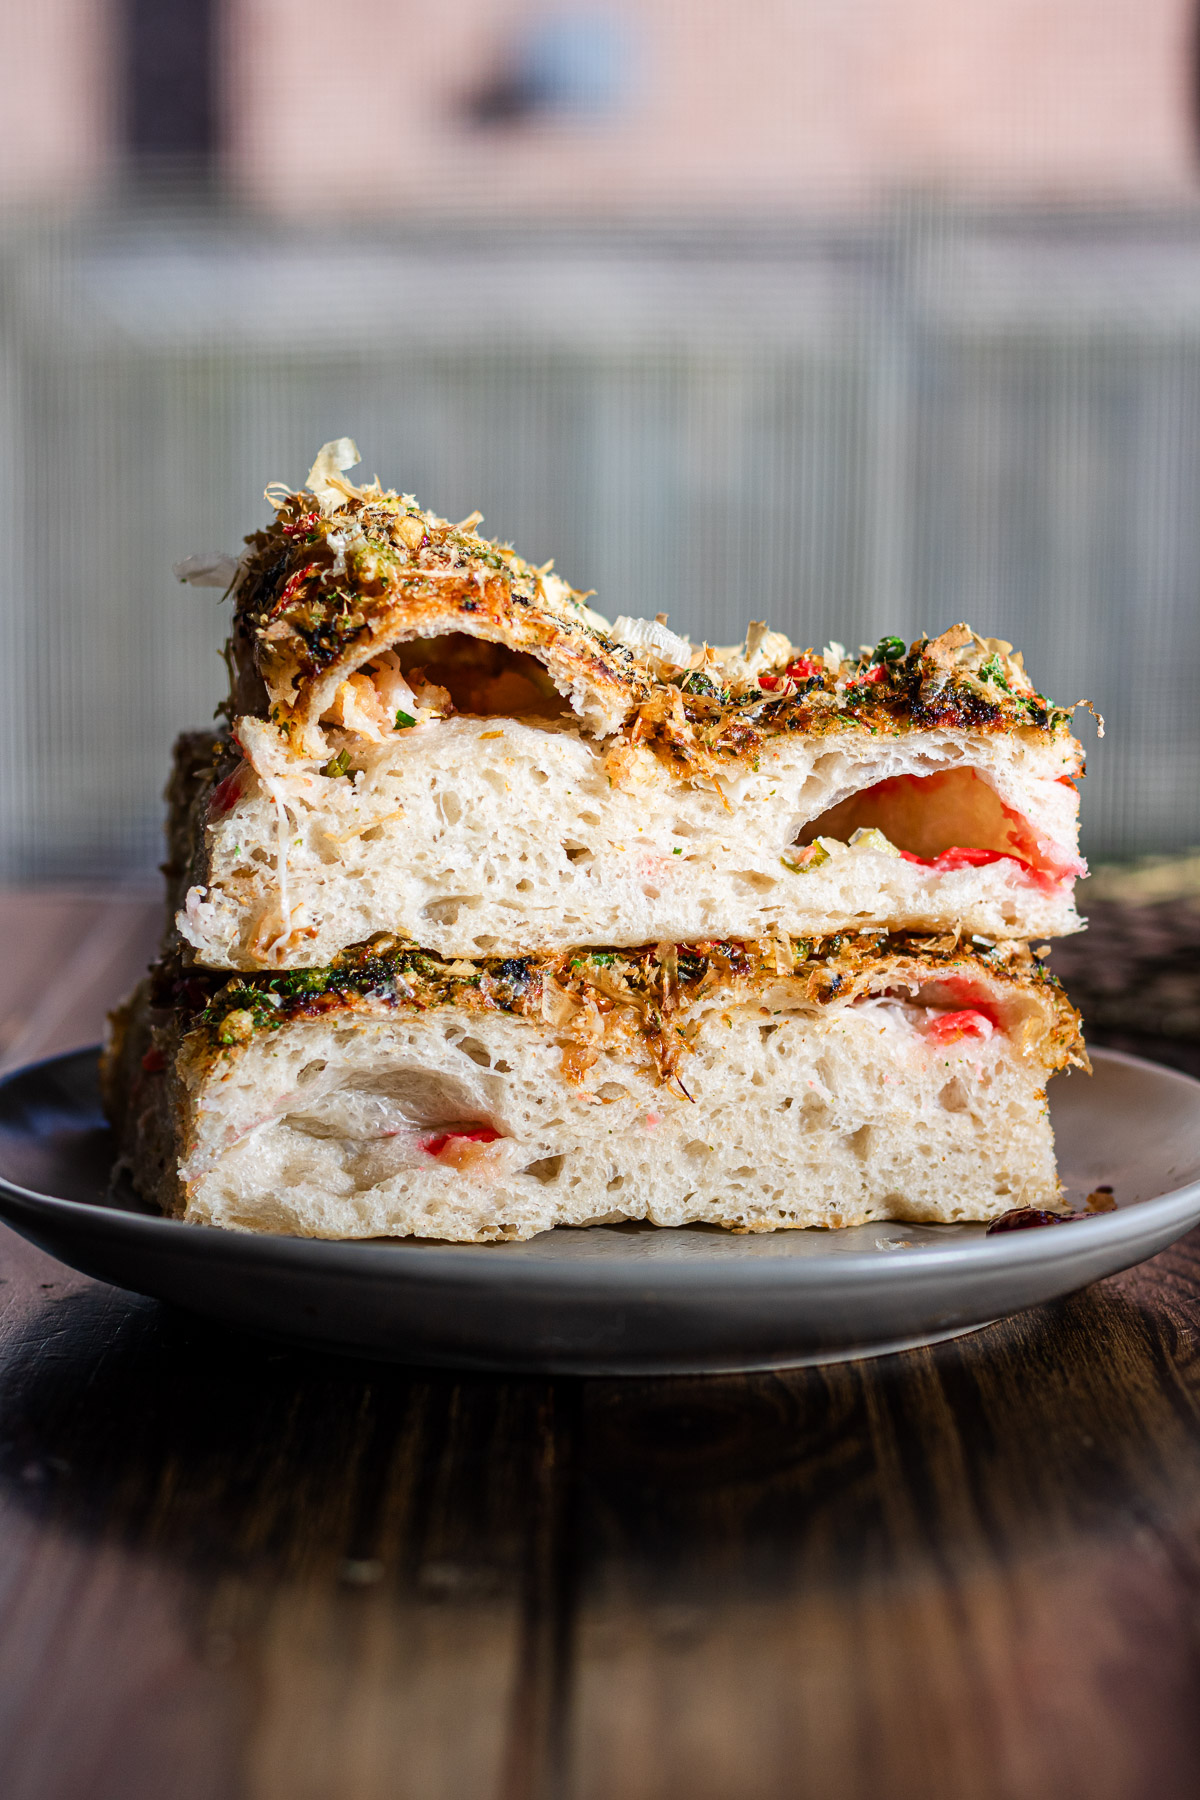
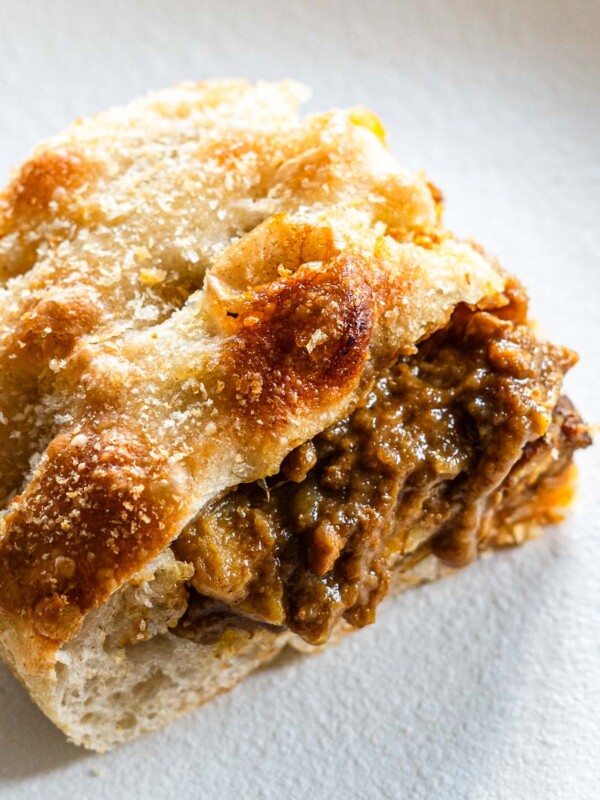
This Okonomiyaki Focaccia is a savory Japanese-Italian fusion bread topped and stuffed with cabbage, bacon, okonomiyaki sauce, and kewpie mayo. With a fluffy no-knead dough base and umami-packed fillings, it’s perfect as a shareable appetizer, snack, or main dish. Inspired by the iconic Japanese pancake, this unique focaccia is both satisfying and delicious.
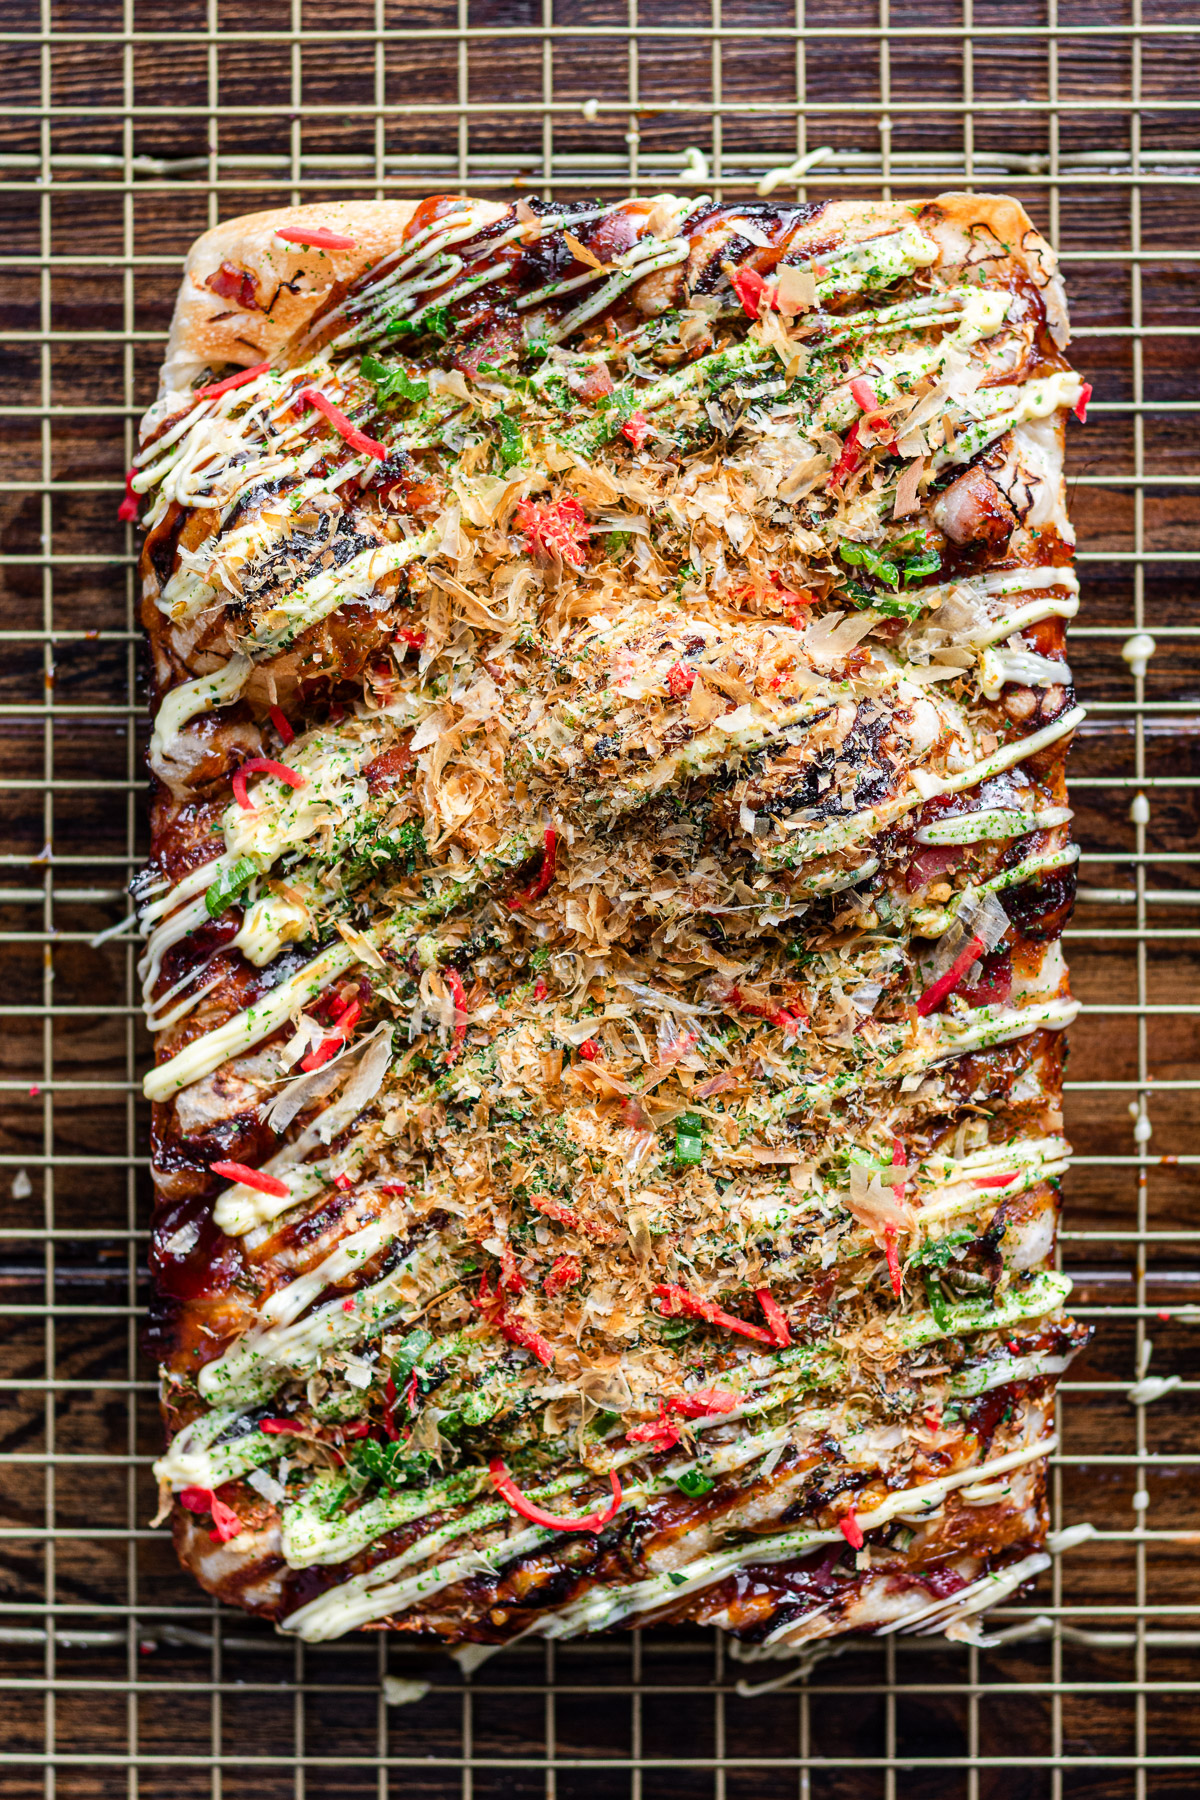
Table of Contents
If I had to rank my top three favorite dishes, okonomiyaki would always make the cut. I’m convinced that if you take the core components of okonomiyaki—cabbage, pork, sauce, kewpie mayo, bonito flakes, and aonori—and add them to any base, it’ll taste amazing. So, I’m kicking off a new series where I make everything okonomiyaki-flavored… starting with this focaccia!
This Okonomiyaki Focaccia is inspired by my most popular menu item during my popups: the okonomiyaki bagel. I developed this version while preparing to move to Japan for a few months. It’s my family’s favorite bagel flavor, but since they’re more familiar with making focaccia than Japanese-style stuffed bagels, I wanted to create a version that was more accessible for them to bake at home.
I’ve made many focaccia variations in the past—like miso butter, chili oil, and even cinnamon roll focaccia—all of which are among the most popular recipes on my blog. But according to my little sister, this okonomiyaki version is the best one yet. Focaccia is such a great base for soaking up bold, umami-rich flavors, and this one does not disappoint.
Why You’ll Love This Okonomiyaki Focaccia
- Fluffy and chewy with crispy edges thanks to my go-to no-knead focaccia base.
- Double-layered flavor: not just topped, but stuffed with okonomiyaki ingredients.
- Perfect for sharing—cut it up like a party snack or pair with a bowl of miso soup for dinner.
- A fun and creative way to use Japanese pantry staples like beni shoga, hon dashi, and agedama.
- Freezer friendly! You can freeze a batch whole or in portions so you can enjoy it anytime.
Ingredients and Substitutions
This Japanese-style savory focaccia uses easy-to-find pantry staples and a few Japanese ingredients. You can find most of these at Asian grocery stores or online.
For the Dough
- Bread flour
- Instant yeast
- Salt
- Hon dashi (dashi powder) or substitute water with dashi stock
- Water (room temperature)
For the Filling & Topping
- Green cabbage
- Scallions
- Beni shoga (pickled red ginger)
- Agedama (tempura bits)
- Cornstarch
- Mozzarella cheese, optional
- Kewpie mayo
- Okonomiyaki sauce
- Aonori (green seaweed powder)
- Katsuobushi (bonito flakes)
How to Make Okonomiyaki Focaccia
This recipe is a two-day process, but most of it is hands-off. The result? A deeply flavorful, textural focaccia you’ll crave again and again.
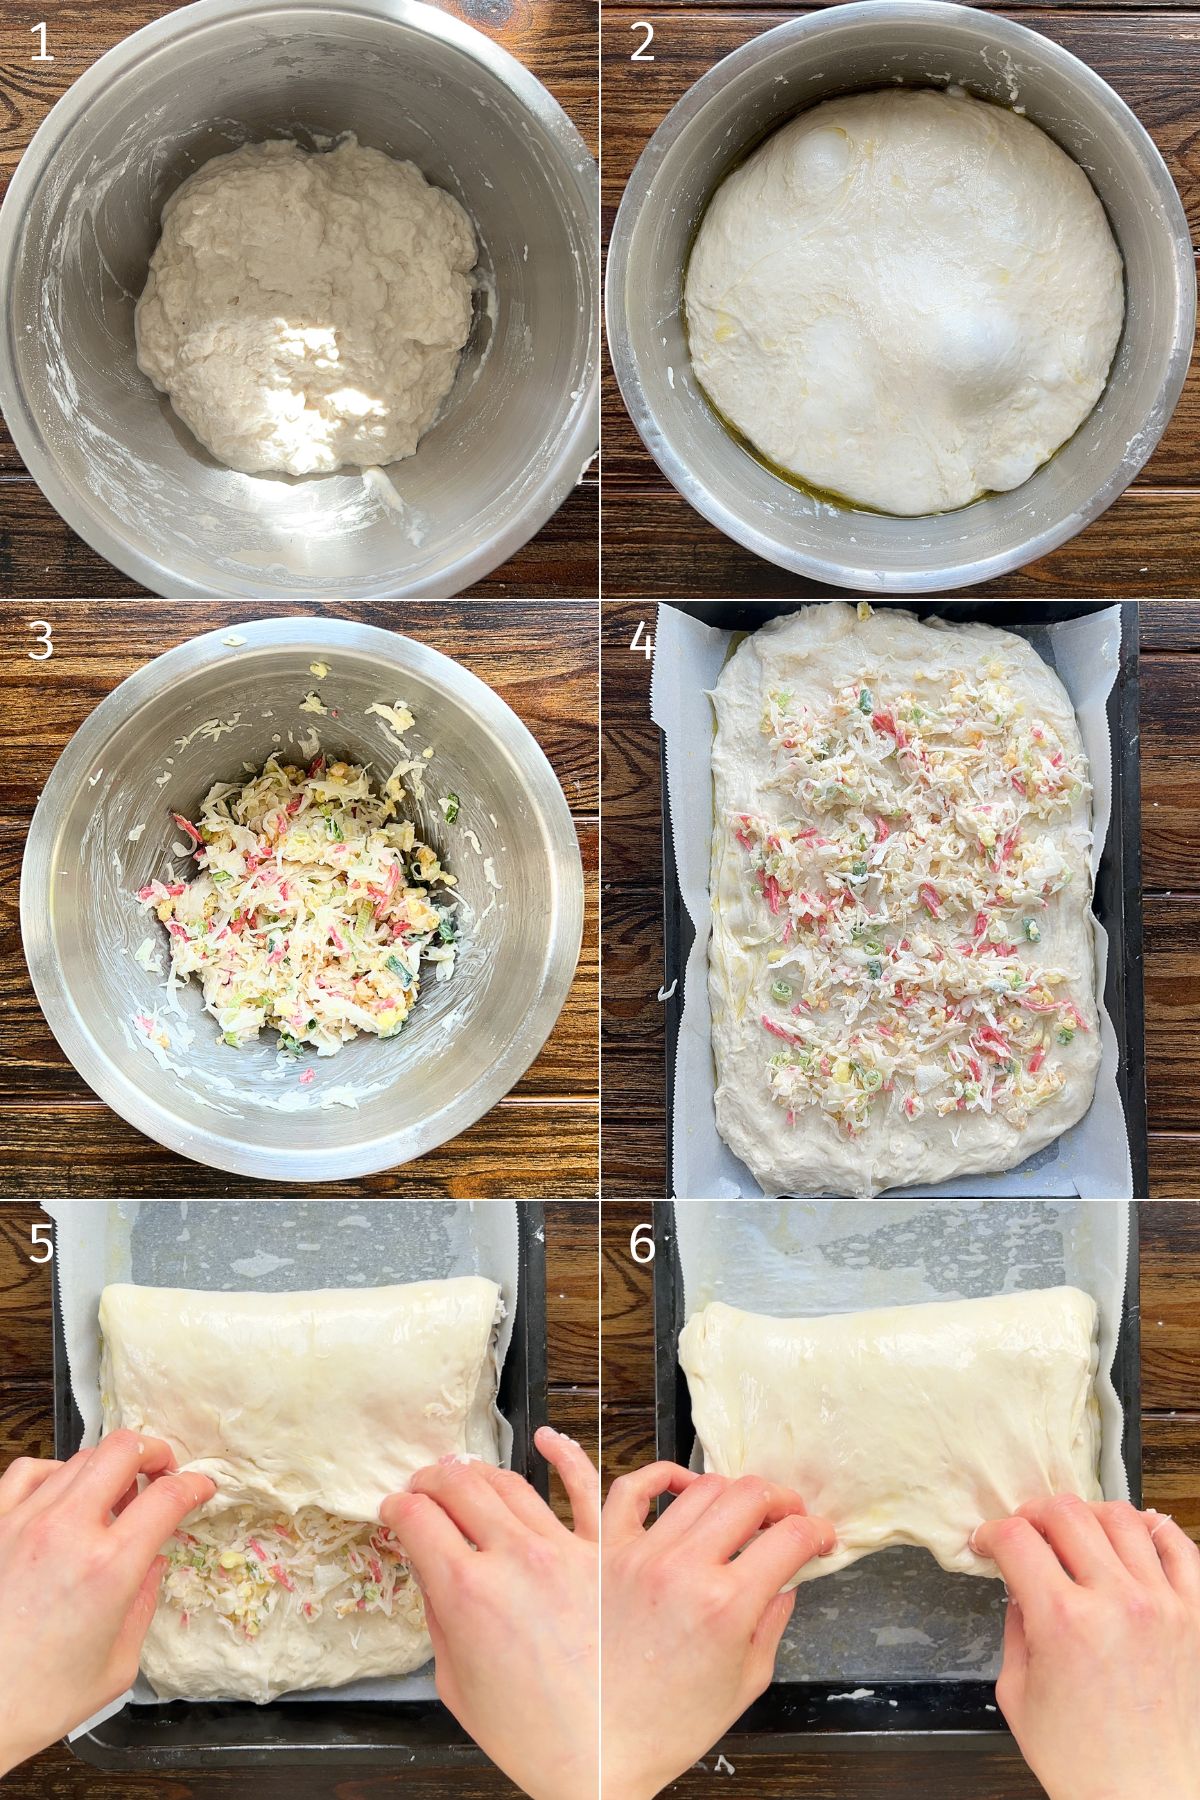
- Mix the dough the night before: Combine the flour, dashi, yeast, salt, and water. Stretch and fold over three rounds, drizzle with oil, and refrigerate overnight.
- Prepare the pan and filling: Line and oil your pan. Mix cabbage, scallions, ginger, agedama, cornstarch, and mayo for the filling.
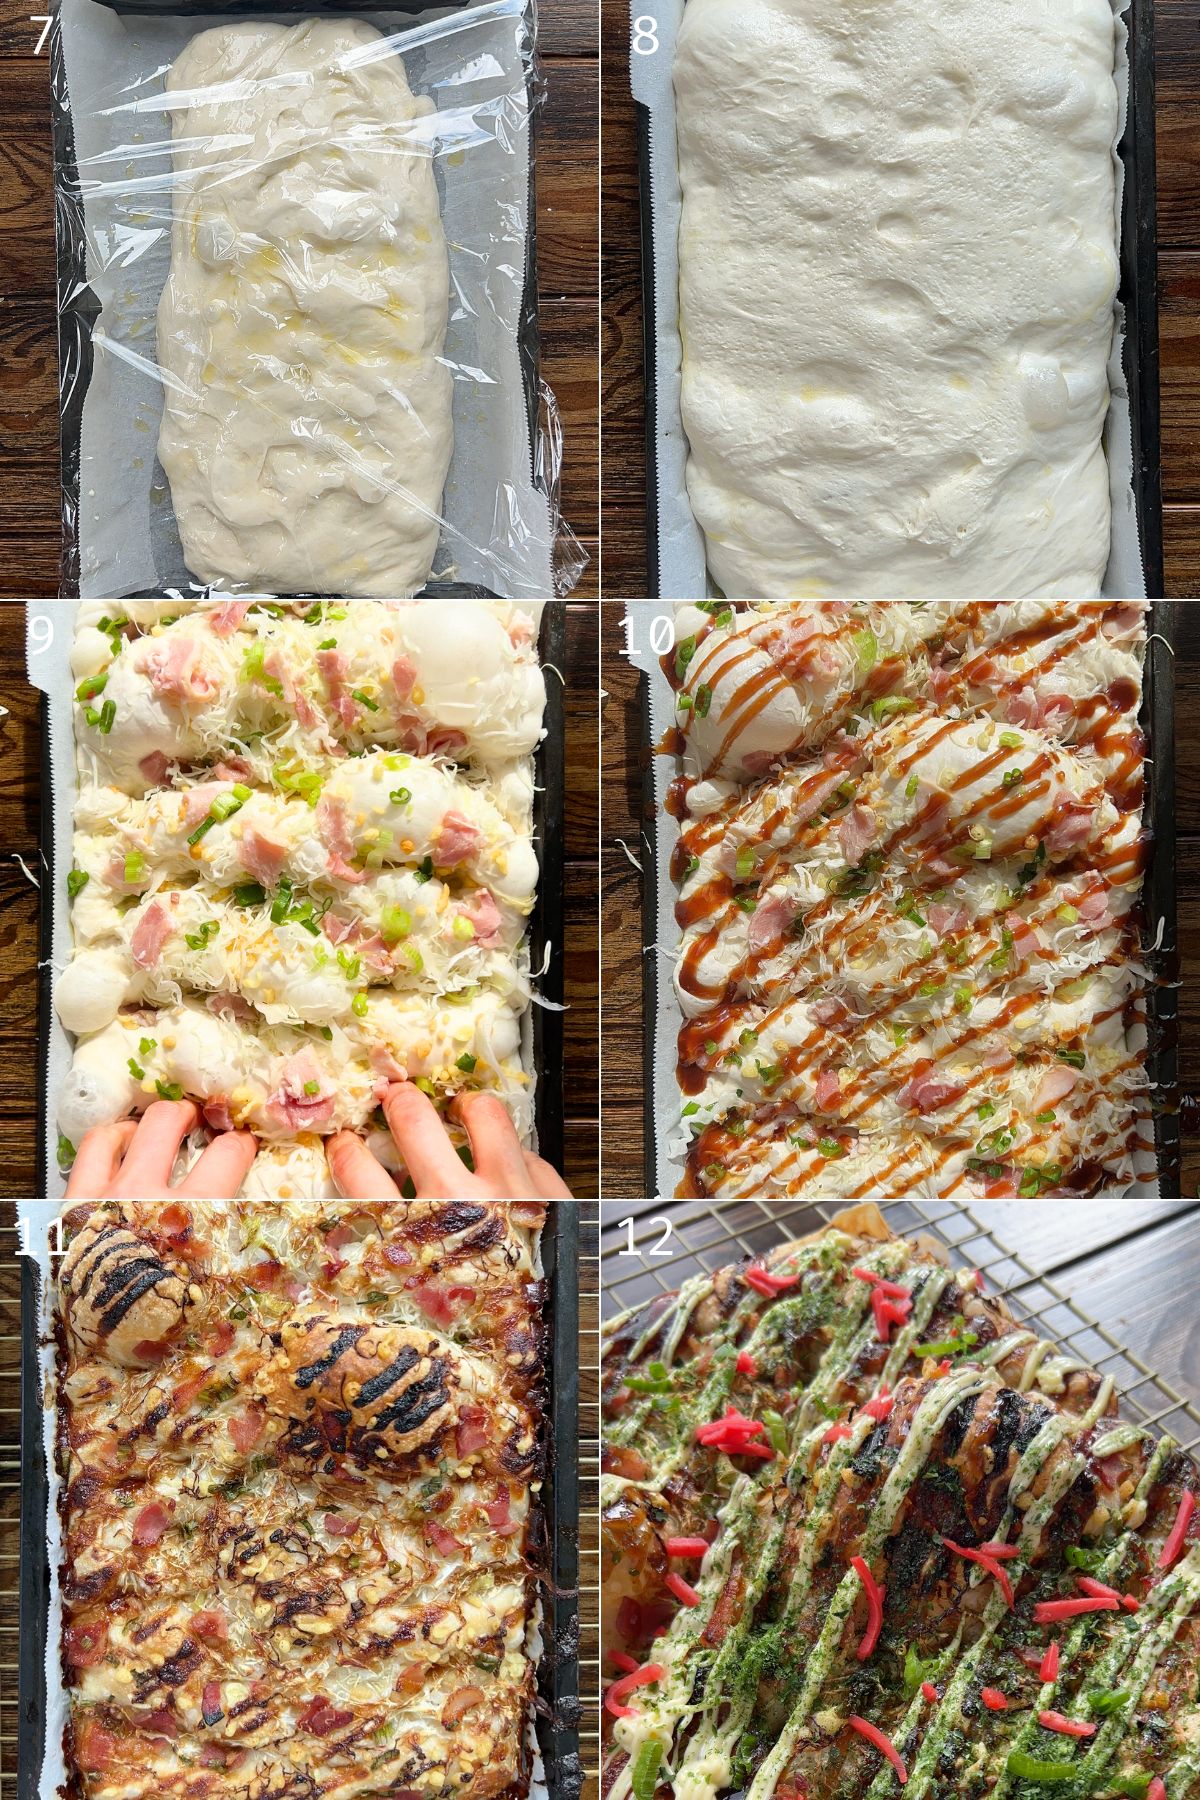
- Shape and stuff: Transfer dough to the pan, add filling, and fold it like a letter. Flip and rest for 2–4 hours until puffy.
- Top and bake: Add toppings (cabbage, bacon, scallions, more agedama). Dimple, drizzle with sauce, and bake until golden and crisp.
- Finish and serve: Top with kewpie mayo, aonori, katsuobushi, and more beni shoga. Slice and enjoy!
VIDEO: Watch How to Make It
Lisa’s Recipe Tips
- Don’t skip squeezing moisture out of the cabbage and scallions—it helps prevent a soggy bottom.
- If you don’t have agedama, you can crush up rice crackers or even potato chips for crunch.
- Avoid drizzle too much sauce before baking as it tends to burn. You just want enough so it slightly chars, and then add it before serving to really taste the okonomiyaki sauce.
How to Store and Reheat Leftovers
- Store in an airtight container in the fridge for up to 2 days.
- Reheat in a toaster oven at 180ºC (350ºF) for 5–7 minutes or until warmed through and crispy again.
- Freeze for up to 1 month. Thaw before reheating or microwave for 20-40 seconds until warm.
Recipe FAQ
An 11×8-inch baking dish or quarter sheet pan works best for the measurements in this recipe, but a standard 8×8 square pan will work with slightly thicker bread. You can also scale it up or down depending on the size of your pan.
This recipe is designed for an 11×8-inch pan, which holds roughly 880–900g of dough. Multiply the surface area of your pan (length × width) and compare it to the original. Use that ratio to scale the dough and filling amounts. Thicker focaccia = fluffier, more bready. Thinner focaccia = crispier edges. Adjust resting time accordingly—larger batches may need slightly longer to rise and bake.
Yes, you can—but the texture will change slightly. Bread flour typically has a higher protein content (around 12–13%) which helps create more gluten, giving the focaccia a chewier, bouncier texture. Most all-purpose flours have a protein content around 9–11%, which will result in less chewy crumb.
Most Asian markets carry it, or you can make a quick version with this okonomiyaki sauce recipe.
More Popular Focaccia Recipes
If you’re loving this one, here are a few more focaccia recipes from the blog that readers keep coming back to:
Enjoy! If you make this Okonomiyaki Focaccia recipe, I’d love to hear what you think! Leave a comment and rating below, and if you share it on social media, tag me on Instagram @Okonomikitchen. I can’t wait to see your creations!
Print
Okonomiyaki Focaccia
Description
This Okonomiyaki Focaccia is a savory Japanese-Italian fusion bread topped and stuffed with cabbage, bacon, okonomiyaki sauce, and kewpie mayo. With a fluffy no-knead dough base and umami-packed fillings, it’s perfect as a shareable appetizer, snack, or main dish. Inspired by the iconic Japanese pancake, this unique focaccia is both satisfying and delicious.
Ingredients
For the Dough
- 2.5 cups (324 g) bread flour
- 1 tsp (5 g) instant yeast
- 1 tsp (6 g) salt
- 2/3 cup + 2 tbsp (290 g) water, room temperature
- 1 tsp hon dashi (dashi powder)
Filling
- 1/8 (70 g) of a cabbage, shredded
- 1 stalk (16 g) scallion, sliced
- 1 tbsp (10 g) beni shoga
- 1 tbsp (15 g) agedama
- 1 tbsp (10 g) corn starch
- 1.5 tbsp (22 g) kewpie mayo
- 1/4 cup (30 g) mozzarella cheese, optional
Toppings
- 2 tbsp (30 g) agedama (fried tempura bits)
- 70 g shredded cabbage
- 1 stalk (16 g) scallion, sliced
- 2 slices (55 g) bacon
- 1/4 cup okonomiyaki sauce
- 1/4 cup kewpie mayo
- 2 tbsp aonori (green laver)
- 1/4 cup katsuobushi (bonito flakes)
Instructions
Night before
- Add the bread flour, instant yeast, salt, hon dashi and water to a bowl and mix with a spatula until a shaggy dough forms. Cover and rest for 15-20 minutes. With wet fingers, pull the dough from one end to the other of the bowl all the way around, flip the dough and rest for another 15-20 minutes. Do another set of stretch and fold and then rest for another 15-20 minutes. Do one last set of stretch and folds. Drizzle with olive oil and make sure the top is coated. Cover with cling wrap and refrigerate overnight,.
The next day
- Prepare a 11×8 inch pan by adding a little oil and lining it with parchment paper*. Drizzle a little bit more olive oil and spread around the parchment paper.
- Place the shredded cabbage in paper towel and squeeze out excess moisture. Pat the sliced scallions and beni shoga to remove excess moisture. Add the cabbage, scallion, beni shoga, agedama and corn starch to a bowl and toss to coat everything in the corn starch. Add the mayo and mix until well combined.
- Transfer the dough into the prepared pan and spread it so it mostly fits.
- Spread the filling and optional mozzarella cheese over the dough and fold short end 1/3 of the way and the other side 1/3 of the way like a letter fold. Flip the dough onto the other side, and rotate it 90 degrees to match the pan size. The dough should be coated in oil but if its not, drizzle a little to ensure its coated. Cover with cling wrap and rest for 2-4 hours or until it fills out the entire pan and is nice and puffy.
- Remove the cling wrap and top with agedama, cabbage, bacon, scallion. Dip your fingers in oil and then dimple the dough. Drizzle generously with okonomiyaki sauce and bake for 27-32 minutes or until browned around the surface and edges.
- Remove from the pan and transfer to cooling wrap. Drizzle with kewpie mayo and top with beni shoga, aonori and katsuobushi, Slice, serve and enjoy!!
Notes
- Parchment paper is optional, but it makes it easier to remove. Without parchment paper you’ll get more of a crust if you use a good pan and enough oil so it doesn’t stick.
Nutrition
- Serving Size: 11×8 inch focaccia
- Calories: 2410
- Sugar: 17 g
- Sodium: 4620 mg
- Fat: 145 g
- Saturated Fat: 31 g
- Unsaturated Fat: 108 g
- Trans Fat: 0.3 g
- Carbohydrates: 220 g
- Fiber: 11 g
- Protein: 55 g
- Cholesterol: 220 mg




The recipe was SO GOOD! Just like okonomiyaki but crispier and fluffier!
Just made this at a bbq and it was huge hit! It was so good. Making it was super easy and I prefer the two day process since the bread is more chewy and soft. I baked it at 425F like her other recipes for 28 min and it came out perfect!