This Rice Cooker Kakuni is a hands-off way to make tender, melt-in-your-mouth Japanese braised pork belly. Slowly simmered in a savory-sweet soy sauce broth, it develops deep umami flavor with minimal effort. Perfect with rice, ramen, or steamed buns, this easy kakuni recipe delivers rich, satisfying flavors.

Table of Contents
Easy Kakuni: Japanese Braised Pork Belly
Kakuni (角煮) is a traditional Japanese dish of braised pork belly, slowly simmered in a savory-sweet broth until melt-in-your-mouth tender. Typically, it requires hours of careful stovetop cooking to achieve its rich, caramelized flavor and ultra-soft texture. This rice cooker version simplifies the process while delivering the same incredible results with minimal effort. Not only does the rice cooker maintain consistent heat for perfect braising, but it also saves energy and eliminates the need for constant monitoring—just set it and let it do the work. Whether served over a bowl of fluffy rice, tucked into soft steamed buns, or added to a steaming bowl of ramen, this easy and satisfying dish is sure to become a favorite!
If you would like to make Japanese braised pork belly over the stove, see my authentic kakuni recipe!
Ingredients and Substitutions
To make this dish, you’ll need a few Japanese pantry staples:
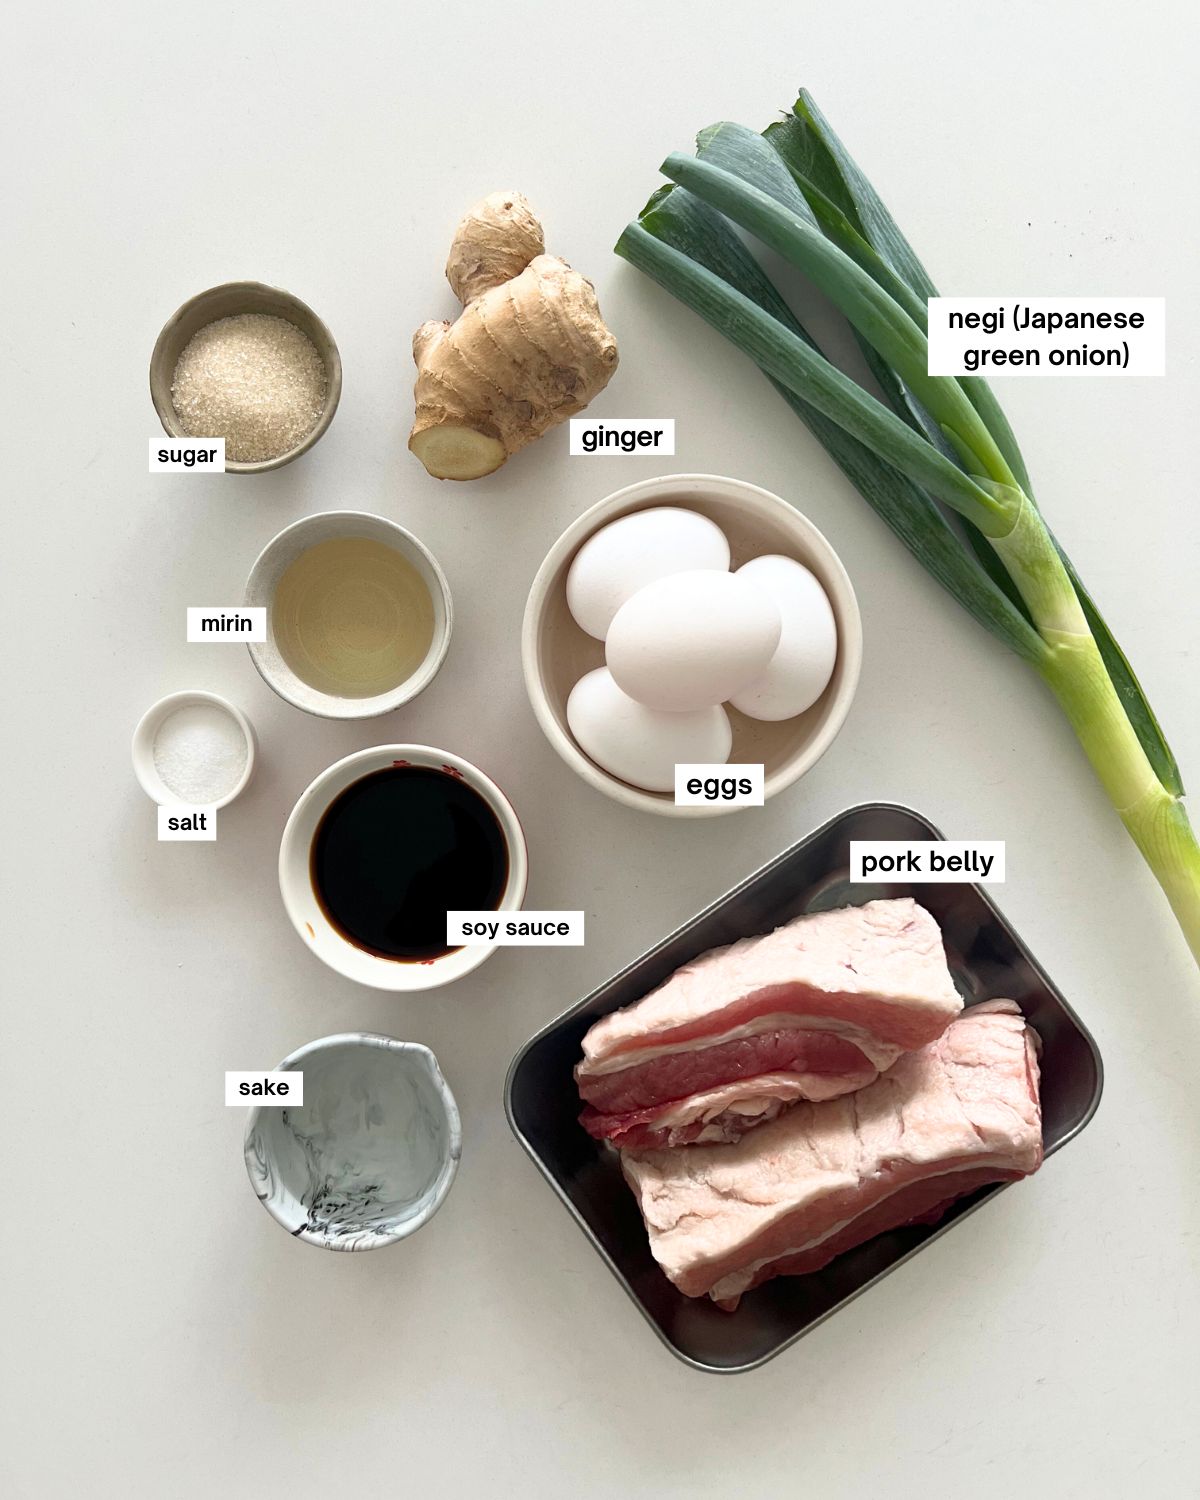
- Pork belly: Use skinless pork belly. Ideally, choose a cut with about 40% fat and 60% meat for the best texture.
- Soy sauce: Use Japanese soy sauce if available. Other types of soy sauces have different flavours and sodium levels so you may need to reduce the amount.
- Mirin
- Sugar
- Sake
- Ginger
- Negi (Japanese green onion): Brings out extra flavor in the broth (substitute with green onions).
- Soft or hard-boiled eggs (optional): Soaks up the flavorful braising sauce for an extra treat.
How to Make Kakuni in a Rice Cooker
Making kakuni in a rice cooker is incredibly simple:
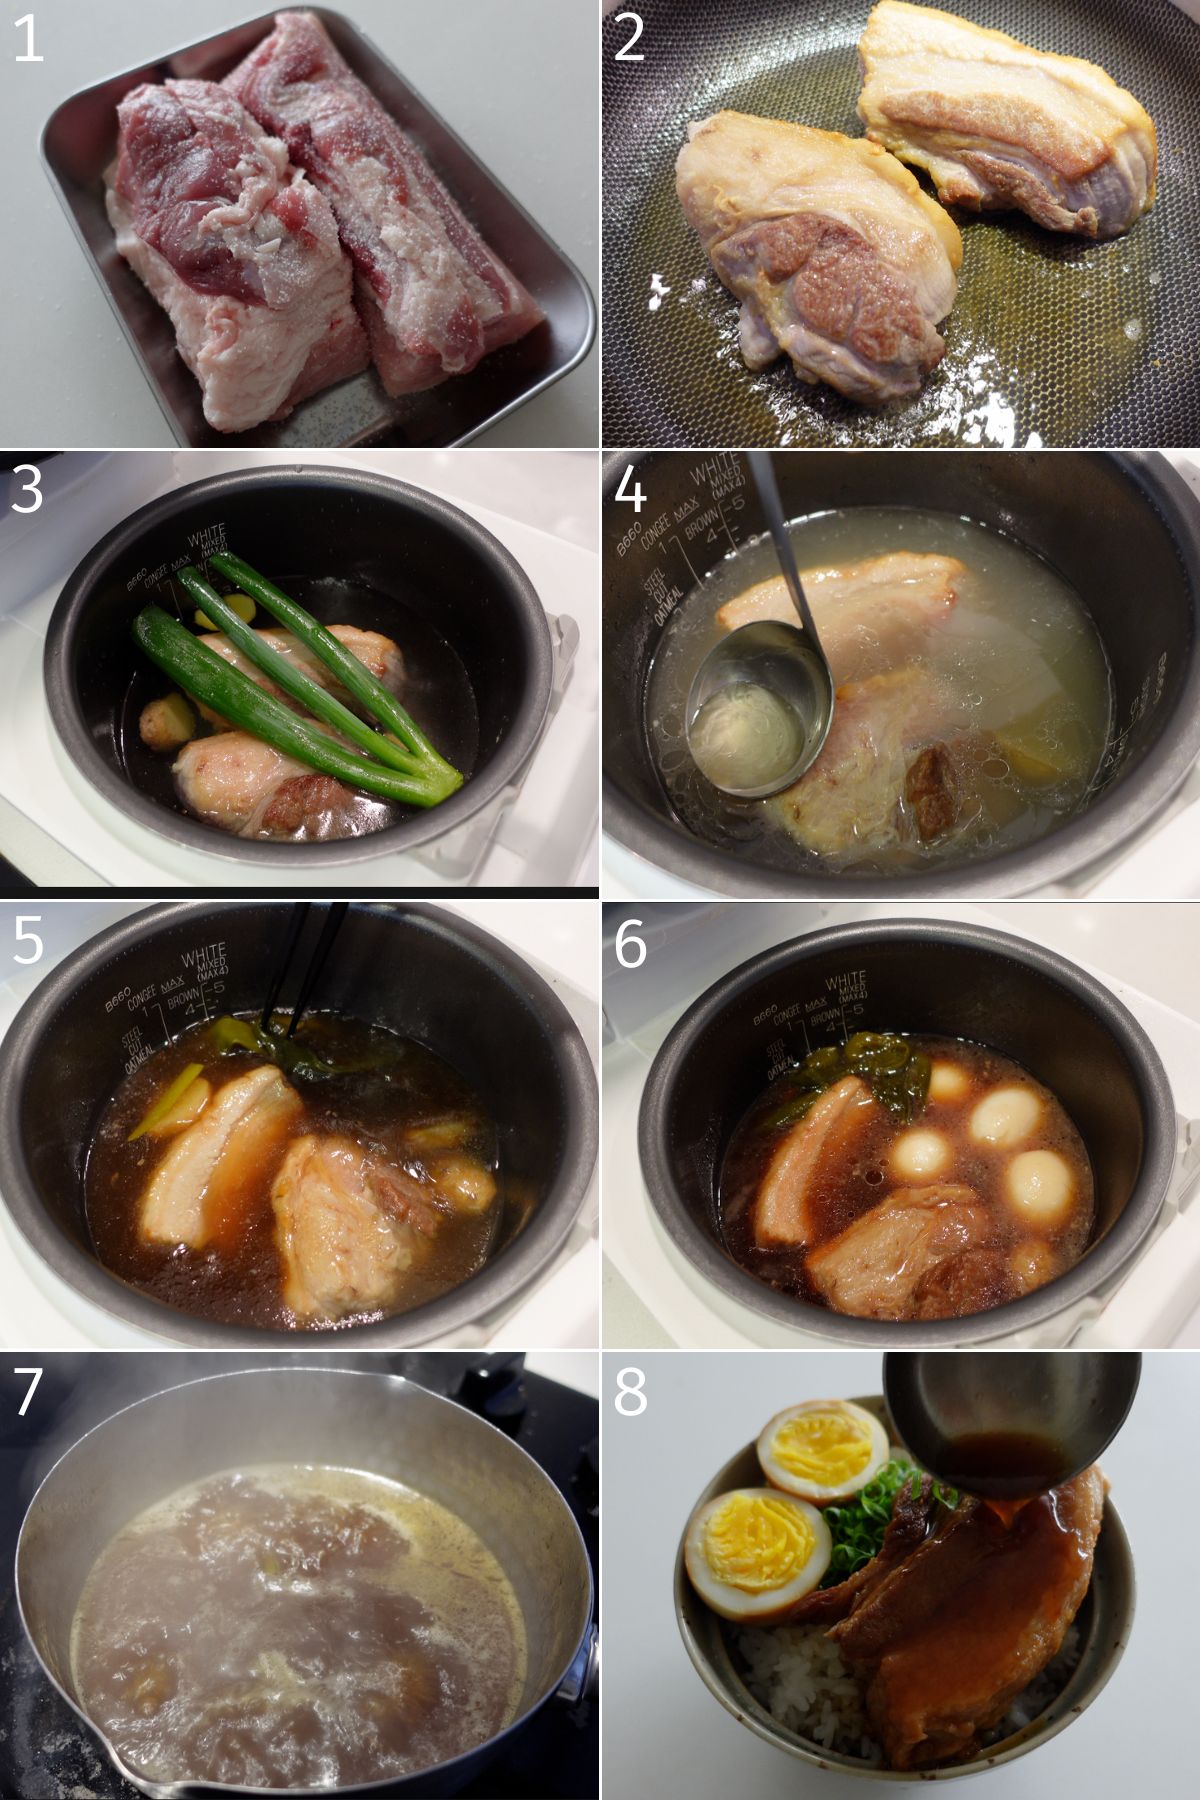
- Prep the pork belly: Slice into thick pieces (keeping them large helps retain juiciness) at least 3-4 cm in width. Lightly season all sides with salt.
- Sear the pork: Lightly pan-fry each side until golden brown.
- First cook cycle: Place pork in the rice cooker, add water, sake, ginger, and negi. Start the rice cooker. In the meantime, make some soft or hard boiled eggs if adding.
- Skim off excess fat: Once the first cycle is done, remove any excess fat from the broth.
- Second cook cycle: Add mirin, sugar, and soy sauce. Restart the rice cooker.
- Add eggs: If adding eggs, add them once the timer goes off. Set to keep warm for 10-15 minutes to marinate them.
- Optional sauce reduction: Pour the braising liquid into a saucepan and simmer until slightly thickened for extra richness.

Instant Pot & Pressure Cooker Method
If you prefer using an Instant Pot or pressure cooker:
- Instant Pot:
- Sear pork belly on Sauté mode with some oil. You can skip this step, but it helps render off more fat and adds extra flavor through charring.
- Pour enough water to cover the meat and add the sake, ginger, and green onion.
- Cover and lock the lid with the steam release set to sealing. Cancel Sauté mode, press Manual, and switch to Pressure Cook for 30 minutes.
- Quick-release the pressure, discard excess fat, add the seasonings, and pressure cook for another 15 minutes with the steam release knob set to sealing.
- Once the timer goes off, do a quick release. Optionally, select Sauté and simmer on low to reduce the braising liquid by about half for a more concentrated sauce.
- Traditional pressure cooker: Follow the same steps, cooking the first stage for 30 minutes and the second for another 10 minutes.
VIDEO: Watch How to Make It
Lisa’s Recipe Tips
- Cook in 2 Cycles: Cook the pork belly without the seasonings first. If you add the soy sauce in the beginning, the lean portion of the pork will be tougher.
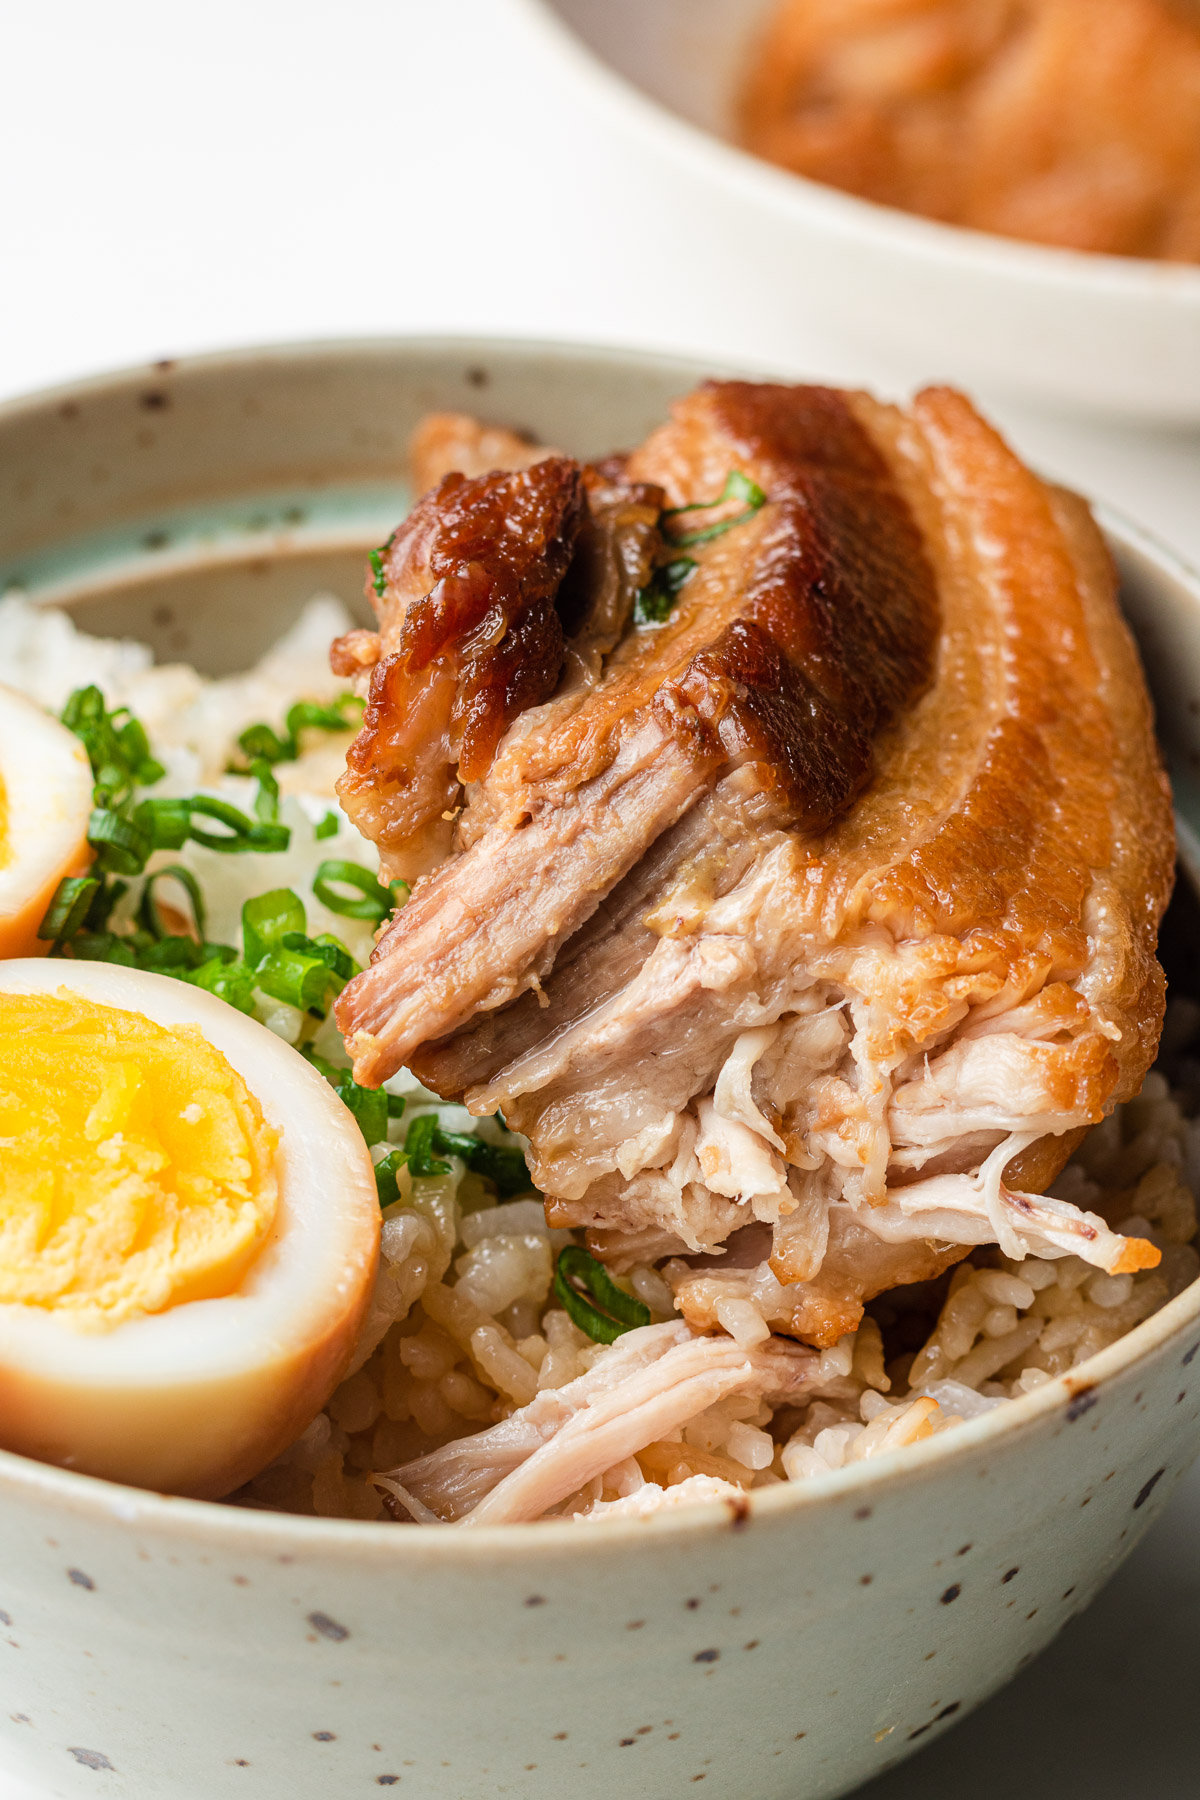
- Cook with Large Pieces: I’ve found that cooking the pork belly in larger pieces to be more tender than cooking in smaller cubes when using a rice cooker. If you want to serve it in smaller pieces, slice after cooking.
- Reduce the sauce: If you have time, reduce the braising liquid over the stove to slightly thicken and to serve over the pork belly and rice.
Serving Suggestions
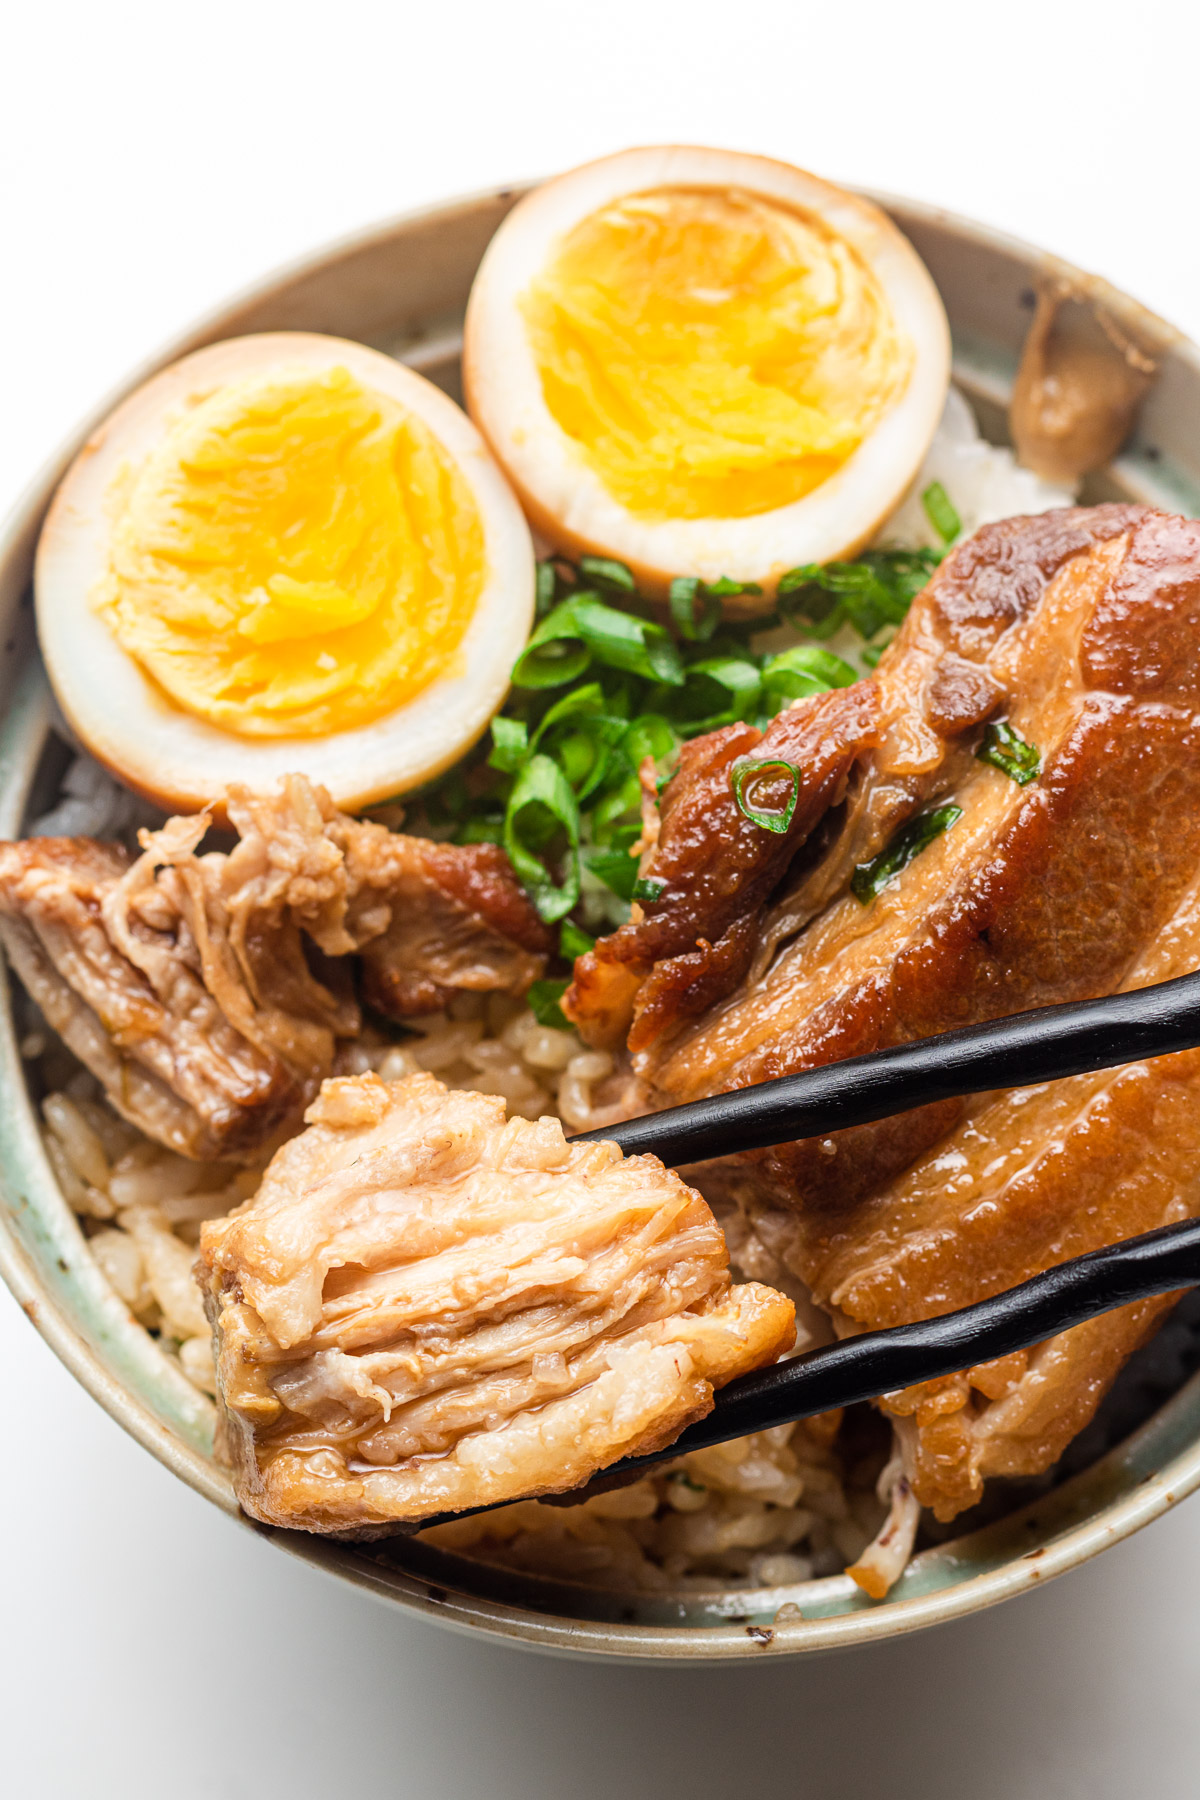
Kakuni is often served with soft or hard-boiled eggs that absorb the flavorful braising liquid. It pairs well with blanched greens like bok choy or spinach for a fresh contrast, and a dab of karashi (Japanese mustard) adds a pleasant kick of spice. For a complete meal, serve kakuni over rice as kakuni don, add it to ramen, or use it as a filling for onigiri and manju (pork belly buns). It also makes a great side dish alongside miso soup, shredded cabbage salad, kiriboshi daikon, or sunomono (Japanese cucumber salad) for a refreshing balance to its rich, savory flavors.
How to Store and Reheat Leftovers
- Storage:
- Refrigerate in an airtight container for up to 4 days.
- Freeze in portions with sauce for up to 3 months. Defrost in the refrigerator before reheating.
- Reheating:
- Remove the pork from the broth and bring the broth to a boil. Once boiling, turn off the heat and return the pork to the pot, letting it warm through gently. This method prevents the meat from drying out while ensuring it’s heated evenly.
Recipe FAQ
Look for a cut with a balance of fat and meat—around 40% fat and 60% meat. Too lean, and it won’t have that signature melt-in-your-mouth texture; too fatty, and it can be overwhelming.
Yes, you can substitute pork belly with skin-on chicken thighs. You can do one cycle for chicken thighs.
You can skip searing the pork belly and cook it in one cycle, but doing the first cook with just water and sake helps keep the lean meat tender. Cooking it with soy sauce from the start may result in a slightly tougher texture, but it will still be flavorful.
More Rice Cooker Recipes
- Rice Cooker Butabara Daikon (Pork Belly and Daikon)
- Rice Cooker Lu Rou Fan (Taiwanese Pork Belly and Rice)
- Rice Cooker Japanese Beef Curry
- Rice Cooker Toriniku Daikon (Chicken and Daikon)
- Rice Cooker Bibimbap
Enjoy! If you make this Rice Cooker Kakuni, I’d love to hear what you think! Leave a comment and rating below, and if you share it on social media, tag me on Instagram @Okonomikitchen. I can’t wait to see your creations!
Print
Rice Cooker Kakuni
- Total Time: 2 hours 12 minutes
- Yield: 4 servings
Description
This Rice Cooker Kakuni is a hands-off way to make tender, melt-in-your-mouth Japanese braised pork belly. Slowly simmered in a savory-sweet soy sauce broth, it develops deep umami flavor with minimal effort. Perfect with rice, ramen, or steamed buns, this easy kakuni recipe delivers rich, satisfying flavors.
Ingredients
- 1.2 lbs (500-550 g) pork belly block
- green part of negi (Japanese green onion)
- 2–3 slices of ginger
- 1 cup water
- 1/4 cup sake
- 1/4 cup mirin
- 1/4 cup sugar
- 1/4 cup soy sauce
- 3–4 soft or hard boiled eggs, optional
- 3–4 servings cooked rice, about 200–250 grams each
Instructions
- Slice the pork belly into 3-4 thick cm pieces. You can keep them whole or cut them into cubes.
- Over medium heat, lightly fry each side of the pork belly until golden brown.
- Place the pork belly into the rice cooker pot and add water, sake, ginger and green onion and turn rice cooker on. Add enough water to cover the pork belly.
- Once the timer goes off, remove excess oil. Add the mirin, sugar and soy sauce. Set to white rice mode again. Open the lid and add in the eggs. Close the lid and let the eggs marinate for 15 minutes.
- Optionally, pour the liquid into a sauce pan and reduce until slightly thickened. Serve over rice along with the eggs. Pour some of the sauce over the kakuni and eggs and enjoy!
- Prep Time: 2 minutes
- Cook Time: 130 minutes
- Category: Main dish
- Method: Rice cooker
- Cuisine: Japanese
Nutrition
- Serving Size: 1 serving
- Calories: 455
- Sugar: 16 g
- Sodium: 900 mg
- Fat: 33 g
- Saturated Fat: 12 g
- Unsaturated Fat: 21 g
- Trans Fat: 0
- Carbohydrates: 18 g
- Fiber: 0
- Protein: 19 g
- Cholesterol: 70 mg


Hi Lisa! How long is one rice cooker cycle? Or do you mean 1 cycle in “white rice” mode?
Yes white rice mode!
This was so easy to make and feels less work since I just let it run its cycles. The result is just as tender and leftovers were great!