This rice cooker ketchup rice recipe is a quick and easy way to make flavorful rice for omurice or a standalone meal. Packed with tender chicken, onions, and savory seasonings, it’s effortlessly cooked for a deliciously tangy and satisfying dish. Perfect for busy weeknights, meal prepping, and freezing! (Rice cooker omurice)

Table of Contents
Rice Cooker Ketchup Rice for Omurice
Rice cooker ketchup rice has been a staple in my family for as long as I can remember. My mom used to make a huge batch in our 10-cup rice cooker, freezing portions to use throughout the week for bentos, onigiri, or quick and easy omurice. It’s perfect for meal prepping and incredibly versatile—you can adjust it by adding more protein or vegetables to suit your taste. Made entirely in the rice cooker, it’s a hands-off meal that combines carbs, protein, and veggies in one dish, making it a balanced and convenient option for busy days. Whether you’re meal prepping or just looking for a comforting and fuss-free recipe, this rice cooker omurice is a must-try!
What is Ketchup Rice?
Ketchup rice, also known as chicken rice, has its origins in the early 20th century and is closely tied to the popularization of ketchup in Japan. The first commercial sale of ketchup in Japan was in 1908 by Kagome, marking a turning point for Japanese cuisine. Prior to that, tomatoes had been introduced to Japan for decorative purposes, and it wasn’t until the Showa era that tomato cultivation became more widespread. Before the advent of ketchup, similar dishes using tomato sauce were rare, and the first rice-based chicken dish was a simple stewed chicken served over rice, which bears little resemblance to the modern version of ketchup rice.
The introduction of ketchup sparked a culinary shift, and ham rice became a popular dish when Kagome’s ketchup became widely available. Kamakura Ham, Japan’s first large-scale ham manufacturer, capitalized on this new trend by selling ham rice mixes, and this concept evolved into chicken rice. By 1924, restaurants began offering chicken rice with ketchup, and it gained traction in Japanese homes during the early Showa period. Ketchup became more affordable, and dishes like chicken rice, made with a savory mix of chicken, rice, and ketchup, became beloved comfort food. Today, ketchup rice remains a staple in Japanese households, often used as a filling for omurice, a dish that showcases the fusion of Western ingredients with Japanese cooking traditions.
Ingredients
Here are the main ingredients you’ll need for chicken ketchup rice:

- Japanese short-grain white rice: This rice provides the ideal texture and stickiness, making it perfect for shaping and serving in dishes like omurice and onigiri.
- Onion: Adds sweetness and depth of flavor, balancing the tanginess of the ketchup.
- Chicken thigh: For rich flavor, tenderness and juiciness chicken thigh is the most common choice.You can substitute with chicken breast for a leaner option, or swap the protein for ham, bacon, sausage, smoked tofu, or vegan alternatives.
- Frozen vegetables: Common choices include green peas, mushrooms, green beans, corn, and carrots, but feel free to add in chopped bell peppers, edamame, or other vegetables that can be finely diced.
- Ketchup: Kagome, a Japanese ketchup brand, is often preferred for its authentic flavor and smooth consistency. However, Heinz ketchup works well as a substitute.
- Worcestershire or tonkatsu sauce: Adds depth and umami to the dish.
- Butter: Provides a creamy texture and richness, helping to balance the tangy flavor of the ketchup.
- Consommé or chicken stock powder: Used for added savory flavor, enhancing the overall depth of the rice.
How to Make Ketchup Rice in the Rice Cooker
The best thing about this ketchup chicken rice recipe is how easy it is to make!
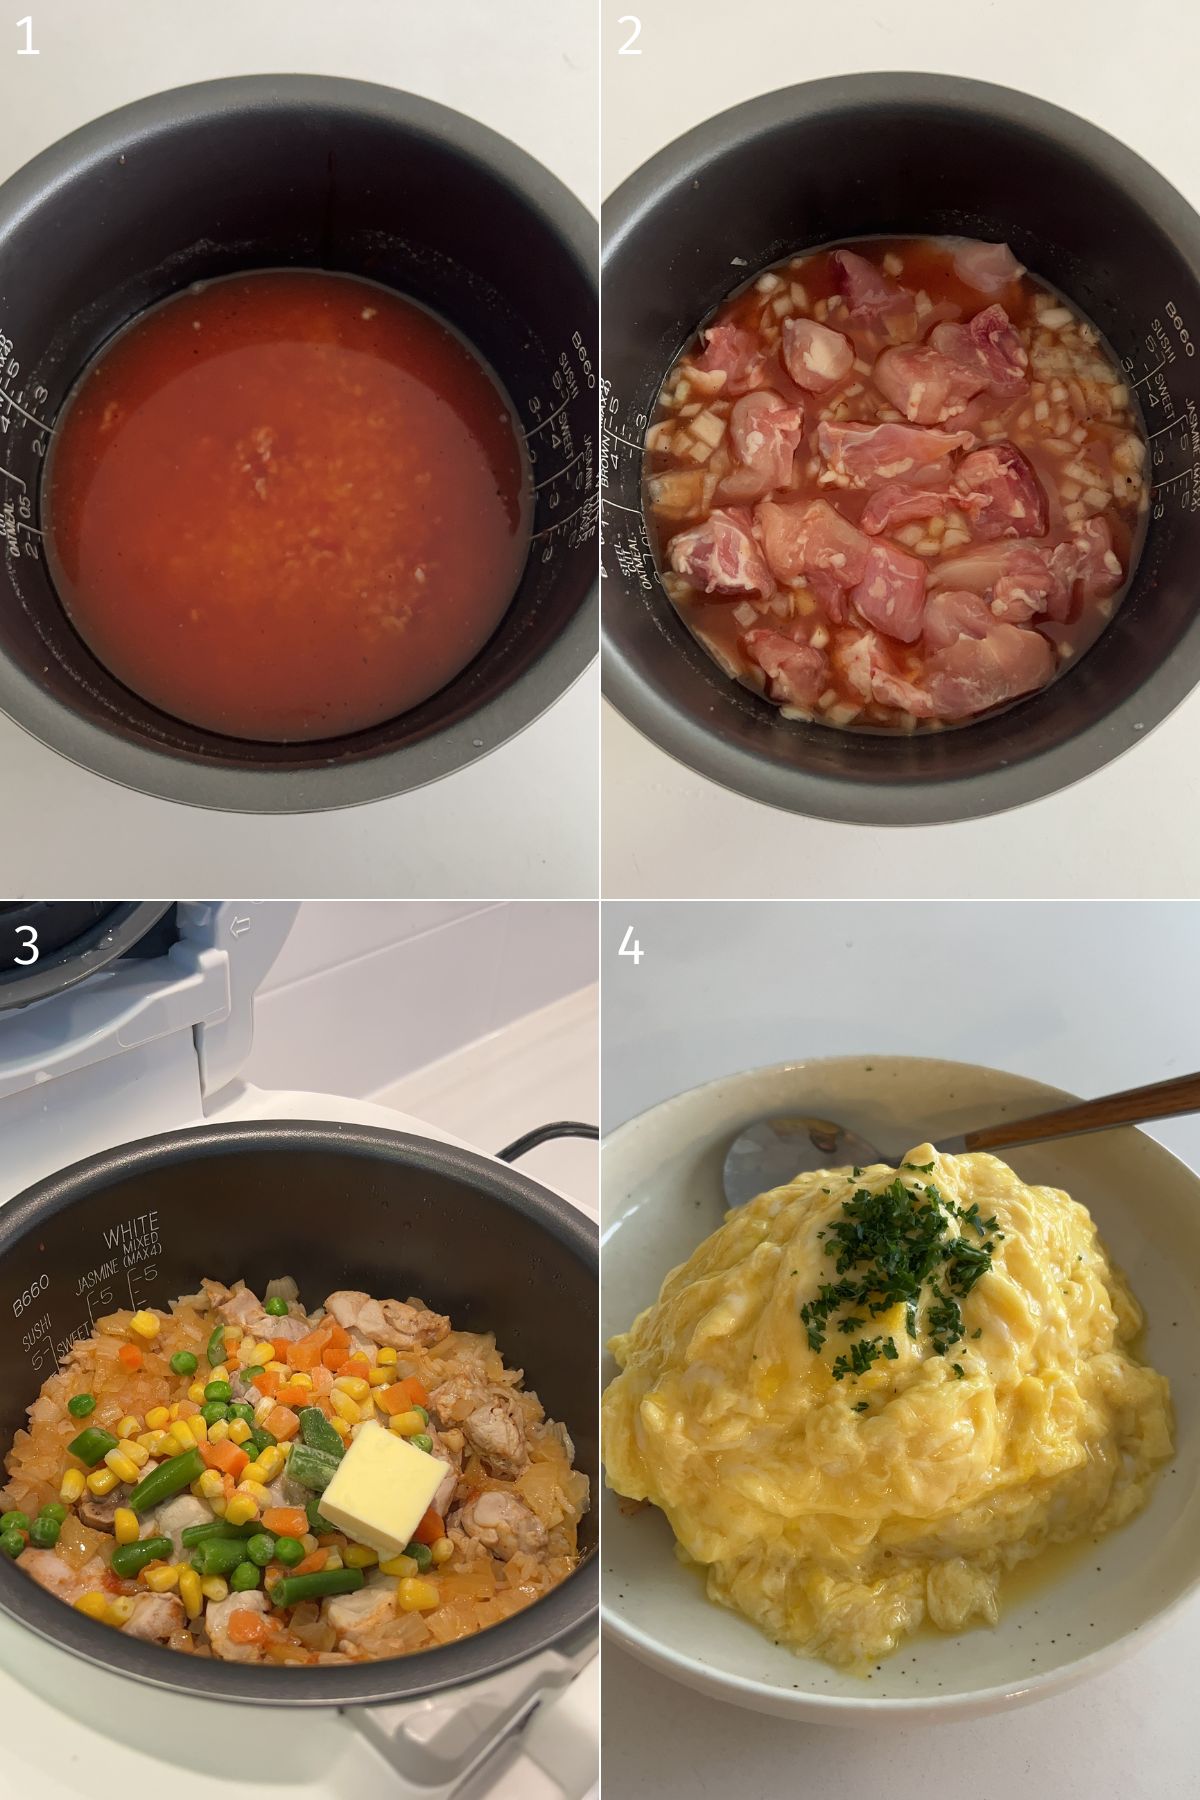
- Wash the rice and drain well. Add the rice to the rice cooker pot with seasonings and water and mix.
- Add the onions and chicken on top without mixing, and cook on white rice mode.
- Add frozen thawed vegetables and butter, and let residual heat warm it up and melt the butter.
- Serve as is, make omurice, onigiri or add to bento!

Recipe Tips
- Rinse the rice: Always rinse the rice until the water runs almost clear to remove excess starch. This helps the rice cook up fluffy and prevents it from becoming too sticky.
- Stir the seasonings: After adding the ketchup, Worcestershire sauce, and other seasonings, stir the mixture well before adding the rice. This ensures even distribution of the flavors throughout the rice.
- Don’t mix protein and vegetables: When adding the chicken and vegetables, don’t stir them in. Simply scatter them on top of the rice mixture. This ensures that the rice cooks properly and the chicken doesn’t over cook.
- Let the rice rest: After cooking, let the rice sit with the lid closed for 5-10 minutes. This allows the flavors to meld together and ensures the vegetables are heated through and the butter melts evenly.
- Make a big batch: This ketchup rice is perfect for meal prepping and freezing so make a big batch for a quick and easy meal throughout the week!
Serving Suggestions
This chicken ketchup rice is delicious on its own but I love transforming it into other dishes for variety. Here are some suggestions:
- Make Omurice: Top your ketchup rice with a soft scrambled egg like my tamagoyaki scramble or a usuyaki tamago (Japanese thin omelette, 薄焼き卵) which you can find the recipe for on my classic homestyle omurice recipe. The creamy eggs complement the savory rice beautifully.
- Make Onigiri: Shape the rice into small balls or triangles to make onigiri. You can wrap them in nori or enjoy them as is, making a perfect portable snack or meal.
- Add to Bentos: Ketchup rice works wonderfully in bentos as it tastes great at room temperature. It’s an easy and flavorful addition to your lunchbox, pairing well with a variety of other sides.
How to Store Chicken Ketchup Rice
- Cool the Rice Quickly: Allow the ketchup rice to cool down to room temperature before storing. I like to place a piece of cling wrap on top and place ice packs to cool it quickly. This helps prevent bacterial growth and maintains the rice’s texture.
- Use an Airtight Container: Transfer the cooled ketchup rice into an airtight container to keep it fresh. Ensure the lid is securely sealed to prevent moisture loss and preserve the flavor.
- Refrigeration: Store the ketchup rice in the refrigerator for up to 3-4 days.
- Freezing: If you want to store it for a longer period, ketchup rice can be frozen. Divide it into meal-sized portions and place it in freezer-safe containers or resealable freezer bags. Be sure to remove as much air as possible to prevent freezer burn. It can be frozen for up to 2-3 months.
- Reheating: To reheat, you can either microwave the rice (with a splash of water to add moisture) or reheat it in a pot on the stove. If frozen, let it thaw in the refrigerator overnight before reheating.
Recipe FAQ
Yes! You can make ketchup rice on the stove with a pot or donabe. Instead of the rice cooker, add the ingredients into a pot as directed. Place the pot on the stove over medium heat and bring the mixture to a gentle boil. Once it begins to boil, reduce the heat to the lowest setting, cover with the lid, and let it simmer for about 15-20 minutes, or until the rice absorbs all the liquid. Then let it rest to steam for 10-15 minutes before fluffing it with a rice paddle.
Yes, simply replace the chicken thighs for a vegan meat alternative like smoked tofu, plant based sausages or plant based chicken. Use vegan chicken stock powder or vegetable powder and vegan butter.

Enjoy!! If you make this Rice Cooker Ketchup Rice recipe, let me know! Leave a comment, rating and if you decide to share it on socials, tag me on instagram @Okonomikitchen. I’d love to hear from you!
Print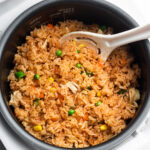
Rice Cooker Ketchup Rice
- Total Time: 1 hour 10 minutes
- Yield: 4 servings
- Diet: Low Fat
Description
This rice cooker ketchup rice recipe is a quick and easy way to make flavorful rice for omurice or a standalone meal. Packed with tender chicken, onions, and savory seasonings, it’s effortlessly cooked for a deliciously tangy and satisfying dish. Perfect for busy weeknights, meal prepping, and freezing!
Ingredients
- 2 cups (300 g) Japanese short grain white rice (rice cooker cups)
- 1/3 – 1/2 lbs (150-225 g) boneless skinless chicken thigh*
- 1/2 medium (100 g) onion
- 6 tbsp (90 g) ketchup
- 1 tbsp Worcestershire or tonkatsu sauce
- 1 tsp soy sauce
- 2 tsp Consommé stock
- 1/2 tsp salt
- 1/4 tsp pepper
- 1/2 cup (92 g) frozen vegetables (corn, carrots and peas)
- 1–2 tbsp butter
Instructions
- Rinse the rice: Wash the rice under cold water until the water runs almost clear. Drain thoroughly. (See “How to Wash Rice the Japanese Way” for details.)
- Prepare the chicken and onion: Finely dice the onion. Cut the chicken thighs into bite-sized pieces.
- Assemble in the rice cooker: Add the rinsed and drained rice to the rice cooker pot. Add ketchup, Worcestershire sauce, soy sauce, consommé, salt, and pepper. Add water until it just reaches slightly below the 2-cup line on your rice cooker (approximately 300 ml). Mix well to combine.
- Add the toppings: Scatter the diced onion and chicken pieces over the top of the rice mixture. Do not stir.
- Cook the rice: Close the lid and set your rice cooker to the white rice (standard) setting.
- Add the finishing touches: Once the rice is cooked, open the lid and add the frozen vegetables and butter. Close the lid and let the residual heat warm the vegetables and melt the butter (about 5–10 minutes).
- Mix and serve: Use a rice paddle to mix the rice, using a slicing motion to fluff and combine the ingredients. Serve immediately or use the rice as a filling for homestyle omurice or top with a soft scramble.
To Cook on the Stove
- Follow steps 1-4. Then place the pot on the stove over medium heat and bring the mixture to a gentle boil. Once it begins to boil, reduce the heat to the lowest setting, cover with the lid, and let it simmer for about 15–20 minutes, or until the rice absorbs all the liquid. Resume to steps 6-7.
- Prep Time: 10 minutes
- Cook Time: 60 minutes
- Category: Main dish
- Method: Rice Cooker
- Cuisine: Japanese
Nutrition
- Serving Size: 1 serving
- Calories: 430
- Sugar: 8 g
- Sodium: 700 mg
- Fat: 7.7 g
- Saturated Fat: 2.1 g
- Unsaturated Fat: 1.2 g
- Trans Fat: 0.1 g
- Carbohydrates: 72 g
- Fiber: 4 g
- Protein: 17 g
- Cholesterol: 0
Okonomi Kitchen is a participant in the Amazon Services LLC Associates Program. When you purchase something through my amazon affiliate links, I earn a small commission that helps me produce consistent content at no cost to you. Thank you for your support!


