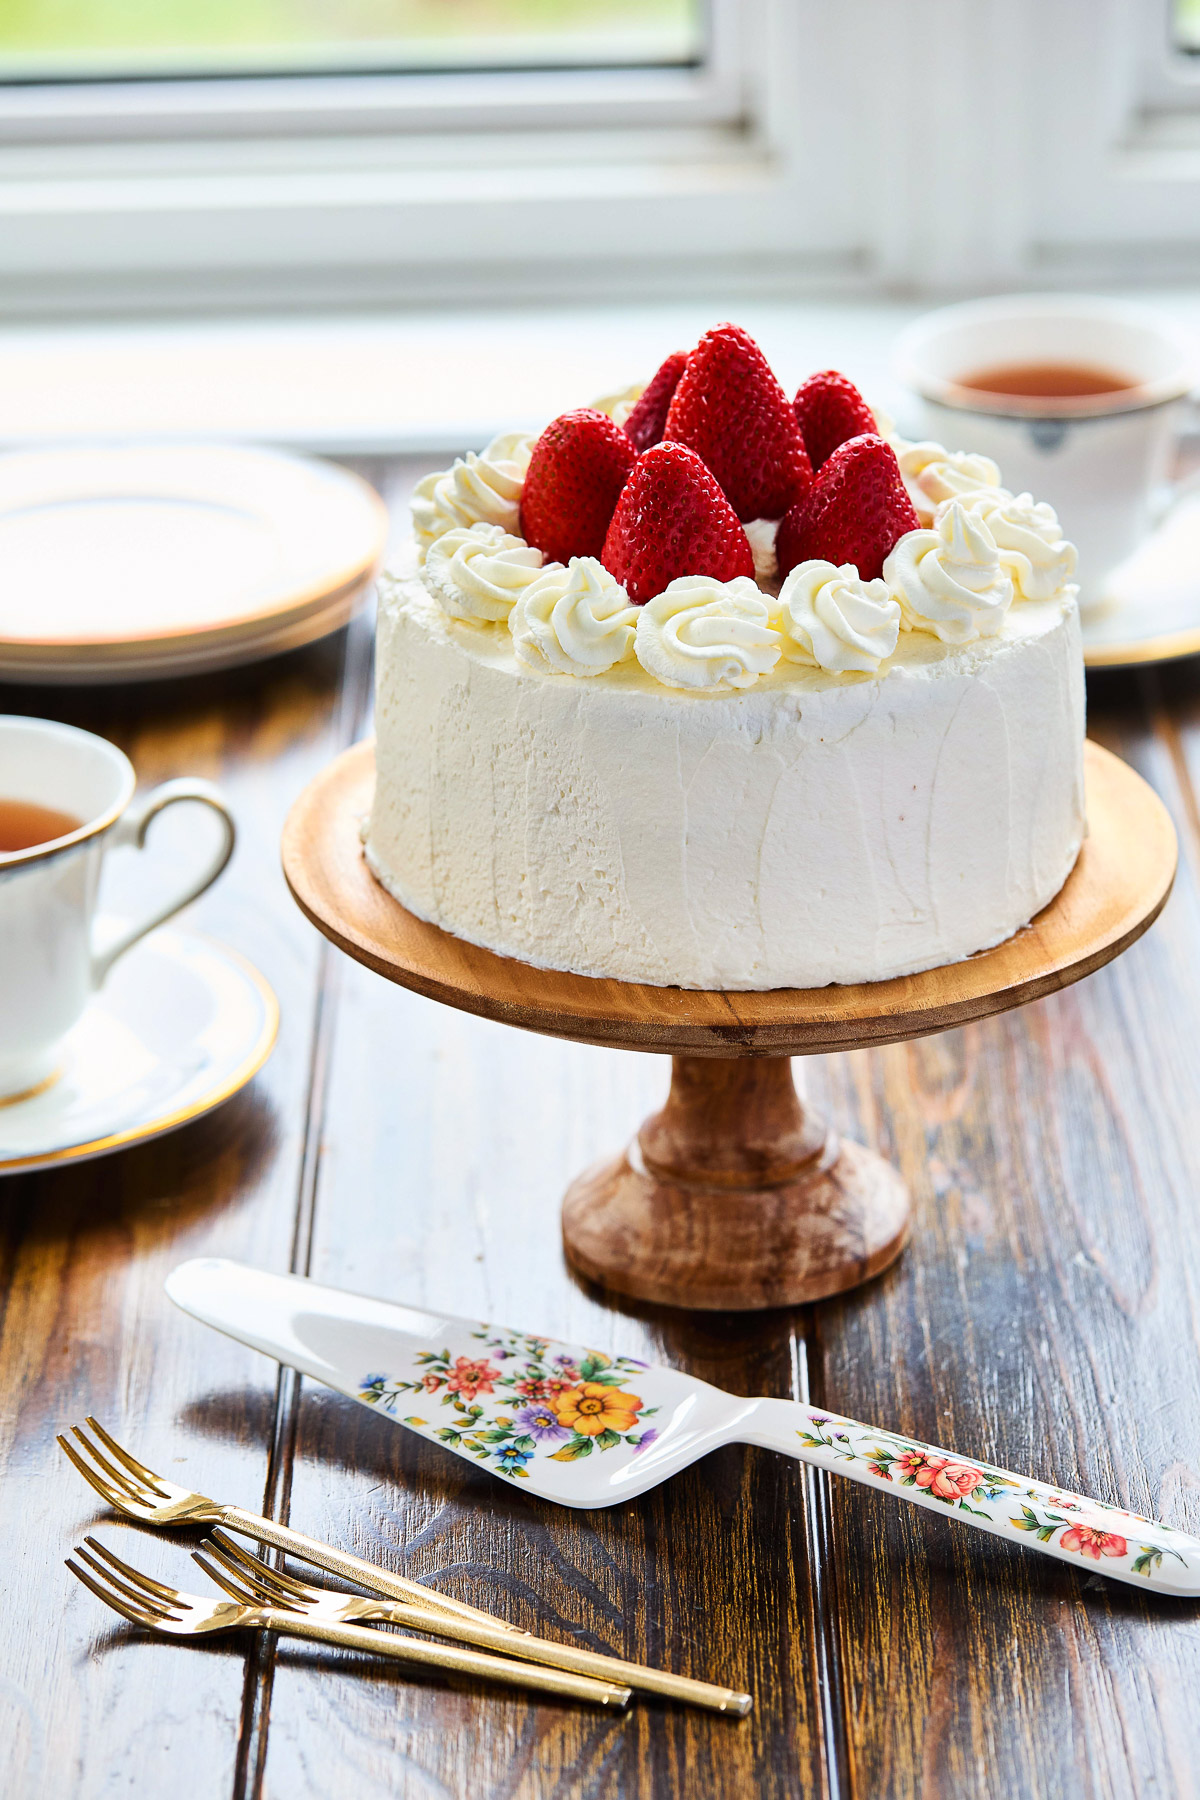
Japanese Strawberry Shortcake is a classic dessert made with moist, fluffy genoise sponge, layered with freshly whipped cream and sweet strawberries. Soft, airy, and delicately sweet, it’s perfect for birthdays, holidays, or any time you want a light and elegant cake.

Table of Contents
- What is Japanese Shortcake?
- Why This Recipe
- Sponge Cake: Genoise vs. Chiffon
- Ingredients and Substitutions
- How to Make Japanese Strawberry Shortcake
- VIDEO: Watch How to Make It
- Lisa’s Recipe Tips
- Serving Suggestions
- How to Store Leftovers
- Recipe FAQ
- More Japanese Dessert Recipes
- Japanese Strawberry Shortcake Recipe
Growing up, my family spent our summers in Japan, and since my birthday falls in July, it became a tradition to celebrate with a Japanese strawberry shortcake. Every year, we’d stop by our favorite pastry shop, Ginza Cozy Corner, to pick up the cake. My grandma and I would spend the day together, wandering through the city, and then bring home that perfectly packaged cake as the highlight of the evening.
After a full birthday feast, no matter how stuffed I was, I always had extra room for that shortcake. It was unlike any other cake—soft, fluffy sponge, the lightest whipped cream with a delicate milky sweetness, and perfectly ripe strawberries that were both tart and sweet. It’s been over 15 years since I last had that exact cake, but this recipe is the closest I’ve come to recreating those special memories.

What is Japanese Shortcake?
If you’ve ever walked through a Japanese bakery, you’ve probably seen a pristine white cake topped with vibrant red strawberries. This is Ichigo no Shōtokēki (いちごのショートケーキ)—a beloved classic in Japan. Despite the name, it’s not a biscuit-based “shortcake” like in the U.S. Instead, it features:
- Genoise sponge: a light, airy sponge that relies on beaten eggs for structure (no chemical leaveners).
- Fresh strawberries: the star of the show, providing natural sweetness and a pop of tartness.
- Whipped cream frosting: smooth, barely sweetened, and ultra-fluffy.
This cake became popular in Japan during the early 20th century when Western-style desserts were introduced. Today, it’s considered the ultimate Japanese celebration cake.
Why This Recipe
I’ve tested this recipe countless times to make sure it’s foolproof, and here’s why it works:
- Soft and moist genoise: Almost as soft as a chiffon cake but with the sturdiness of a genoise cake.
- Perfect sweetness balance: Just enough sugar to highlight the strawberries without overpowering them.
- Make-ahead friendly: Bake the sponge a day before or freeze it to streamline the process.
- Step-by-step guidance: Tips for folding, whipping cream, and layering so your cake looks bakery-perfect.
Sponge Cake: Genoise vs. Chiffon
Many Japanese shortcake recipes use genoise sponge, which is what I recommend here for its light, soft and springy texture. Chiffon cake is another option—it’s softer and moister but more delicate to slice and layer. For this recipe, genoise gives the perfect balance between structure and softness.
Ingredients and Substitutions
Before you start, measure and prepare all your ingredients. Here’s what you’ll need:
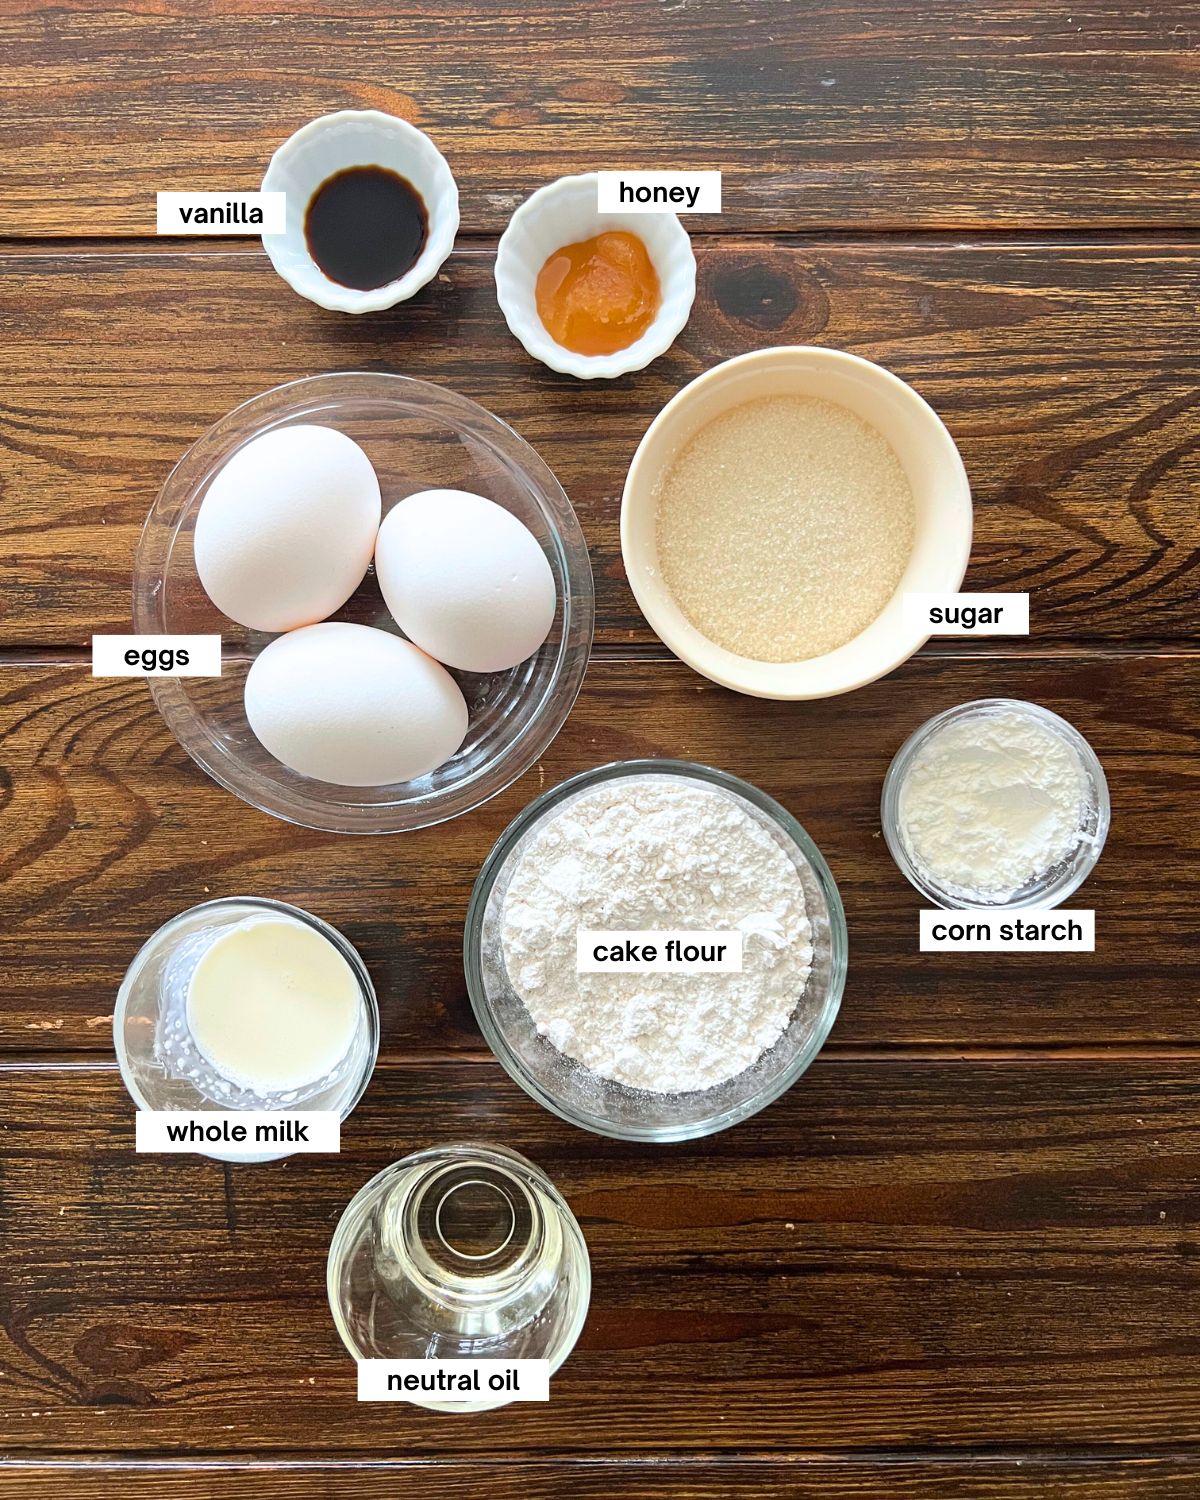
For the Genoise Sponge
- Eggs and egg yolk
- Granulated sugar
- Honey (for moisture and subtle sweetness)
- Cake flour
- Cornstarch
- Whole Milk
- Neutral oil
- Vanilla extract
Other Ingredients
- Sugar, for the sugar syrup
- Heavy whipping cream (42% fat if possible)
- Powdered sugar
- Fresh strawberries (look for ripe, vibrant berries)
How to Make Japanese Strawberry Shortcake
Making this cake may seem intimidating, but it’s easier than you think! Here’s a breakdown of the process:
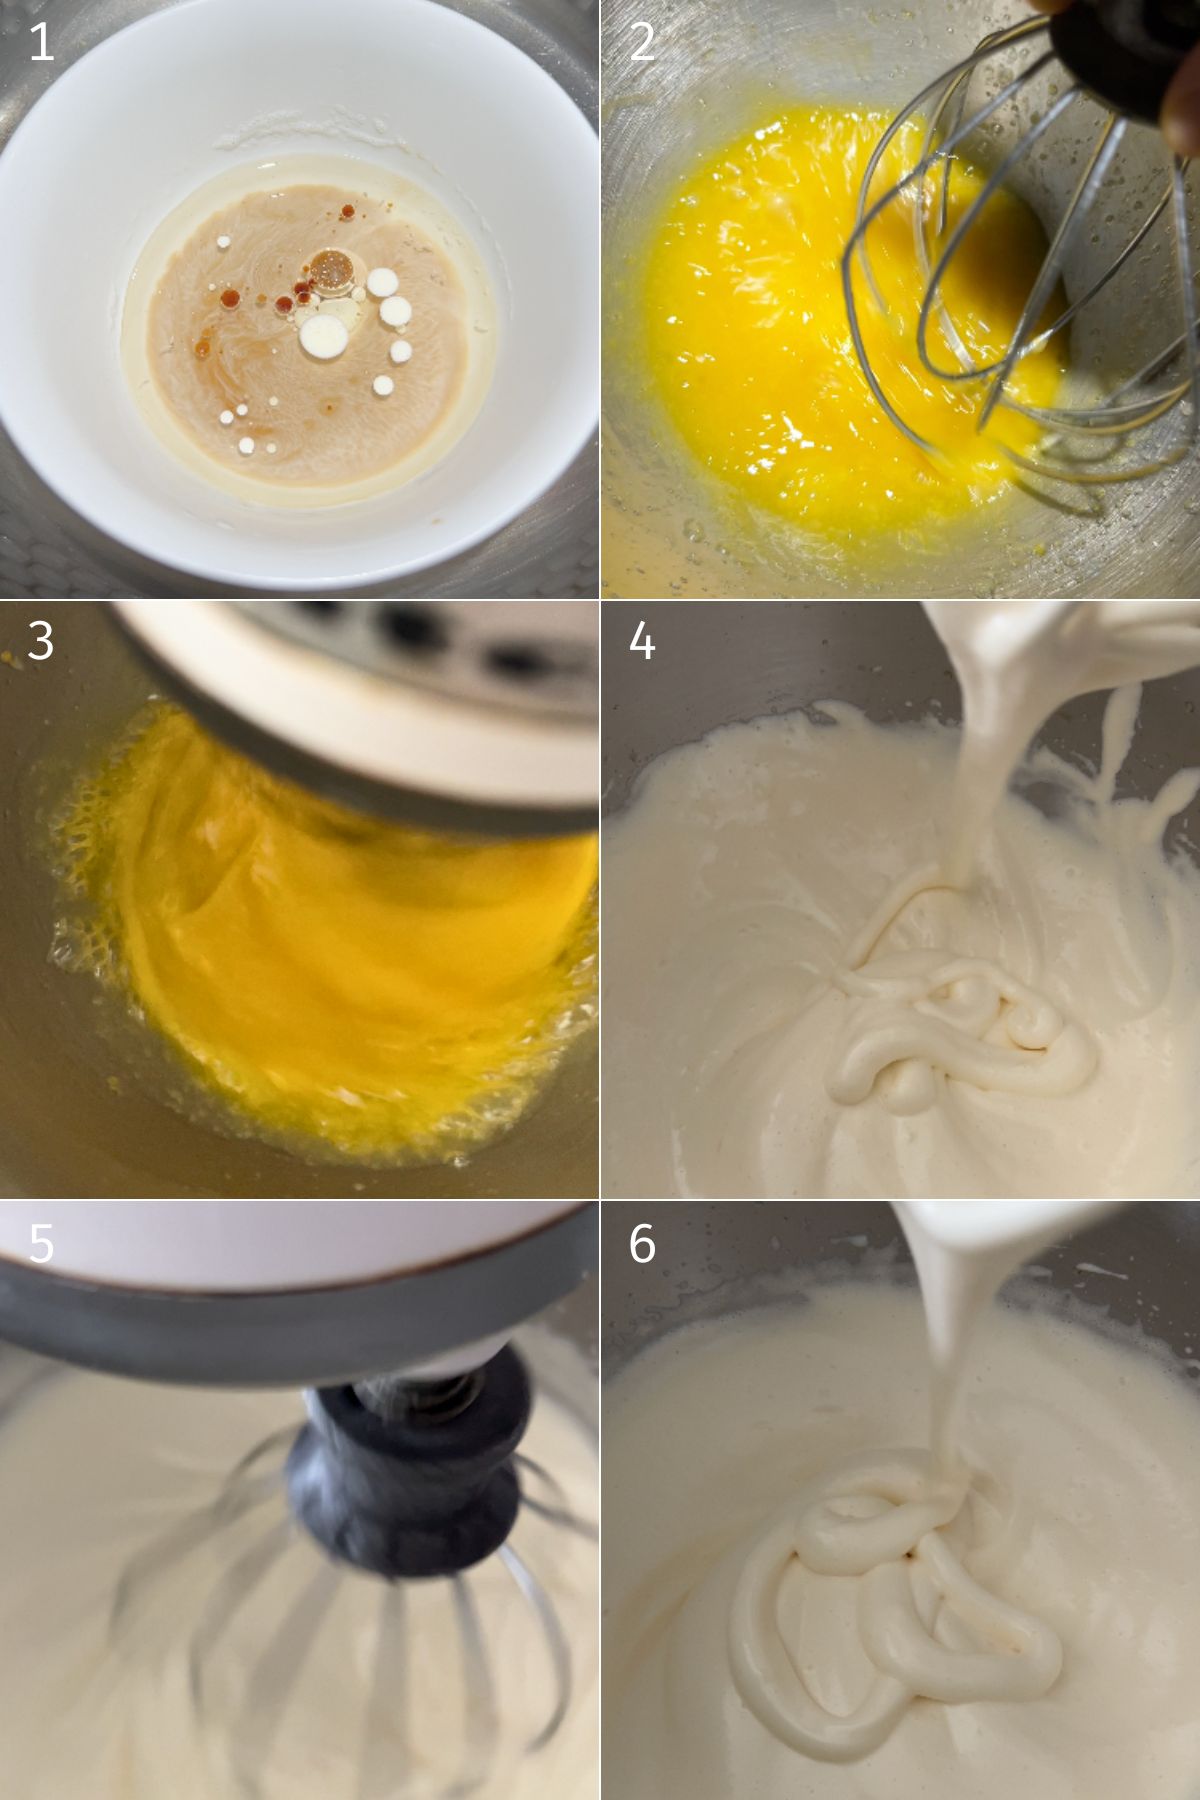

- Warm Ingredients: Set up a water bath and warm up the milk mixture. Whisk together the eggs, sugar and honey and heat until just warm to the touch (40–43°C / 104–110°F).
- Whisk the Eggs: Transfer to a stand mixer and beat on high speed until the mixture reaches ribbon stage (thick, pale, and falls in ribbons that sit on the surface). Lower to medium speed for 1 minute to smooth out the batter and remove large bubbles.
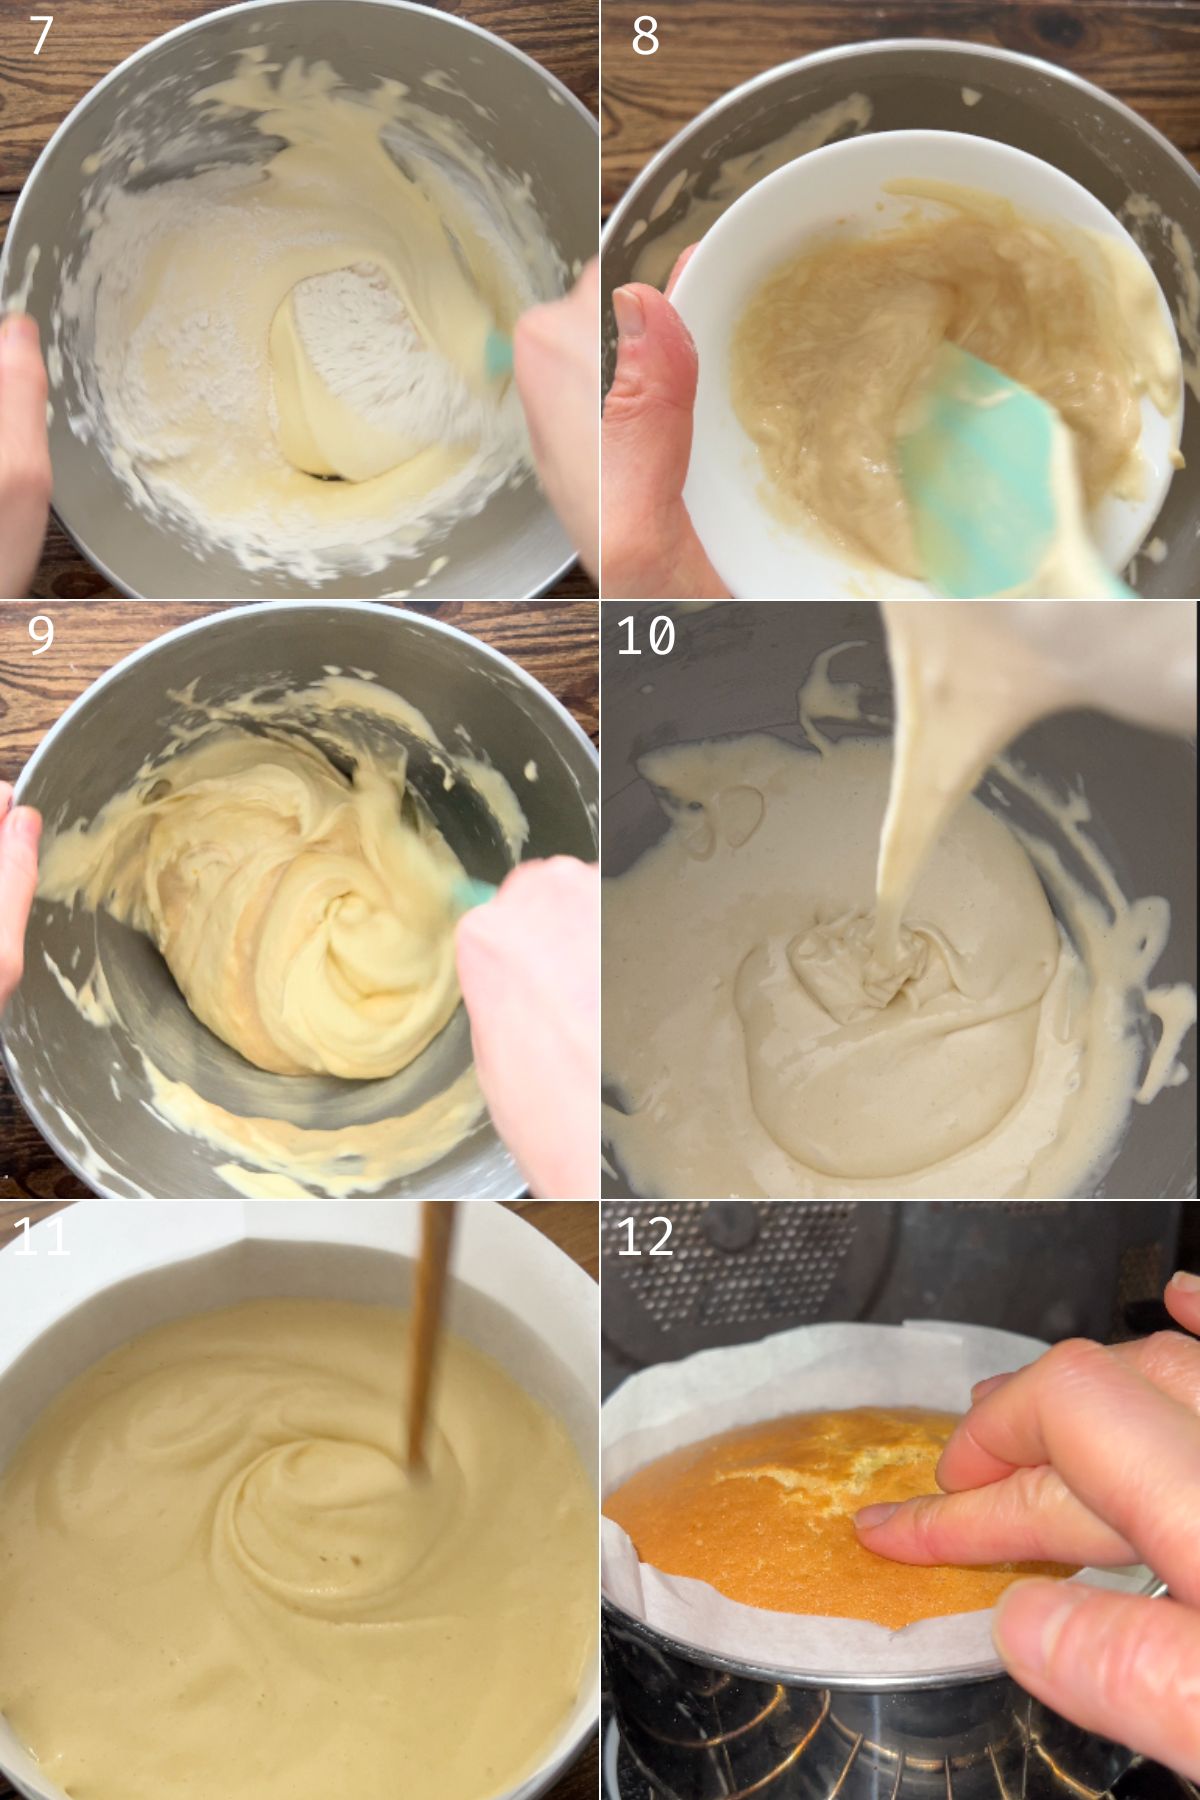
- Fold & Mix: Add sifted cake flour and cornstarch to egg mixture and gently fold until combined. Mix a small amount of batter with the warm milk-oil mixture, then fold it back into the main batter until smooth and flows like a ribbon.
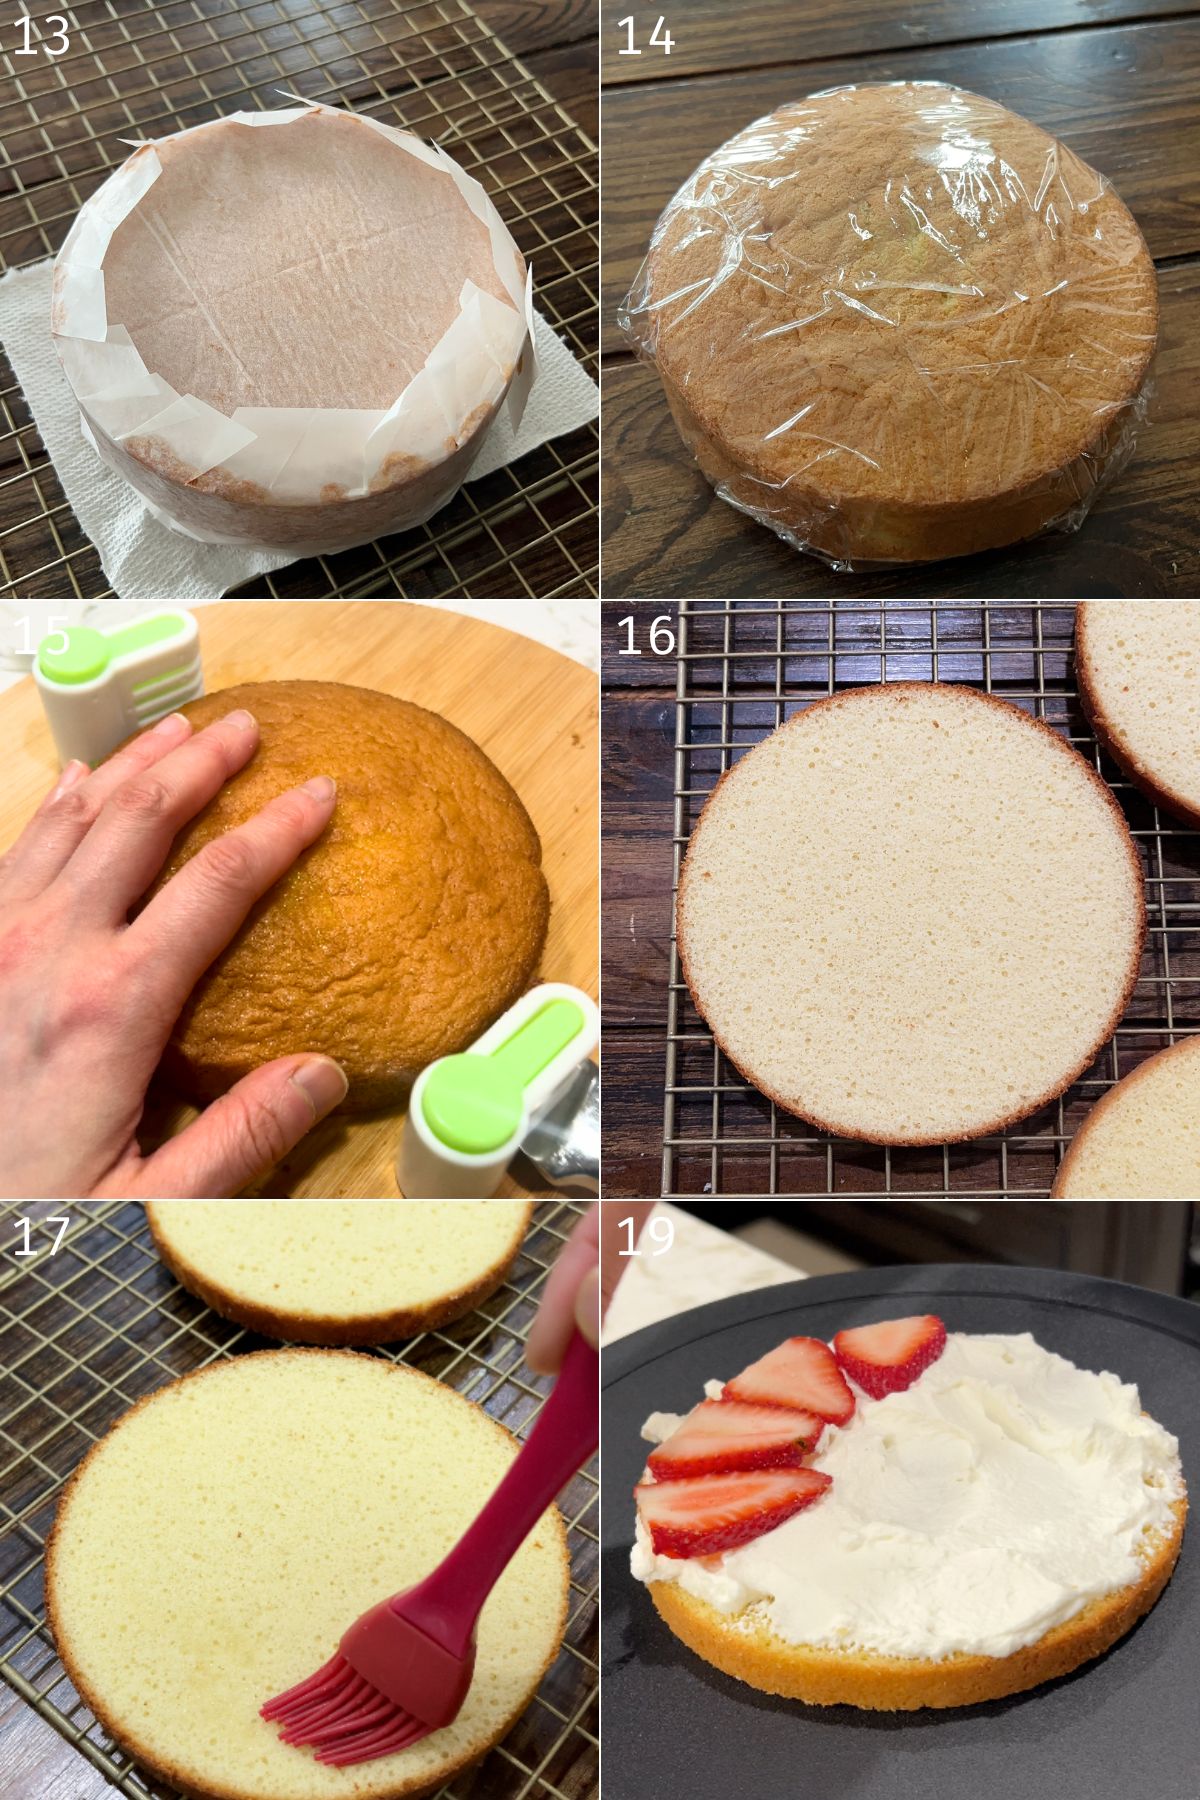
- Bake the Sponge: Pour the batter into the prepared 6-inch cake pan. Bake until golden and springy (about 25–28 minutes). Immediately invert onto a cooling rack and wrap in plastic while slightly warm to prevent drying out.
- Slice & Prepare Layers: Once completely cool, slice the cake into 2 or 3 even layers using a serrated knife or cake slicer.
- Brush with Syrup: Lightly brush both sides of each layer with sugar syrup to keep the cake moist.
- Layer & Assemble: On the first layer, spread whipped cream, then add sliced strawberries. Top with another thin layer of cream to secure the berries. Repeat with the remaining layers.
- Frost & Decorate: Apply a thin crumb coat with stiff cream, then frost the cake smoothly using softer cream. Decorate with piped cream and whole or halved strawberries.
- Chill Before Serving: Refrigerate for at least 3 hours (or overnight) to let the cake set for clean slices.
VIDEO: Watch How to Make It

Lisa’s Recipe Tips
- Warm the Eggs Properly: Genoise relies on beaten eggs for structure, so volume is everything. Warm the eggs and sugar mixture over a gentle water bath until it reaches 40–43°C (104–110°F). This helps dissolve the sugar and allows the eggs to whip to maximum volume. If you skip this step, the sponge will be dense and flat.
- Whip to Ribbon Stage: When you lift your whisk, the batter should fall back in thick ribbons that sit on the surface for at least 3 seconds before dissolving. If you stop too early, the cake will collapse. After whipping on high, mix on low for 1 more minute to remove large air bubbles—this gives a fine, even crumb.
- Fold Gently (But Thoroughly): This is where most people deflate their batter. Use a wide spatula and fold in a scooping-and-turning motion. Rotate the bowl as you fold and scrape the bottom so no flour pockets remain. If you see streaks of flour, keep folding gently—don’t beat!
- Temperature Matters: For whipped cream, everything should be very cold. Chill your mixing bowl, whisk, and cream before whipping. If the cream warms up, it won’t hold peaks and the frosting will slide off.
- Brush the Layers with Syrup: Genoise can dry out quickly. Brushing with a light sugar syrup adds moisture and keeps the cake tender even after chilling.
- Chill Before Slicing: Give the finished cake at least 3 hours in the fridge before slicing. This allows the cake to absorb some of the moisture from the cream, cream to firm up, and the flavors to meld. Overnight is even better for neat, clean slices.
Serving Suggestions
This cake is best served chilled with hot green tea or coffee. For special occasions, garnish with extra strawberries, edible flowers, or a dusting of powdered sugar.
How to Store Leftovers
Japanese Strawberry Shortcake is best enjoyed fresh, but here’s how to store it at different stages:
Storing the Baked Genoise (Before Assembly)
- Once the sponge is baked and completely cooled, wrap it tightly in plastic wrap.
- You can keep it at room temperature for 1 day or refrigerate for up to 2 days.
- For longer storage, freeze the sponge: wrap in plastic wrap, then foil, and place in a freezer bag. It will last for up to 1 month. Thaw at room temperature.
Storing the Assembled Cake
- After frosting, store the cake in an airtight cake box or container in the refrigerator for up to 2 days. Beyond that, the cream and strawberries begin to weep.
- Avoid covering directly with plastic wrap (it will stick to the frosting). Use a cake carrier or gently tent with wrap without touching the surface.
Freezing Slices
- If you need to store leftovers for longer, slice the cake and wrap each piece individually in plastic wrap, then place in an airtight container or freezer bag.
- Freeze for up to 2 weeks.
- To serve, thaw slices in the refrigerator overnight. The whipped cream texture may soften slightly but will still taste great.
Recipe FAQ
Yes! Bake, cool, wrap tightly, and refrigerate for 1–2 days or freeze for up to a month.
Absolutely—mango, kiwi, and peaches all work well!
You can make your own by replacing 1 tbsp of flour with cornstarch per cup.
More Japanese Dessert Recipes
- Matcha Roll Cake
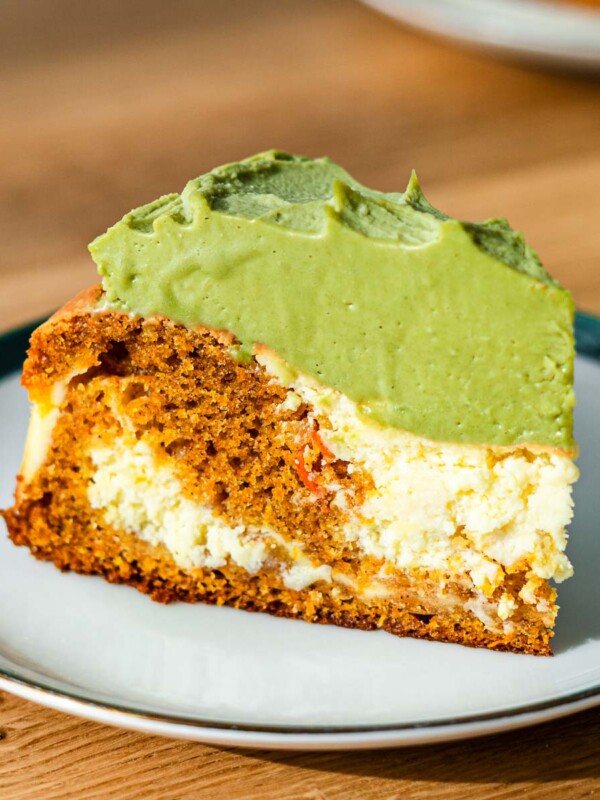
- Matcha Gateau (Matcha White Chocolate Cake)
- Matcha Basque Cheesecake (coming soon)
- Dorayaki (coming soon)
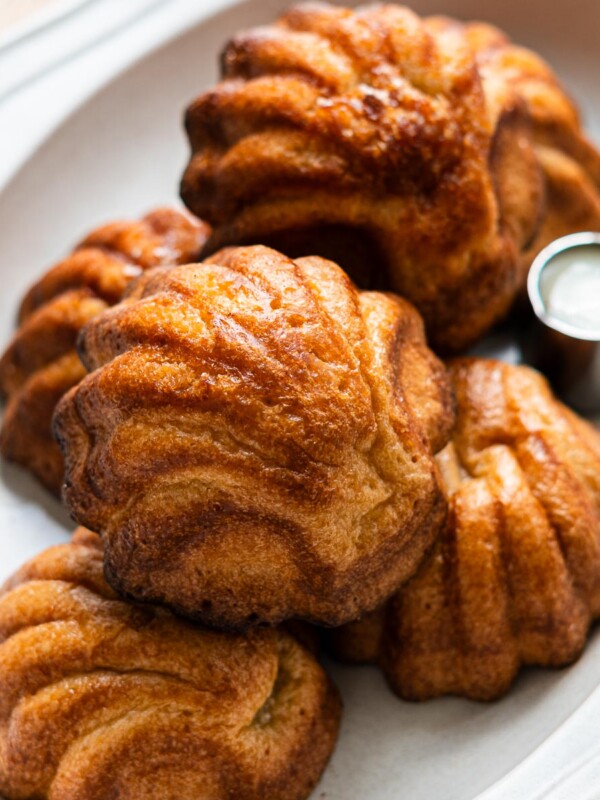
- Taiyaki

Enjoy! If you make this Japanese Strawberry Shortcake recipe, I’d love to hear what you think! Leave a comment and rating below, and if you share it on social media, tag me on Instagram @Okonomikitchen. I can’t wait to see your creations!
Print
Japanese Strawberry Shortcake
- Total Time: 4 hours 15 minutes
- Yield: 6-8 servings
- Diet: Vegetarian
Description
Japanese Strawberry Shortcake is a classic dessert made with moist, fluffy genoise sponge, layered with freshly whipped cream and sweet strawberries. Soft, airy, and delicately sweet, it’s perfect for birthdays, holidays, or any time you want a light and elegant cake.
Ingredients
Genoise Sponge Cake
- 2 large eggs
- 1 egg yolk (total weight with whole eggs: 127 g)
- 1/3 cup (65 g) granulated sugar
- 2 tsp (10 ml) honey
- 1/2 cup (62 g) cake flour
- 1 tbsp (8 g) cornstarch
- 2 1/2 tsp (12 ml) whole milk
- 1 tbsp + 1 tsp (20 ml) neutral oil
- 1/2 tsp vanilla extract
Sugar Syrup
- 1 tbsp sugar
- 2 tbsp water
Whipped Cream
- 2 cups heavy whipping cream (42% preferred, minimum 35%)
- 1/2 cup (50 g) powdered sugar
Decoration
- 1 pint (450 g) fresh strawberries
Instructions
Prepare the Cake Batter
- Preheat oven to 350°F (180°C). Line a 15 cm (6–7 inch) round cake pan with parchment paper.
- Sift the cake flour and cornstarch twice and set aside.
- In a small bowl, whisk together milk, neutral oil, and vanilla extract. Set aside.
- Bring a pot of water (~2.5 inches high) to a gentle simmer over medium low to low heat.
- In the bowl of a stand mixer (or heatproof bowl), add eggs, egg yolk, sugar, and honey. Mix slightly, then place over the simmering water bath. Heat until warm to the touch (about 40–43°C / 104–110°F).
- Immediately transfer to the stand mixer and beat on high speed (Speed 10) for 5–6 minutes until the increases in volume and thick ribbons form. You should be able to “draw” a ribbon with the whisk attachment that stays on the surface.
- Lower to medium speed (Speed 4) and beat for 1 more minute to smooth out the batter and eliminate large air bubbles.
Fold & Bake
- Gently fold in the sifted flour and cornstarch using a spatula with a scooping and tossing motion (refer to your video if needed).
- Take a scoop of the batter and mix it with the milk-oil mixture until smooth.
- Pour that back into the main batter and fold until fully incorporated and the batter flows smoothly.
- Pour the batter into your prepared pan. There may be some deflated (darker and denser) batter on top. Use chopsticks to swirl it in a few times and then tap the pan on the counter a few times to remove air bubbles.
- Bake for 25–28 minutes, or until golden and slightly springy. You may hear a soft “fizz” when it’s ready.
- Once out of the oven, tap the pan lightly, invert the cake onto a wire rack lined with paper towel, and let it cool completely.
- Once cooled, wrap tightly until ready to assemble.
Make the Sugar Syrup & Whipped Cream
- Sugar Syrup: Heat sugar and water in a small saucepan or microwave-safe bowl until sugar is fully dissolved. Let cool.
- Whipped Cream: Prepare an ice bath (a large bowl with ice and cold water). Place your mixing bowl into the ice bath. Add cold heavy cream and powdered sugar. Whip on high speed until medium peaks form. Set aside half of the cream. Continue whipping the other half to stiff peaks for layering.
Assemble the Cake
- Slice strawberries into 1/4-inch thick pieces. Reserve whole or halved strawberries for the top.
- Using a cake slicer or serrated knife, slice your sponge cake horizontally into 2 or 3 even layers.
- Lightly brush both sides of each layer with sugar syrup. Keep them wrapped to prevent drying out.
- On the first layer, spread a thin layer of stiff whipped cream, followed by a single layer of sliced strawberries.
- Spread another layer of cream over the strawberries to fill gaps and smooth the surface.
- Repeat with the second layer.
- Place the final cake layer on top and apply a thin crumb coat of cream.
- Use the softer whipped cream to frost the entire cake. Decorate with leftover cream using a piping tip of your choice and top with whole or halved strawberries.
- Chill in the refrigerator for at least 3 hours, preferably overnight, to set.
- Slice with sharp knife, serve and enjoy!
- Prep Time: 45 minutes
- Rest time: 3 hours
- Cook Time: 30 minutes
- Category: Dessert
- Method: Oven, Baking
- Cuisine: Japanese
Nutrition
- Serving Size: 1 whole cake
- Calories: 2938
- Sugar: 158 g
- Sodium: 150 mg
- Fat: 207 g
- Saturated Fat: 118 g
- Unsaturated Fat: 89 g
- Trans Fat: 0
- Carbohydrates: 225 g
- Fiber: 10 g
- Protein: 35 g
- Cholesterol: 567 mg
Photography (photos 3,9,10) by Danielle Matar.


came out so soft, fluffy, and light but still moist! the recipe was so easy to follow and broke down the intimidating baking process to doable steps with helpful tips. my japanese mom approves and says it’s just like a good japanese bakery’s shortcakes 🙂
This strawberry shortcake was so soft, not too sweet and tasted like the ones in Japan, I can’t believe I made it myself! Thanks for the tips they really helped.